
Table of Contents
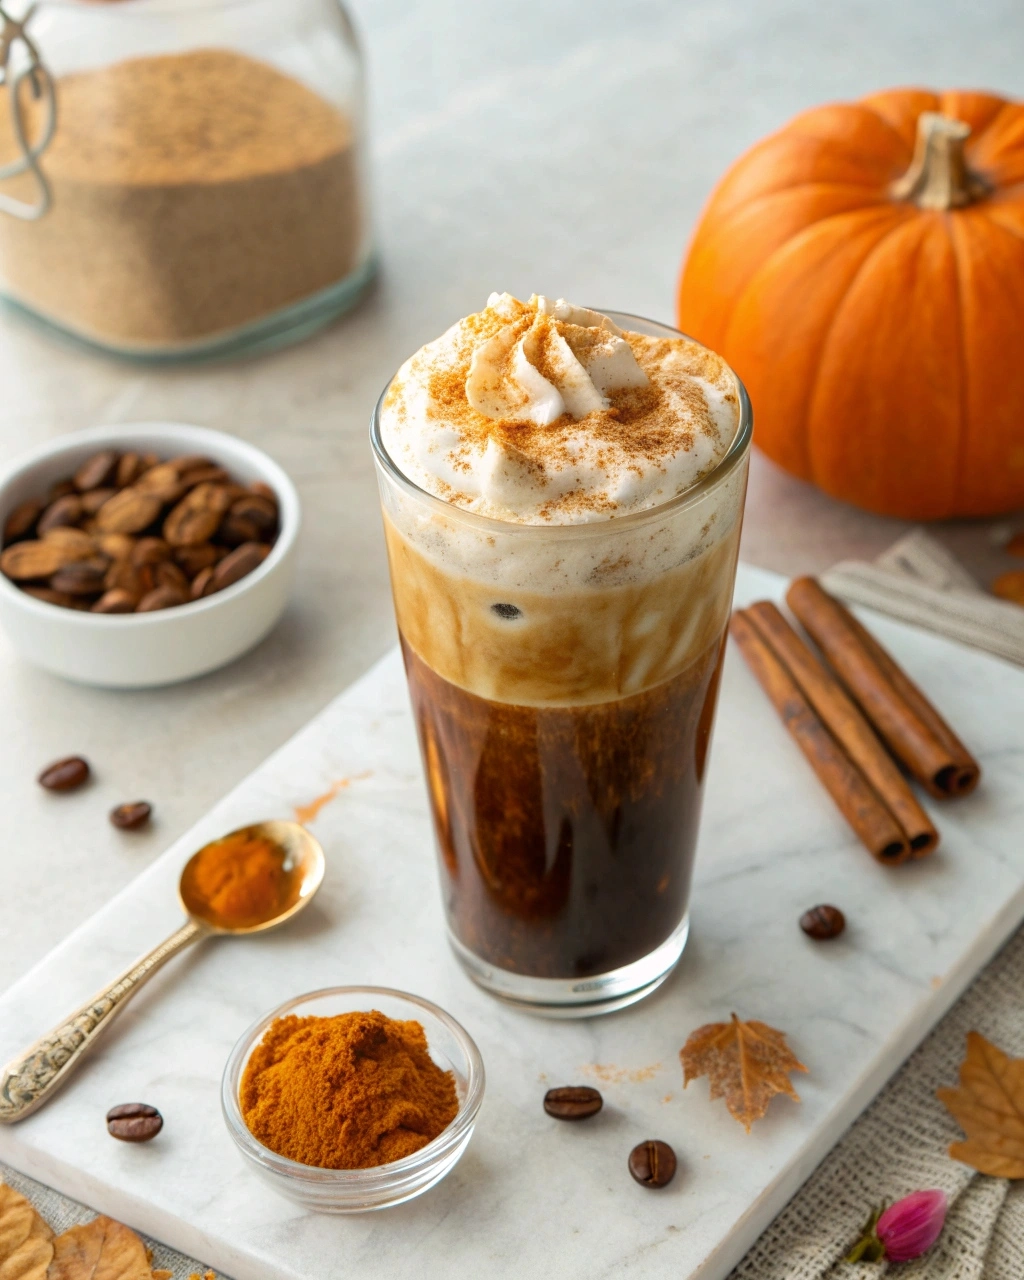
Pumpkin Cream Cold Foam
Ingredients
Equipment
Method
- In a cold container, combine heavy cream, sweetened condensed milk, pumpkin purée, pumpkin pie spice, and vanilla extract.
- Use a hand frother, blender, or whisk to whip until the mixture becomes thick and foamy.
- Fill a glass with ice and pour in the cold brew or iced coffee.
- Top the coffee with the pumpkin cold foam and optionally sprinkle extra pumpkin pie spice.
Notes
If you’ve ever ordered a Pumpkin Cream Cold Brew at Starbucks and wondered how to recreate that silky, spiced cold foam at home, you’re in the right place! As a former Starbucks barista, I’m sharing the exact technique and insider tips to make pumpkin cold foam that rivals (and might even surpass) your favorite coffee shop version.
I still remember the first time I tried to make cold foam at home before I worked at Starbucks. It was flat, watery, and nothing like the billowy cloud that sits perfectly on top of iced coffee. But once I learned the barista secrets behind perfect cold foam, everything changed. Now I make it at home all the time, and I’m about to show you exactly how.
What Makes This Recipe Special?
This homemade pumpkin cold foam recipe uses the exact ratios and technique that baristas use behind the counter, but with ingredients you can easily find at any grocery store. The result is a thick, creamy, perfectly spiced foam that sits beautifully on top of your cold brew or iced coffee without immediately sinking to the bottom.
The beauty of making Starbucks pumpkin cold foam at home is that you can customize it to your taste—make it sweeter, spicier, or even dairy-free. Plus, you’ll save a significant amount of money. A grande Pumpkin Cream Cold Brew costs around $6, but you can make the cold foam at home for less than $1 per serving!
What is Cold Foam?
Before we dive into the recipe, let’s talk about what cold foam actually is. Cold foam is frothed cold milk (or non-dairy alternative) that’s been whipped to create a thick, creamy, marshmallow-like texture. Unlike traditional milk foam or whipped cream, it’s:
- Light and airy but still has body
- Cold (not steamed or heated)
- Sweet but not too heavy
- Thick enough to sit on top of iced drinks
- Slow to dissolve into the coffee below
The key to perfect cold foam is getting the right ratio of milk, sweetener, and air—which I’ll break down for you step by step.
Ingredients You’ll Need
For the Pumpkin Cold Foam:
- ½ cup (120ml) heavy cream or half-and-half (see notes for non-dairy options)
- 2 tablespoons pumpkin puree (pure pumpkin, not pie filling)
- 2 tablespoons vanilla syrup or simple syrup
- ½ teaspoon pumpkin pie spice
- ¼ teaspoon vanilla extract
- Pinch of salt
For the Base (Optional but Recommended):
- 1 cup (240ml) cold brew coffee or strong iced coffee
- Ice cubes
- Additional pumpkin pie spice for topping
Equipment Needed:
- Milk frother (handheld, electric, or French press)
- Tall glass
- Small bowl or measuring cup
- Whisk (if no frother available)
Step-by-Step Barista Instructions
Step 1: Choose Your Frothing Method
The method you use to froth your cold foam makes a huge difference. Here are the options from best to good:
Best: Electric Milk Frother with Cold Foam Setting – This is what Starbucks uses (modified versions). Brands like Nespresso Aeroccino or Zulay give professional results.
Great: Handheld Milk Frother – This is my go-to at home! A simple $15 battery-operated frother works wonderfully if you use the right technique.
Good: French Press – The manual pumping action creates excellent foam, though it takes more arm work.
Decent: Mason Jar Shake Method – Vigorous shaking in a sealed jar works in a pinch, but doesn’t create as stable a foam.
Pro tip: Whatever method you use, make sure everything is COLD. Room temperature ingredients won’t foam properly. I keep my cream in the back of the fridge where it’s coldest.
Step 2: Prepare Your Pumpkin Cold Foam Base
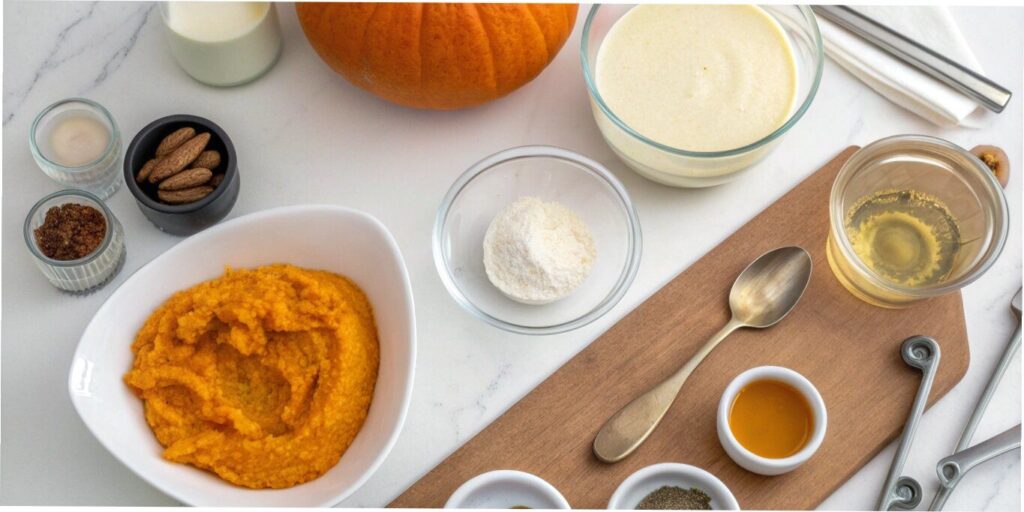
In a small bowl or 2-cup measuring cup, combine:
- ½ cup cold heavy cream or half-and-half
- 2 tablespoons pumpkin puree
- 2 tablespoons vanilla syrup
- ½ teaspoon pumpkin pie spice
- ¼ teaspoon vanilla extract
- Pinch of salt
Important: Whisk these ingredients together BEFORE frothing. The pumpkin puree needs to be fully incorporated or you’ll have clumps. I spend about 30 seconds whisking vigorously until the mixture is completely smooth and uniform in color—no orange streaks!
The salt is my secret ingredient—it enhances all the flavors and keeps the foam from tasting one-dimensional.
Step 3: Froth to Perfection
Now comes the magic part! Here’s how to froth using different methods:
Handheld Frother Method (Most Common):
- Insert the frother into your pumpkin cream mixture
- Turn it on HIGH speed
- Hold the frother at a slight angle and move it in small circles
- Gradually lift it toward the surface to incorporate air
- Froth for 45-60 seconds total
- You’re done when the mixture has doubled in volume and holds stiff peaks
Electric Milk Frother Method:
- Pour the mixture into your frother (don’t exceed the max fill line)
- Select the COLD foam setting (not hot cappuccino mode!)
- Press start and let it work its magic for 60-90 seconds
- The foam is ready when it’s thick, glossy, and nearly doubled in volume
French Press Method:
- Pour mixture into a French press (fill no more than ⅓ full)
- Pump the plunger vigorously up and down for 30-45 seconds
- Don’t press down all the way—you want to incorporate air
- Stop when the foam is thick and has increased significantly in volume
Mason Jar Method:
- Pour mixture into a mason jar with a tight-fitting lid (fill only ⅓ full)
- Seal tightly and shake vigorously for 45-60 seconds
- Let it rest for 30 seconds so foam separates from liquid
- Spoon off the thick foam from the top
Barista secret: The key is incorporating enough air while keeping the mixture cold. If your foam is too thin, froth longer. If it’s too thick and buttery, add a splash more milk and re-froth.
Step 4: Prepare Your Coffee Base
While your foam is settling (give it 30 seconds to stabilize), prepare your iced coffee:
- Fill a tall glass with ice cubes (about ¾ full)
- Pour in 1 cup of cold brew or strong iced coffee
- You can add a splash of milk to the coffee if you like it less strong
- No need to sweeten the coffee itself—the cold foam is sweet!
Pro tip: Use cold brew instead of regular iced coffee for the smoothest, least acidic base. Starbucks uses cold brew for their Pumpkin Cream Cold Brew for a reason!
Step 5: Top and Serve
Here’s where presentation matters:
- Using a spoon, gently scoop the pumpkin cold foam onto your iced coffee
- Layer it on top—it should sit like a thick cloud on the surface
- Don’t stir! The beauty of cold foam is how it slowly cascades through the coffee as you drink
- Finish with a light dusting of pumpkin pie spice on top
- Add a straw and serve immediately
Instagram-worthy tip: For that perfect Starbucks look, use a clear glass so you can see the beautiful layers—dark coffee on bottom, creamy orange foam on top, with a sprinkle of spice.
Variations to Try
Starbucks Pumpkin Cream Cold Brew Copycat
For the most accurate Starbucks replication:
- Use exactly ½ cup heavy cream (not half-and-half)
- Add 1 extra tablespoon of vanilla syrup for extra sweetness
- Use their cold brew coffee (or a dark roast cold brew)
- Top with extra pumpkin pie spice
Dairy-Free Pumpkin Cold Foam
Best non-dairy option: Oat milk (specifically Oatly Barista Edition)
- Use ½ cup oat milk barista blend
- Add 1 tablespoon coconut cream for richness
- Increase vanilla syrup to 3 tablespoons
- Froth 15-30 seconds longer than dairy
Coconut cream option:
- Use ¼ cup full-fat coconut cream + ¼ cup coconut milk
- Same sweetener and spice ratios
- Creates the thickest dairy-free foam
Almond or soy milk: These work but create thinner foam. Add 1 teaspoon of xanthan gum to help stabilize.
Extra-Spiced Pumpkin Cold Foam
For serious pumpkin spice lovers:
- Increase pumpkin pie spice to 1 teaspoon
- Add a tiny pinch of cayenne pepper for warmth
- Swirl in ¼ teaspoon of cinnamon extract
- Top with cinnamon sugar instead of just spice
Maple Pumpkin Cold Foam
Replace vanilla syrup with pure maple syrup for a deeper, more complex sweetness. Use 1½ tablespoons maple syrup instead of 2 tablespoons vanilla syrup (it’s sweeter).
Pumpkin Chai Cold Foam
Add ¼ teaspoon of chai spice blend or steep a chai tea bag in your cold foam mixture for 5 minutes before frothing (remove bag first).
Troubleshooting Common Issues
My cold foam is too thin and watery
Causes:
- Mixture is too warm
- Not enough fat content in your milk
- Didn’t froth long enough
Solutions:
- Chill everything for at least 2 hours before frothing
- Use heavy cream or half-and-half, not regular milk
- Froth for an additional 15-30 seconds
- Add 1 tablespoon of heavy cream to your mixture
My cold foam won’t stay on top of the coffee
Causes:
- Foam is over-whipped and too stiff
- Coffee is too warm
- Wrong milk-to-air ratio
Solutions:
- Don’t froth longer than 60 seconds with handheld frother
- Make sure your coffee is ICE COLD
- Use fresh, cold heavy cream (old cream doesn’t foam well)
- Let foam rest 30 seconds before adding to coffee
My pumpkin puree is clumpy in the foam
Causes:
- Didn’t whisk before frothing
- Pumpkin puree is too thick or cold
Solutions:
- Always whisk ingredients together thoroughly first
- Let pumpkin puree sit at room temperature for 10 minutes
- Strain the mixture through a fine-mesh sieve if needed
- Use a high-quality, smooth pumpkin puree
The foam deflates immediately
Causes:
- Not enough protein/fat to stabilize bubbles
- Over-mixed after frothing
- Adding to hot coffee instead of cold
Solutions:
- Use heavy cream, not milk
- Don’t stir after frothing—spoon gently onto coffee
- Ensure coffee base is truly cold with plenty of ice
Storage and Make-Ahead Tips
Fresh is best: Cold foam is at its peak texture for about 15-20 minutes after frothing. After that, it starts to deflate.
Pre-mix the base: You can whisk together all the pumpkin cold foam ingredients (without frothing) and store in the fridge for up to 3 days. When ready to use, give it a good shake and froth as directed.
Batch prep: Make a larger batch of the un-frothed mixture and store in a squeeze bottle or jar. Measure out ½ cup portions and froth as needed throughout the week.
Can you freeze it? Unfortunately, cold foam doesn’t freeze and rehydrate well. The texture becomes grainy. Always make it fresh when you want to enjoy it.
Pumpkin puree storage: Once you open a can of pumpkin puree, transfer leftovers to an airtight container and refrigerate for up to 1 week, or freeze in ice cube trays for longer storage.
Cost Comparison: Starbucks vs. Homemade
Let’s break down the economics:
Starbucks Pumpkin Cream Cold Brew:
- Grande (16 oz): $5.95-$6.45
- Cost per serving: ~$6.00
Homemade Version:
- Heavy cream (½ cup): $0.50
- Pumpkin puree (2 tbsp): $0.15
- Vanilla syrup (2 tbsp): $0.20
- Pumpkin pie spice: $0.05
- Cold brew coffee: $0.30
- Total: $1.20 per serving
Savings: $4.80 per drink or 80% less expensive!
If you buy one Pumpkin Cream Cold Brew per week during fall (12 weeks), you’d spend $72 at Starbucks vs. $14.40 making it at home. That’s a savings of $57.60!
Why This Recipe Works So Well
As someone who made hundreds of these drinks behind the Starbucks bar, I can tell you the magic is in three things:
- The right fat content: Heavy cream is essential for stable, long-lasting foam. The fat proteins trap air bubbles and create that signature thick texture.
- Proper frothing technique: You need to incorporate enough air without over-whipping. It’s a sweet spot that takes practice but is totally achievable.
- Temperature control: Everything must be cold. Warm ingredients simply won’t foam properly because the fat proteins behave differently at different temperatures.
The recipe I’ve shared uses the exact ratios Starbucks uses (which I learned during training), but I’ve simplified the technique for home equipment.
Frequently Asked Questions
Can I use regular milk instead of heavy cream?
You can, but the foam won’t be as thick or stable. Whole milk creates a lighter foam that deflates faster. For best results, use at least half-and-half (which is what Starbucks uses for some cold foams), or try 2% milk with 2 tablespoons of heavy cream added.
Do I need a milk frother?
While a frother makes it much easier, you can use the mason jar shake method or a French press. You’ll just need to put in more physical effort. A handheld frother costs $10-15 and is worth it if you plan to make cold foam regularly.
Can I make this with instant coffee?
Yes! Dissolve 2 tablespoons of instant coffee in ½ cup cold water, let it chill completely, then add ice and proceed with the recipe. It won’t taste exactly like cold brew but it’s a quick alternative.
How long does pumpkin cold foam last?
The frothed foam lasts about 15-20 minutes at peak texture, then gradually deflates. However, the un-frothed mixture (before adding air) can be refrigerated for 3-4 days. Just froth a fresh portion when you’re ready to drink.
Why does Starbucks cold foam taste different?
Starbucks uses commercial-grade cold foam blenders and very specific vanilla and pumpkin sauces that aren’t available to consumers. However, this homemade version gets you 95% of the way there! The main difference is they use a proprietary vanilla base that’s slightly different from vanilla syrup.
Can I add protein powder to make it healthier?
Yes, but it changes the texture. Add 1 scoop of vanilla protein powder and reduce the vanilla syrup to 1 tablespoon. The foam will be slightly thicker and more filling. Collagen powder works better than whey as it doesn’t affect texture as much.
What’s the difference between cold foam and whipped cream?
Cold foam is frothed cold milk that’s airy but pourable, while whipped cream is heavy cream whipped to stiff peaks with lots of air. Cold foam has less fat and fewer calories, and it blends into your drink as you sip. Whipped cream sits on top and doesn’t mix in.
Can I use sugar-free sweetener?
Absolutely! Replace the vanilla syrup with sugar-free vanilla syrup (Torani makes a great one) or use 1-2 tablespoons of your preferred sweetener. Liquid sweeteners work better than granulated in cold foam.
Final Thoughts
Learning to make pumpkin cold foam at home was one of the best coffee skills I picked up during my barista days. Not only does it save me money, but I actually prefer it to the Starbucks version because I can control the sweetness and spice level exactly how I like it.
The first few times you make it, you might not get it perfect—and that’s okay! Even as a trained barista, it took me a few tries to master the technique at home with different equipment. But once you nail it, you’ll be making café-quality drinks in your own kitchen every morning.
The best part? Once you master the basic technique, you can apply it to any cold foam flavor—vanilla, caramel, cinnamon, or even chocolate. The world of fancy iced coffee is now at your fingertips!
So grab your frother, stock up on pumpkin puree, and get ready to become your own favorite barista. Your wallet (and your taste buds) will thank you! ☕🎃
Happy frothing, and welcome to the cold foam club!
Yield: 1 serving (about ½ cup cold foam)
Prep Time: 5 minutes
Total Time: 5 minutes
Difficulty: Easy
Cost per serving: ~$1.20
Equipment needed: Milk frother (handheld or electric)
Jump to Recipe
