Meta Description: Learn how to make stunning Mango Strawberry Sunset Cupcakes with ombre frosting! This tropical cupcake recipe features fresh mango, strawberry filling, and gorgeous sunset-colored buttercream.
Introduction: Bring Paradise to Your Dessert Table
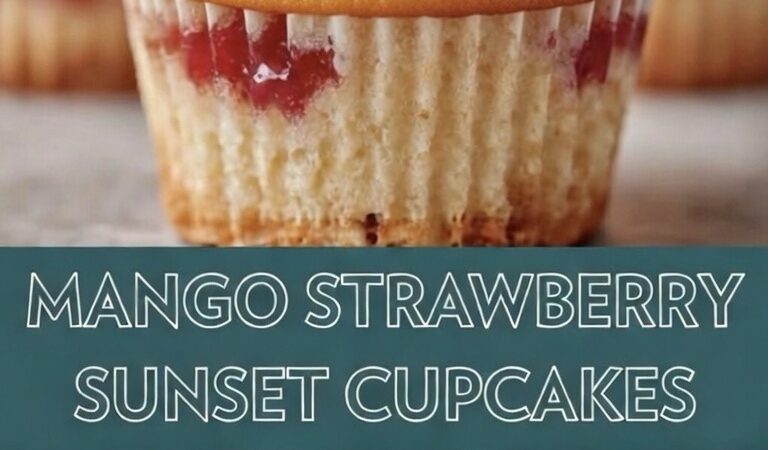
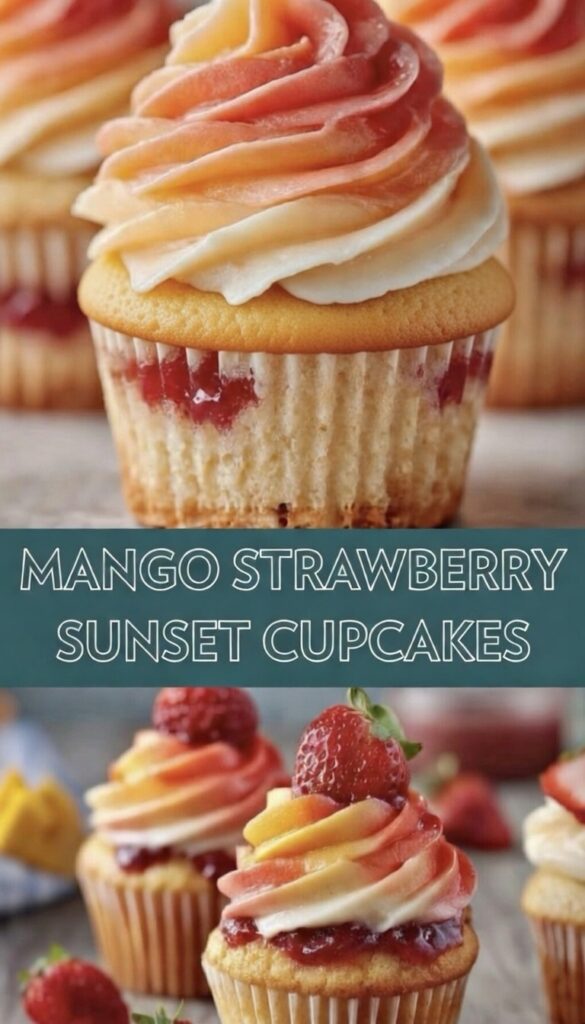
Imagine biting into a fluffy vanilla cupcake filled with sweet strawberry jam, topped with a swirl of stunning ombre buttercream that captures the colors of a tropical sunset. These Mango Strawberry Sunset Cupcakes aren’t just delicious—they’re edible art that will have everyone reaching for their cameras before taking that first bite.
Combining the tropical sweetness of mango with the classic appeal of fresh strawberries, these cupcakes deliver a flavor explosion that’s perfect for summer parties, tropical-themed celebrations, or any time you want to add a pop of color and exotic flavor to your dessert spread.
Best of all? While they look like they came from a fancy bakery, these cupcakes are surprisingly achievable for home bakers of all skill levels. The secret lies in the gorgeous ombre frosting technique that creates that signature sunset effect.
Why You’ll Absolutely Love These Cupcakes
Instagram-Worthy Presentation: The stunning ombre frosting in sunset colors (pink, orange, yellow, cream) makes these cupcakes incredibly photogenic and perfect for special occasions.
Tropical Flavor Combination: Mango and strawberry create a refreshing, fruity taste that’s not overly sweet and perfectly balanced.
Impressive Yet Achievable: While they look professional, the techniques are simple enough for beginners with a little practice.
Perfect for Any Season: Bright tropical flavors work year-round, bringing sunshine to winter gatherings or enhancing summer celebrations.
Customizable: Easy to adapt the fruit fillings, frosting colors, or cake flavors to suit your preferences or event theme.
Crowd-Pleaser: The combination of moist cake, fruit filling, and creamy frosting appeals to all age groups.
Ingredients You’ll Need
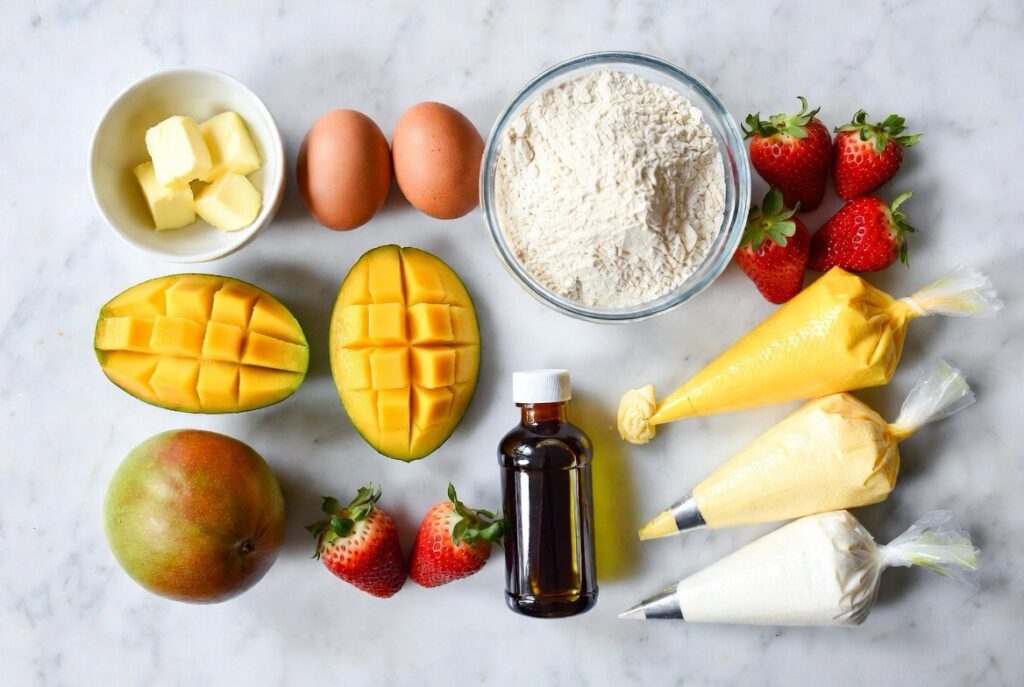
For the Vanilla Cupcakes (Makes 12 standard cupcakes):
Dry Ingredients:
- 1½ cups (190g) all-purpose flour
- 1½ teaspoons baking powder
- ¼ teaspoon salt
Wet Ingredients:
- ½ cup (115g) unsalted butter, softened to room temperature
- ¾ cup (150g) granulated sugar
- 2 large eggs, room temperature
- 2 teaspoons pure vanilla extract
- ½ cup (120ml) whole milk, room temperature
- ¼ cup (60ml) sour cream or Greek yogurt
For the Strawberry Filling:
Option 1 – Quick Method:
- ½ cup high-quality strawberry jam or preserves
Option 2 – Homemade (Recommended):
- 1 cup fresh strawberries, hulled and diced
- 3 tablespoons granulated sugar
- 1 tablespoon lemon juice
- 1 teaspoon cornstarch
For the Mango Strawberry Sunset Buttercream:
Base Buttercream:
- 1 cup (230g) unsalted butter, softened to room temperature
- 4 cups (480g) powdered sugar, sifted
- 3-4 tablespoons heavy cream or whole milk
- 2 teaspoons pure vanilla extract
- Pinch of salt
- 2 tablespoons mango puree (fresh or canned)
For Ombre Coloring:
- Pink gel food coloring (or strawberry powder for natural color)
- Orange gel food coloring (or combination of red + yellow)
- Yellow gel food coloring (or turmeric for natural option)
- Leave some frosting white/cream colored
Optional Garnishes:
- Fresh strawberry slices
- Diced fresh mango
- Edible glitter or sugar crystals
- White chocolate shavings
- Fresh mint leaves
Special Equipment Needed:
- Piping bags (4 separate bags or 1 bag with coupler)
- Large star tip (Wilton 1M or similar)
- Cupcake corer or small knife
- Offset spatula
- Cupcake liners
- 12-cup muffin tin
Step-by-Step Instructions
Prep Time: 30 minutes | Bake Time: 18-20 minutes | Decorating: 30 minutes | Total Time: 1 hour 20 minutes | Yield: 12 cupcakes
Step 1: Prepare the Cupcake Batter
- Preheat your oven to 350°F (175°C). Line a 12-cup muffin tin with cupcake liners.
- Combine dry ingredients: In a medium bowl, whisk together flour, baking powder, and salt. Set aside.
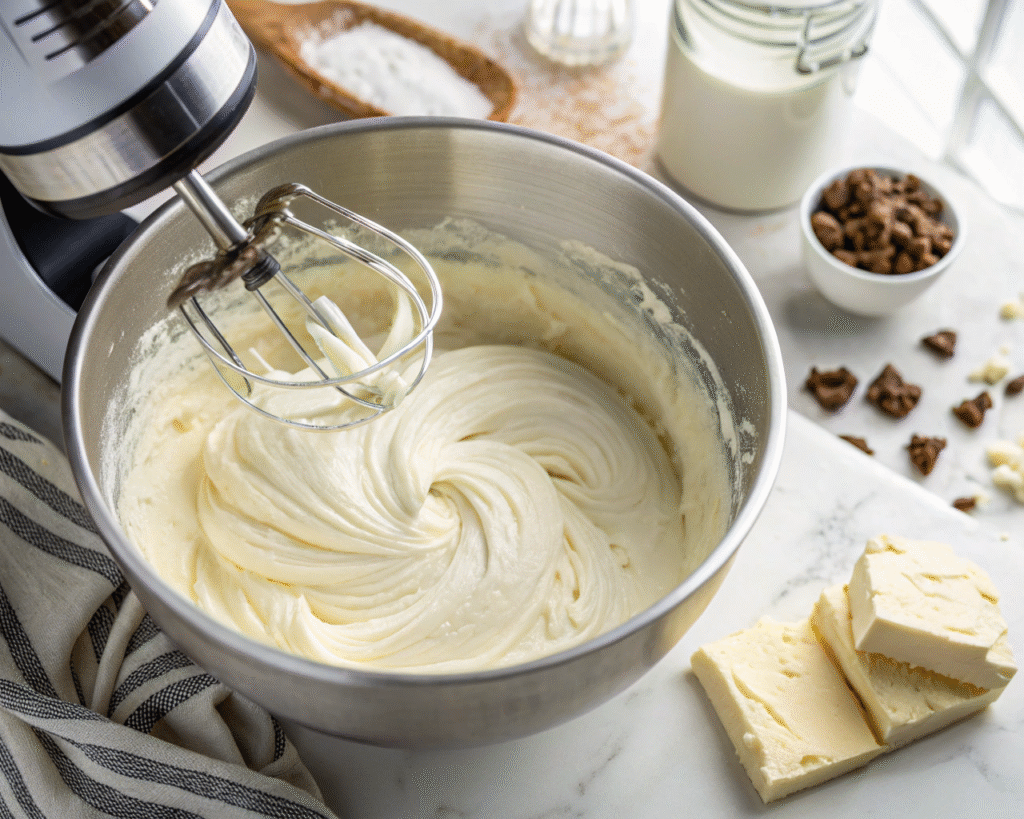
- Cream butter and sugar: In a large bowl, using an electric mixer on medium-high speed, beat the softened butter and sugar together for 3-4 minutes until light, fluffy, and pale in color. This step is crucial for light, airy cupcakes!
- Add eggs: Beat in eggs one at a time, mixing well after each addition. Scrape down the sides of the bowl as needed.
- Add vanilla: Mix in vanilla extract until combined.
- Combine wet and dry ingredients:
- Add one-third of the flour mixture to the butter mixture, mix on low speed
- Add half the milk, mix until just combined
- Add another third of flour, then the remaining milk
- Finish with the final third of flour
- Fold in the sour cream gently with a spatula
- Important: Don’t overmix! Mix just until no flour streaks remain. Overmixing creates dense cupcakes.
- Fill cupcake liners: Using an ice cream scoop or spoon, fill each liner about ⅔ full (approximately 3 tablespoons of batter per cupcake).
Step 2: Bake to Perfection
- Bake for 18-20 minutes, or until a toothpick inserted into the center comes out clean or with just a few moist crumbs.
- Check for doneness: The tops should spring back lightly when touched, and the edges should just be starting to pull away from the liners.
- Cool in pan for 5 minutes, then transfer cupcakes to a wire rack to cool completely before filling and frosting. This is essential—frosting warm cupcakes will cause the buttercream to melt!
Step 3: Make the Strawberry Filling
For Homemade Filling (Recommended):
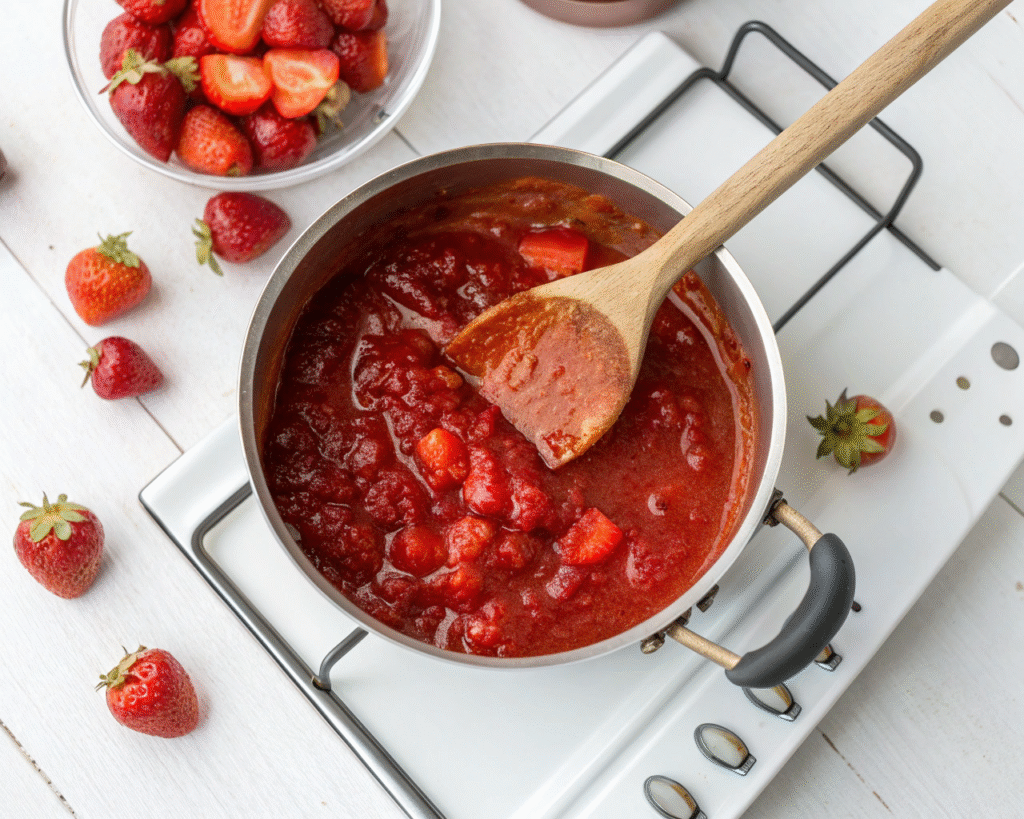
- Combine ingredients: In a small saucepan, combine diced strawberries, sugar, lemon juice, and cornstarch.
- Cook: Heat over medium heat, stirring frequently, until the mixture comes to a simmer and thickens (about 5-7 minutes).
- Mash slightly: Use a fork to mash some of the strawberries for a jam-like consistency while leaving some small chunks.
- Cool completely: Transfer to a bowl and refrigerate until completely cool. The filling will thicken more as it cools.
For Store-Bought:
Simply transfer jam to a small bowl and stir until smooth.
Step 4: Prepare the Mango Puree
If using fresh mango:
- Peel and dice 1 ripe mango
- Blend until completely smooth
- Strain through fine-mesh sieve to remove any fibers
- Measure out 2 tablespoons for the frosting
If using canned:
Use 2 tablespoons of mango puree from a can (drain excess liquid).
Step 5: Make the Mango Buttercream Base
- Beat the butter: In a large bowl, beat softened butter on medium-high speed for 3-4 minutes until very light and creamy.
- Add powdered sugar gradually: Add powdered sugar one cup at a time, beating on low speed after each addition to prevent a sugar cloud.
- Add flavorings: Mix in vanilla extract, mango puree, and a pinch of salt.
- Adjust consistency: Add heavy cream 1 tablespoon at a time until you reach a smooth, pipeable consistency. The frosting should hold its shape but be soft enough to pipe easily.
- Taste and adjust: If the mango flavor isn’t strong enough, add more puree. If too thin, add more powdered sugar.
Step 6: Create the Ombre Sunset Effect
This is where the magic happens! Here’s how to achieve those gorgeous sunset colors:
- Divide the buttercream: Separate your buttercream into 4 bowls:
- Bowl 1: 1 cup (leave white/cream with the mango color)
- Bowl 2: ¾ cup (yellow)
- Bowl 3: ¾ cup (orange)
- Bowl 4: ½ cup (pink/red)
- Color each portion:
- Bowl 1: Keep as is (mango-cream color)
- Bowl 2: Add yellow food coloring, mix until pastel yellow
- Bowl 3: Add orange food coloring (or red + yellow), mix until peachy-orange
- Bowl 4: Add pink/red food coloring, mix until coral-pink
- Prepare the piping bag:
- Fit a large piping bag with a large star tip (Wilton 1M works perfectly)
- Using a spatula or spoon, create vertical stripes inside the bag:
- Start with pink frosting on one side
- Add orange next to it
- Add yellow next to that
- Finish with cream/white on the other side
- Gently smooth the frosting to remove air pockets without mixing the colors
Pro Tip: Practice on parchment paper first to see how the colors swirl together!
Step 7: Fill the Cupcakes
- Core the cupcakes: Once completely cool, use a cupcake corer or small knife to cut a cone-shaped piece from the center of each cupcake (about 1 inch deep and ¾ inch wide).
- Remove the core: Set the cone-shaped piece aside (you can trim off the pointed bottom to use as a “cap”).
- Fill with jam: Spoon or pipe strawberry filling into each hole, filling about ¾ of the way up.
- Replace the cap: Place the trimmed cake piece back on top to seal the filling inside.
Step 8: Pipe the Sunset Frosting
- Hold the piping bag vertically: Position the tip about ½ inch above the center of the cupcake.
- Start piping: Apply steady pressure and start in the center, piping in a circular motion moving outward.
- Create the swirl: Continue piping in a spiral motion, building up the frosting in a cone shape.
- Finish with flair: When you reach your desired height, release pressure and pull away quickly to create a nice peak.
- Admire the ombre effect: Each cupcake should display beautiful sunset colors blending from pink at the top through orange, yellow, and cream at the base.
Step 9: Garnish & Serve
Immediate Garnishing:
- Top with a fresh strawberry slice
- Add a small piece of fresh mango
- Sprinkle with edible glitter or coarse sugar for sparkle
- Add a tiny mint leaf for a fresh touch
Serve: These cupcakes are best enjoyed within 24 hours but can be stored for up to 3 days.
Nutritional Information (Per Cupcake)
- Calories: 425
- Total Fat: 22g (28% DV)
- Saturated Fat: 14g (70% DV)
- Trans Fat: 0g
- Cholesterol: 85mg (28% DV)
- Sodium: 145mg (6% DV)
- Total Carbohydrates: 55g (20% DV)
- Dietary Fiber: 0.5g (2% DV)
- Sugars: 45g
- Added Sugars: 42g (84% DV)
- Protein: 3g (6% DV)
- Vitamin A: 18% DV
- Vitamin C: 12% DV
- Calcium: 4% DV
- Iron: 5% DV
Key Nutritional Highlights:
- Contains vitamin C from strawberries and mango
- Provides vitamin A from butter and mango
- Energy-dense dessert best enjoyed in moderation
- Can be made lighter with substitutions (see variations)
Expert Tips for Perfect Cupcakes
For the Best Texture:
- Room temperature ingredients are crucial: Butter, eggs, and milk should all be at room temperature (about 70°F). This ensures even mixing and maximum fluffiness.
- Don’t overmix the batter: Once you add the flour, mix just until combined. Overmixing develops gluten, creating tough, dense cupcakes.
- Use an ice cream scoop: For perfectly uniform cupcakes, use a 3-tablespoon ice cream scoop to fill liners.
- Avoid opening the oven: Opening the oven door during baking causes temperature fluctuations that can result in sunken cupcakes.
- Test for doneness properly: A toothpick should come out with a few moist crumbs, not completely clean (which indicates overbaking).
For the Most Stunning Ombre Effect:
- Use gel food coloring: Liquid food coloring can thin your frosting. Gel colors are concentrated and don’t affect consistency.
- Create distinct color gradients: Make sure there’s enough contrast between each color shade for the ombre effect to show.
- Load the piping bag carefully: Take time to create neat stripes of color side by side in the bag.
- Pipe consistently: Use steady, even pressure for uniform swirls.
- Practice makes perfect: Your first cupcake might not be perfect—that’s okay! You’ll improve with each one.
For Maximum Flavor:
- Use real vanilla extract: Imitation vanilla lacks the depth of flavor that pure extract provides.
- Choose ripe mango: For the most intense mango flavor, use very ripe, fragrant mangoes.
- Make filling from scratch: Homemade strawberry filling has fresher, brighter flavor than most store-bought jams.
- Don’t skip the sour cream: It adds moisture and a subtle tang that balances the sweetness.
Creative Variations to Try
1. Tropical Paradise Cupcakes
- Replace strawberry filling with passion fruit curd
- Add coconut extract to the buttercream
- Top with toasted coconut flakes
- Use pineapple-mango ombre colors
Calories per cupcake: ~435
2. Lighter Version
- Use Greek yogurt instead of sour cream
- Replace half the butter in frosting with cream cheese
- Reduce sugar by ¼ cup in the cake
- Use sugar-free jam for filling
Calories per cupcake: ~325
3. Chocolate Mango Strawberry
- Replace ¼ cup flour with cocoa powder
- Add chocolate ganache layer under frosting
- Keep the fruit filling and ombre frosting
Calories per cupcake: ~455
4. Vegan Sunset Cupcakes
- Use vegan butter for both cake and frosting
- Replace eggs with flax eggs (2 tablespoons ground flaxseed + 6 tablespoons water)
- Use non-dairy milk
- Choose vegan food colorings
Calories per cupcake: ~395
5. Mini Sunset Cupcakes
- Make 24 mini cupcakes instead of 12 standard
- Bake for 10-12 minutes
- Perfect for parties and portion control
Calories per mini cupcake: ~210
6. Adult Version with Rum
- Add 2 tablespoons rum to the cake batter
- Brush cooled cupcakes with rum syrup
- Add 1 tablespoon rum to buttercream
Calories per cupcake: ~445
Storage Instructions
Room Temperature:
- Unfrosted cupcakes: Store in airtight container for up to 2 days
- Frosted cupcakes: Not recommended due to buttercream containing butter
Refrigerator Storage:
- Frosted cupcakes: Store in airtight container for up to 4 days
- Bring to room temperature: Remove from fridge 30 minutes before serving for best texture and flavor
- Storage tip: Place cupcakes in a single layer; don’t stack them or the frosting will smudge
Freezing:
- Unfrosted cupcakes:
- Wrap individually in plastic wrap, then place in freezer bag
- Freeze up to 3 months
- Thaw overnight in refrigerator before decorating
- Frosted cupcakes:
- Flash freeze uncovered for 1 hour
- Once firm, wrap individually or place in airtight container
- Freeze up to 2 months
- Thaw in refrigerator overnight, then bring to room temperature
Make-Ahead Tips:
- Bake cupcakes 1-2 days ahead: Store unfrosted at room temperature
- Make buttercream 3 days ahead: Refrigerate, then bring to room temperature and re-whip before using
- Make filling 1 week ahead: Store strawberry filling in refrigerator
- Decorate morning of event: Frosted cupcakes are best within 24 hours
Troubleshooting Common Issues
Problem: Cupcakes sank in the middle
Solutions:
- Oven temperature was too high; use an oven thermometer
- You opened the oven door too early
- Overmixed the batter, creating too much air
- Too much leavening agent
Problem: Cupcakes are dense and heavy
Solutions:
- Butter and eggs weren’t at room temperature
- Overmixed the batter after adding flour
- Measured flour incorrectly (use spoon-and-level method)
- Insufficient creaming of butter and sugar
Problem: Frosting won’t hold its shape
Solutions:
- Butter was too warm; chill frosting for 10-15 minutes
- Too much liquid was added
- Need more powdered sugar for stability
- Room is too warm; refrigerate briefly
Problem: Ombre colors are muddy or blended
Solutions:
- Colors weren’t distinct enough from each other
- Mixed the colors too much when loading the bag
- Used too much pressure when piping
- Need to clean and reload bag between cupcakes
Problem: Filling leaked out
Solutions:
- Cut the core too wide or too deep
- Overfilled the cavity
- Didn’t replace the cake “cap” properly
- Frosting wasn’t thick enough to seal it
Problem: Cupcakes taste dry
Solutions:
- Overbaked; check a few minutes earlier next time
- Too much flour; make sure to measure correctly
- Not enough moisture ingredients
- Stored without airtight covering
Perfect Occasions for These Cupcakes
🌺 Tropical-Themed Parties – Hawaii luau, beach party, Caribbean celebration
🌅 Summer Gatherings – BBQs, pool parties, outdoor picnics, Fourth of July
🎂 Birthday Celebrations – Kids and adults both love the colors and flavors
👶 Baby Showers – The pastel ombre colors work beautifully for baby celebrations
💒 Bridal Showers – Elegant and feminine presentation
🌸 Spring & Summer Weddings – Perfect as wedding favors or dessert table additions
🎓 Graduation Parties – Bright, cheerful, and celebratory
🏖️ Beach Weddings – Tropical flavors match the seaside theme
🎉 Gender Reveals – Create pink-to-blue ombre or keep neutral with sunset colors
Serving Suggestions & Pairings
Beverage Pairings:
Non-Alcoholic:
- Iced mango tea – Complements the tropical flavors
- Sparkling strawberry lemonade – Refreshing contrast to rich buttercream
- Cold milk – Classic pairing that cuts the sweetness
- Tropical fruit smoothies – Double down on the fruity theme
- Coconut water – Light and hydrating
Alcoholic (for adults):
- Rosé wine – Matches the pink tones and fruit flavors
- Moscato – Sweet wine complements the dessert
- Mango margaritas – Tropical cocktail pairing
- Prosecco – Bubbly lightness balances richness
- Strawberry daiquiris – Themed cocktail pairing
Complementary Desserts:
For a full dessert spread, serve alongside:
- Fresh tropical fruit platter
- Coconut macaroons
- Mango sorbet or ice cream
- Strawberry shortcake
- Light angel food cake
The Story Behind Sunset Ombre Cupcakes
The ombre frosting technique gained popularity on social media platforms like Instagram and Pinterest around 2015-2016, when bakers began experimenting with multi-colored buttercream effects. The sunset color palette—featuring warm pinks, oranges, yellows, and creams—became particularly beloved for its romantic, eye-catching appearance.
Combining this trendy decorating technique with tropical fruit flavors creates a dessert that’s both contemporary and timeless. The mango-strawberry pairing draws inspiration from tropical cuisines where these fruits are often enjoyed together, particularly in Southeast Asian and Latin American desserts.
Why This Recipe Works: The Science
Sour cream in the batter: The acid in sour cream reacts with baking powder to create extra lift, while the fat adds moisture and tenderness.
Room temperature ingredients: When butter, eggs, and milk are at the same temperature, they emulsify properly, creating a smooth batter that bakes into tender cupcakes.
Proper creaming: Beating butter and sugar together for several minutes creates tiny air pockets that expand during baking, resulting in light, fluffy cupcakes.
Mango puree in frosting: The natural pectin and fruit solids help stabilize the buttercream while adding flavor without excess liquid.
Filling after baking: Adding jam after baking prevents it from sinking or making the cake soggy during baking.
Tips for Transporting These Cupcakes
Use a cupcake carrier: Invest in a carrier with individual slots to prevent movement and frosting damage.
Keep them cool: Buttercream can soften in heat. Transport in air-conditioned vehicle and avoid direct sunlight.
Add garnishes on arrival: Wait until you reach your destination to add fresh fruit garnishes.
Bring extra frosting: Pack a small amount of each colored frosting for touch-ups if needed.
Secure the carrier: Place the carrier on a flat surface and secure it so it won’t slide during transport.
Frequently Asked Questions
Q: Can I make these cupcakes without the filling?
A: Absolutely! They’re delicious plain or with just the mango buttercream. The filling adds an extra flavor dimension but isn’t required.
Q: What if I can’t find fresh mango?
A: Use canned mango puree (available in most grocery stores), frozen mango (thawed and pureed), or substitute with another tropical fruit like peach or papaya.
Q: How do I get the frosting colors to stay separated?
A: The key is loading the piping bag carefully with distinct vertical stripes of each color and not mixing them as you fill the bag. Each swirl will naturally blend slightly, creating that ombre effect.
Q: Can I use this frosting technique with other cupcake flavors?
A: Yes! This ombre technique works with any cupcake flavor. Try chocolate cupcakes with sunset frosting or lemon cupcakes with blue-to-purple ocean ombre.
Q: My buttercream is too soft to pipe. What should I do?
A: Refrigerate the frosting for 10-15 minutes, then re-whip. If still too soft, add more powdered sugar ¼ cup at a time until it reaches piping consistency.
Q: How far in advance can I color the buttercream?
A: Color your buttercream the same day you plan to use it, as gel food colors can intensify and darken over time. If you must color it ahead, make the colors slightly lighter than desired.
Final Tips for Success
✨ Quality ingredients matter: Use real butter (not margarine), pure vanilla extract, and fresh fruit for the best flavor.
✨ Temperature control is key: Room temperature ingredients mix better; cool cupcakes completely before frosting.
✨ Practice the ombre technique: Don’t get discouraged if your first attempt isn’t perfect. Each cupcake will look slightly different, and that’s part of their charm!
✨ Have fun with colors: Feel free to adjust the sunset colors to match your event theme or personal preferences.
✨ Document your creation: These cupcakes are so photogenic—take pictures before everyone devours them!
Conclusion: Create Your Own Edible Sunset
These Mango Strawberry Sunset Cupcakes represent the perfect marriage of flavor and aesthetics. With their moist, tender crumb, bursts of fruity filling, and showstopping ombre frosting, they’re guaranteed to be the star of any dessert table.
While they may look like they require professional baking skills, the reality is that with patience, quality ingredients, and a little practice, anyone can create these stunning treats. The key is taking your time with each step and remembering that even if your first attempts aren’t Instagram-perfect, they’ll still taste absolutely incredible.
So gather your ingredients, embrace your inner artist, and get ready to create desserts that taste as beautiful as they look. Your guests won’t believe you made these at home—but the empty cupcake wrappers and endless compliments will prove they’re real!
Whether you’re celebrating a special occasion or simply want to bring a taste of the tropics to your table, these Mango Strawberry Sunset Cupcakes are guaranteed to deliver smiles, sunshine, and pure deliciousness in every bite.
Quick Reference Recipe Card
MANGO STRAWBERRY SUNSET CUPCAKES
Prep: 30 min | Bake: 18-20 min | Decorate: 30 min | Total: 1h 20m | Yield: 12 cupcakes
CUPCAKES:
- 1½ cups flour, 1½ tsp baking powder, ¼ tsp salt
- ½ cup butter, ¾ cup sugar, 2 eggs
- 2 tsp vanilla, ½ cup milk, ¼ cup sour cream
FILLING: ½ cup strawberry jam
FROSTING:
- 1 cup butter, 4 cups powdered sugar
- 3-4 tbsp cream, 2 tsp vanilla, 2 tbsp mango puree
- Food coloring: pink, orange, yellow
INSTRUCTIONS:
- Bake cupcakes at 350°F for 18-20 min, cool completely
- Core and fill with strawberry jam
- Divide frosting into 4 bowls, color each differently
- Load piping bag with vertical color stripes
- Pipe sunset swirls on each cupcake
- Garnish with fresh fruit
NUTRITION: 425 cal | 22g fat | 55g carbs | 3g protein per cupcake
Tags: tropical cupcakes, ombre frosting, mango strawberry cupcakes, sunset cupcakes, summer desserts, filled cupcakes, decorated cupcakes, party cupcakes, tropical desserts, fruit-filled cupcakes, colorful cupcakes, bakery-style cupcakes, special occasion desserts, instagram desserts, show-stopping cupcakes
Keywords: mango strawberry cupcakes, sunset ombre frosting, tropical cupcake recipe, how to make ombre frosting, filled cupcake recipe, colorful desserts, summer cupcake ideas, bakery-style cupcakes at home, fruit-filled cupcakes, party dessert ideas, tropical themed desserts, gradient frosting tutorial

Meta Description: Discover the easiest strawberry banana pudding recipe! This no-bake layered dessert with vanilla wafers takes just 20 minutes to prep. Perfect for parties, potlucks & summer gatherings.
Introduction: Your New Favorite Crowd-Pleasing Dessert
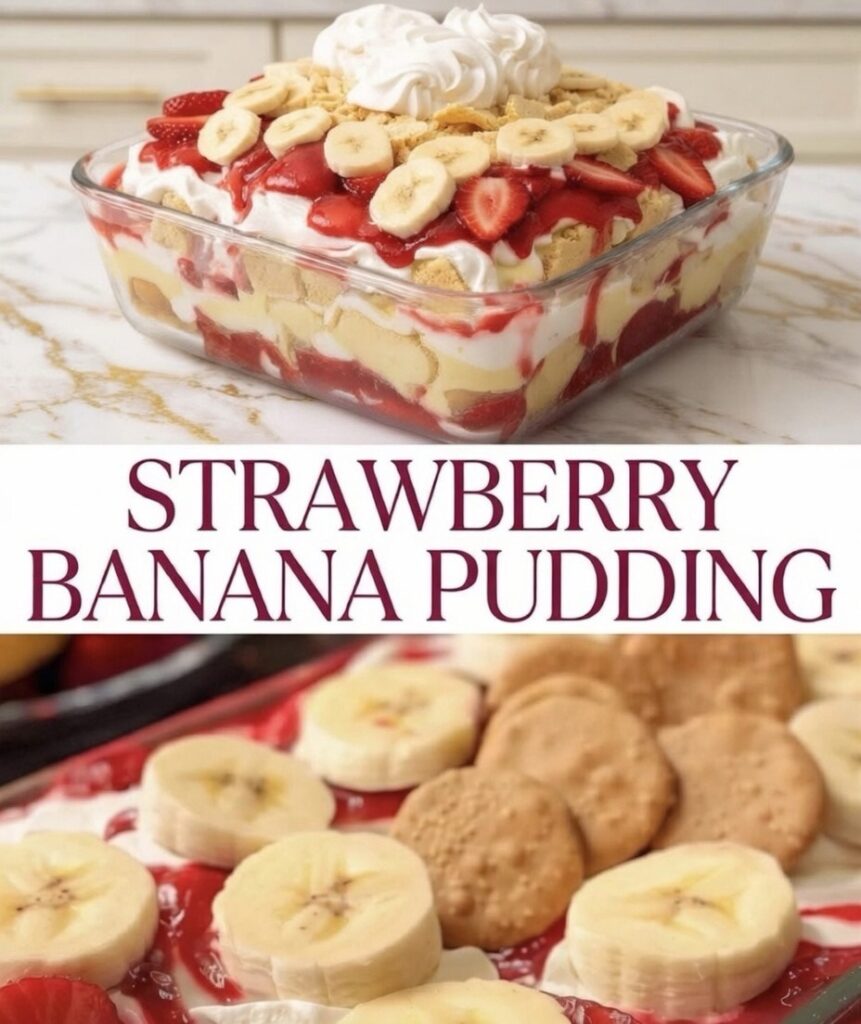
If you’re looking for a show-stopping dessert that requires zero baking skills and minimal effort, this Strawberry Banana Pudding is about to become your go-to recipe. Combining the classic Southern charm of banana pudding with fresh, juicy strawberries, this layered masterpiece looks impressive but is surprisingly simple to make.
Whether you’re hosting a summer barbecue, bringing dessert to a potluck, or simply craving something sweet and refreshing, this no-bake dessert delivers on flavor, presentation, and convenience. Best of all? It takes just 20 minutes of hands-on time, and the refrigerator does the rest of the work!
Why You’ll Love This Strawberry Banana Pudding
Easy & No-Bake: No oven required! Perfect for hot summer days or when you want to avoid heating up the kitchen.
Make-Ahead Friendly: Prepare up to 24 hours in advance, making it ideal for entertaining and stress-free party planning.
Crowd-Pleaser: The combination of creamy vanilla pudding, fresh fruit, and crunchy cookies appeals to both kids and adults.
Budget-Friendly: Simple, affordable ingredients that you can find at any grocery store.
Customizable: Easy to adapt for dietary preferences or ingredient availability.
Visually Stunning: The beautiful layers make it Instagram-worthy and perfect for special occasions.
Ingredients You’ll Need
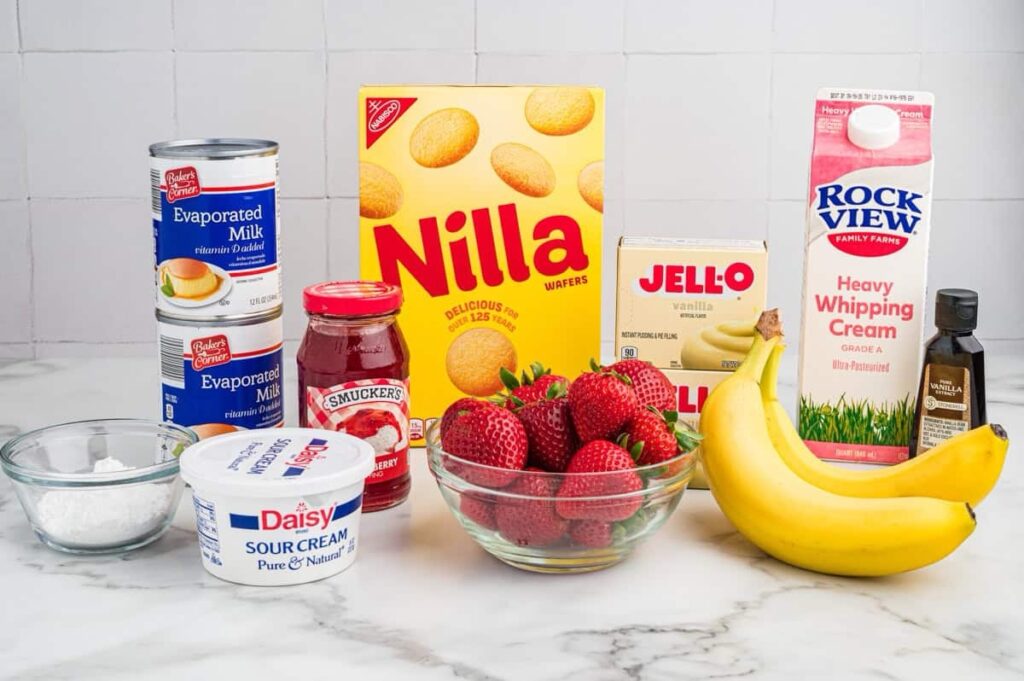


For the Pudding Layer:
- 2 boxes (3.4 oz each) instant vanilla pudding mix
- 3 cups cold whole milk (can substitute with 2% milk)
- 1 can (14 oz) sweetened condensed milk
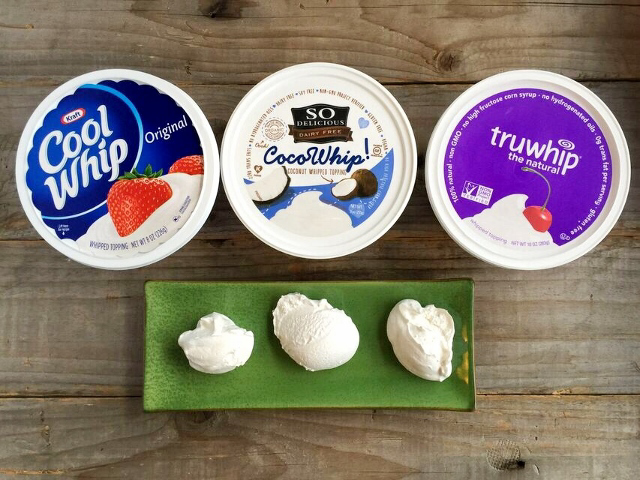
- 1 container (8 oz) Cool Whip or whipped topping, thawed
- 1 cup heavy cream (optional, for extra richness)
- 1 teaspoon pure vanilla extract
For the Fruit & Cookie Layers:
- 1 box (11 oz) vanilla wafers (Nilla wafers or similar)
- 4 cups fresh strawberries, hulled and sliced
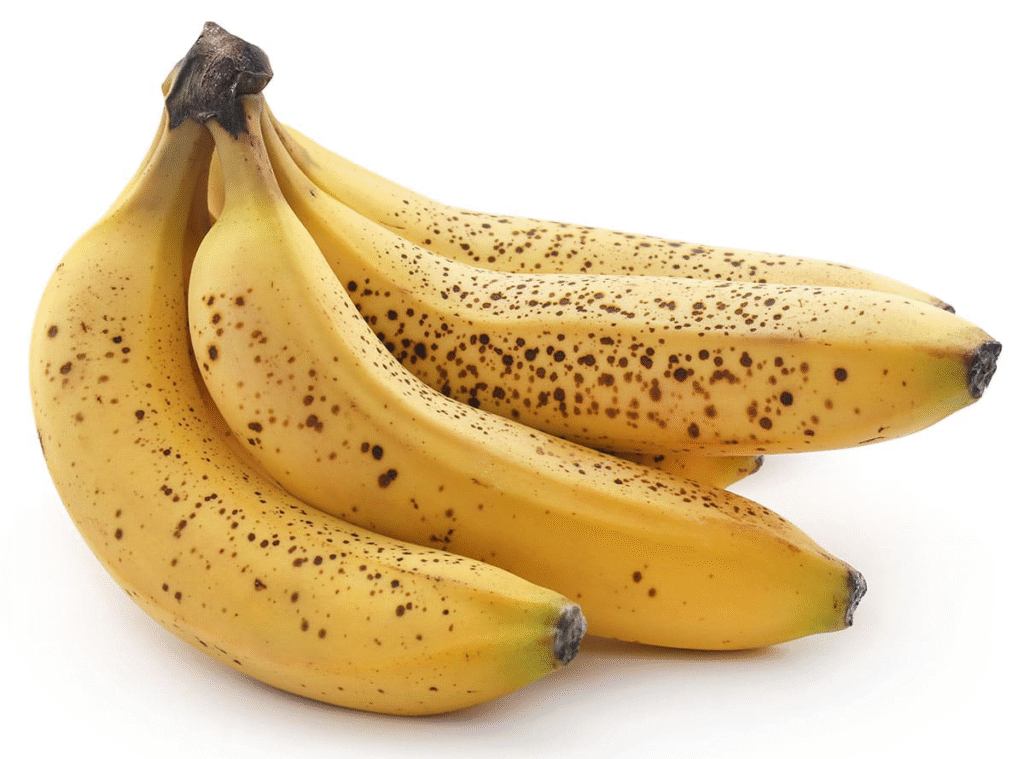
- 4 medium ripe bananas, sliced
- 2 tablespoons fresh lemon juice (to prevent banana browning)
- 2 tablespoons granulated sugar (optional, to sweeten strawberries)
For Garnish:
- Additional whipped cream
- Whole strawberries
- Banana slices
- Crushed vanilla wafers
- Fresh mint leaves (optional)
Optional Additions:
- Strawberry sauce or syrup for drizzling
- White chocolate shavings
- Toasted coconut flakes
Step-by-Step Instructions
Prep Time: 20 minutes | Chill Time: 4 hours | Total Time: 4 hours 20 minutes | Servings: 12-15
Step 1: Prepare the Fruit
- Slice the strawberries: Hull and slice strawberries into ¼-inch thick pieces. If your berries aren’t very sweet, toss them with 2 tablespoons of sugar and let them sit for 10 minutes to release their juices.
- Slice the bananas: Cut bananas into ¼-inch rounds. Immediately toss with lemon juice to prevent browning. This is crucial for maintaining the beautiful appearance of your dessert!
- Set aside: Keep fruit refrigerated until you’re ready to assemble.
Step 2: Make the Creamy Pudding Mixture
- Combine pudding mix and milk: In a large mixing bowl, whisk together the instant vanilla pudding mix and cold milk for 2 minutes until thick and well combined.
- Add sweetened condensed milk: Pour in the sweetened condensed milk and whisk until smooth. This adds incredible richness and sweetness to your pudding layer.
- Fold in whipped topping: Gently fold in the Cool Whip (or homemade whipped cream if you prefer) and vanilla extract until the mixture is light, fluffy, and completely combined.
- Optional enrichment: For an extra-decadent version, whip 1 cup of heavy cream to stiff peaks and fold it into the mixture.
- Refrigerate: Cover and chill for 5 minutes while you prepare your dish and cookies.
Step 3: Assemble the Layers
You’ll need: A 9×13 inch glass baking dish, trifle bowl, or individual serving glasses
Layer 1 – Cookie Base:
- Arrange a single layer of vanilla wafers to cover the bottom of your dish
- You can also crush some cookies for a more even base
Layer 2 – Pudding:
- Spread about ⅓ of the pudding mixture over the cookies
- Use an offset spatula for even distribution
Layer 3 – Bananas:
- Arrange banana slices in a single layer over the pudding
- Overlap slightly to ensure complete coverage
Layer 4 – Strawberries:
- Add a generous layer of sliced strawberries
- Reserve the prettiest slices for the top
Repeat Layers:
- Continue layering: cookies, pudding, bananas, strawberries
- Aim for 2-3 complete sets of layers depending on your dish depth
Final Top Layer:
- End with a generous layer of pudding
- Smooth the top with a spatula
Step 4: Chill & Set
- Cover tightly: Use plastic wrap, pressing it directly onto the surface to prevent a skin from forming
- Refrigerate: Chill for at least 4 hours, or preferably overnight
- This step is crucial: The pudding needs time to set, and the cookies need to soften for that perfect texture
Step 5: Garnish & Serve
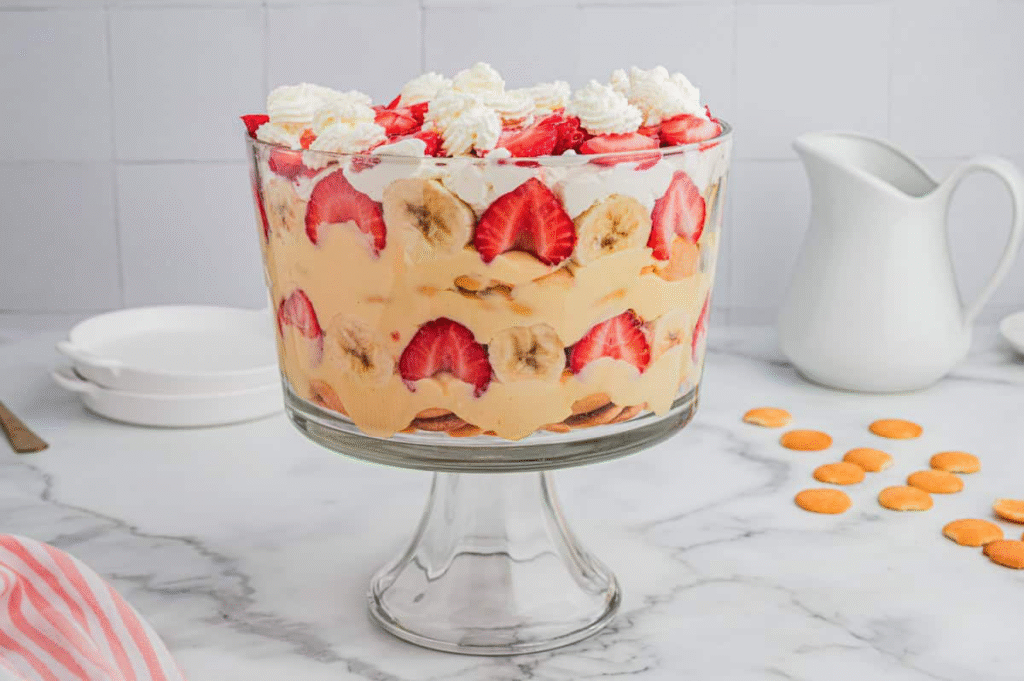
Just before serving:
- Remove plastic wrap carefully
- Top with fresh whipped cream (pipe it decoratively or spread smoothly)
- Arrange fresh strawberry slices and banana rounds on top
- Add crushed vanilla wafers for texture contrast
- Optional: Drizzle with strawberry sauce for extra flavor and visual appeal
Serving tips:
- Use a large serving spoon to scoop through all the layers
- Serve in clear dessert cups or bowls to show off the beautiful layers
- Garnish individual servings with a mint leaf for elegance
Nutritional Information (Per Serving – Based on 12 servings)
- Calories: 385
- Total Fat: 15g (19% DV)
- Saturated Fat: 9g
- Trans Fat: 0g
- Cholesterol: 35mg (12% DV)
- Sodium: 285mg (12% DV)
- Total Carbohydrates: 58g (21% DV)
- Dietary Fiber: 2g (7% DV)
- Sugars: 42g
- Added Sugars: 35g (70% DV)
- Protein: 6g (12% DV)
- Vitamin D: 1.2mcg (6% DV)
- Calcium: 185mg (14% DV)
- Potassium: 425mg (9% DV)
- Vitamin C: 35mg (39% DV)
Key Nutritional Highlights:
- Good source of Vitamin C from strawberries
- Provides potassium from bananas
- Contains calcium from milk products
- Energy-dense dessert best enjoyed in moderation
Expert Tips for Perfect Strawberry Banana Pudding
For the Best Texture:
- Don’t skip the chilling time: At least 4 hours is necessary for cookies to soften and flavors to meld. Overnight is even better!
- Use cold milk: Cold milk helps the instant pudding set properly and creates a thicker consistency.
- Fold, don’t stir: When adding Cool Whip, use a folding motion to maintain the airy texture.
- Layer thickness matters: Keep layers relatively even for the best texture balance in each bite.
For Maximum Flavor:
- Use ripe bananas: Look for bananas with some brown spots – they’re sweeter and have better flavor.
- Choose fresh strawberries: Peak season strawberries (spring/early summer) taste best. Avoid berries with white centers.
- Add a flavor boost: A teaspoon of banana extract in the pudding mixture intensifies banana flavor.
- Make it boozy (adults only): Add 2 tablespoons of banana liqueur or strawberry liqueur to the pudding for grown-up gatherings.
For Beautiful Presentation:
- Use a glass dish: Clear glass shows off those gorgeous layers – it’s part of the appeal!
- Make neat layers: Take your time arranging fruit in even, overlapping patterns.
- Save the best for last: Reserve the most attractive fruit slices for the top garnish.
- Pipe the whipped cream: Use a piping bag with a star tip for professional-looking swirls on top.
Creative Variations to Try
1. Chocolate Strawberry Banana Pudding
- Replace vanilla pudding with chocolate pudding
- Use chocolate wafer cookies instead of vanilla
- Drizzle with chocolate sauce
Calories per serving: ~405
2. Lighter Version
- Use sugar-free pudding mix
- Replace condensed milk with low-fat evaporated milk + sweetener
- Use light Cool Whip
- Reduce vanilla wafers by half
Calories per serving: ~245
3. Tropical Twist
- Add sliced fresh pineapple to the layers
- Use coconut milk in the pudding
- Top with toasted coconut flakes
- Garnish with tropical fruit
Calories per serving: ~395
4. Peanut Butter Banana Strawberry Pudding
- Add ½ cup creamy peanut butter to pudding mixture
- Use peanut butter cookies instead of vanilla wafers
- Drizzle with melted peanut butter
Calories per serving: ~450
5. Individual Parfaits
- Assemble in clear plastic cups or mason jars
- Perfect for picnics, parties, or portion control
- Makes about 15 single-serve portions
Calories per serving: ~255
6. Vegan Version
- Use plant-based pudding mix
- Substitute coconut cream for condensed milk
- Use dairy-free whipped topping
- Choose vegan vanilla wafers
Calories per serving: ~360
Storage Instructions
Refrigerator Storage:
- Covered tightly: Store in the refrigerator covered with plastic wrap or lid
- Shelf life: Best within 24-48 hours of making
- After 48 hours: Cookies may become too soft, bananas may darken despite lemon juice
- Maximum storage: Up to 3 days, but texture and appearance decline
Freezing (Not Recommended):
While technically possible, freezing is not recommended because:
- Strawberries become mushy when thawed
- Bananas turn brown and watery
- Pudding texture changes and may separate
- Cookies lose their texture completely
Make-Ahead Tips:
- Best timing: Make 4-24 hours before serving
- Add garnishes last: Wait until just before serving to add whipped cream topping
- Keep fruit fresh: Add top layer of fruit garnish within 2 hours of serving
Common Questions & Troubleshooting
Q: Can I use homemade pudding instead of instant?
A: Yes! Cook pudding according to package directions, cool completely, then proceed. The texture will be slightly different but still delicious.
Q: My pudding is too thin. What went wrong?
A: Possible causes: milk wasn’t cold enough, didn’t whisk long enough (needs 2 full minutes), or pudding mix was expired. Next time, add pudding mix gradually while whisking vigorously.
Q: The bananas turned brown even with lemon juice. Help!
A: This can happen if the dessert sits too long. Make sure to thoroughly coat banana slices in lemon juice, and consider making the dessert closer to serving time. You can also add a tiny bit of ascorbic acid (Fruit Fresh) to the lemon juice for extra protection.
Q: Can I use frozen strawberries?
A: Fresh is strongly preferred for texture and appearance. If using frozen, thaw completely, drain excess liquid, and pat very dry. Expect a softer, less vibrant result.
Q: The cookies are still crunchy after chilling. Why?
A: They need more time! Cookies need at least 4 hours to soften properly. If they’re still crunchy after 6 hours, your pudding mixture might have been too thick. Add a splash more milk next time.
Q: Can I make this without vanilla wafers?
A: Absolutely! Alternatives include: graham crackers, ladyfingers, shortbread cookies, or even pound cake cubes. Each creates a unique texture and flavor profile.
Q: How do I transport this to a party?
A: Use a dish with a tight-fitting lid or cover very tightly with plastic wrap. Keep it cold in a cooler with ice packs. Add the whipped cream garnish after arrival.
Q: Can I reduce the sugar?
A: Yes, but carefully. The pudding mix contains sugar, so you can’t eliminate it entirely. Skip the extra sugar on strawberries, use sugar-free pudding, or reduce condensed milk by half.
Perfect Occasions for This Dessert
✨ Summer BBQs & Picnics – Refreshing and doesn’t require last-minute preparation
🎉 Birthday Parties – Appeals to all ages, easy to serve in large quantities
🏈 Game Day Gatherings – Make ahead and focus on the game
🎄 Holiday Potlucks – Beautiful presentation and feeds a crowd
👨👩👧👦 Family Reunions – Traditional comfort food with a twist
💍 Bridal & Baby Showers – Elegant enough for special celebrations
🎓 Graduation Parties – Easy to scale up for large groups
🌸 Spring & Summer Celebrations – Takes advantage of fresh berry season
Serving Suggestions & Pairings
Beverage Pairings:
- Coffee: The dessert’s sweetness pairs beautifully with strong black coffee or espresso
- Milk: Classic pairing, especially for kids
- Sweet Tea: Southern tradition meets Southern dessert
- Champagne: For elegant occasions, try a dry prosecco to cut the sweetness
- Dessert Wine: Late harvest Riesling or Moscato complement the fruit flavors
Serve Alongside:
- Fresh fruit platter for a lighter option
- Nuts or trail mix for texture contrast
- Cheese plate (mild cheeses like brie or cream cheese)
- Light cookies or biscotti
The History of Banana Pudding
While this recipe puts a strawberry twist on the classic, traditional banana pudding has deep roots in Southern American cuisine. The dessert became popular in the early 1900s when vanilla wafers (Nilla Wafers) were introduced. The back-of-the-box recipe became a staple at church socials, family gatherings, and Sunday dinners throughout the South.
Our strawberry banana version honors this tradition while adding fresh seasonal fruit for a modern, colorful update that’s perfect for contemporary entertaining.
Why This Recipe Works
Science behind the magic:
- Cookie softening: The moisture from the pudding gradually hydrates the cookies, creating that signature cake-like texture. This takes time, which is why chilling is essential.
- Stabilized whipped cream: Combining Cool Whip with pudding creates a stable mixture that won’t weep or separate during chilling.
- Acid prevents browning: Lemon juice lowers the pH on banana surfaces, slowing the enzymatic browning process.
- Cold sets pudding: The gelatin in instant pudding needs cold temperatures to fully set and create the perfect creamy texture.
- Layer integration: As it chills, flavors meld together while maintaining distinct textural elements in each layer.
Final Tips for Success
🎯 Plan ahead: This dessert actually improves with time, so making it the day before is ideal
🎯 Quality ingredients matter: Use real vanilla extract, fresh fruit, and good quality pudding mix for best results
🎯 Temperature control: Keep all ingredients and the finished dessert properly chilled
🎯 Presentation counts: Take time with your layers and garnishes – this dessert is meant to impress visually
🎯 Taste as you go: Before final assembly, taste your pudding mixture and adjust sweetness if needed
🎯 Have fun with it: Don’t stress about perfection – even imperfect layers taste delicious!
Conclusion: Your New Signature Dessert Awaits
This Strawberry Banana Pudding is more than just a dessert – it’s a conversation starter, a crowd-pleaser, and a testament to the fact that impressive doesn’t have to mean complicated. With simple ingredients, minimal prep time, and maximum visual impact, this no-bake layered dessert deserves a permanent spot in your recipe collection.
Whether you’re a seasoned baker or a kitchen novice, this recipe guarantees success. The combination of creamy vanilla pudding, sweet ripe bananas, tangy fresh strawberries, and vanilla wafers creates a symphony of flavors and textures that will have everyone asking for seconds.
So grab your ingredients, clear some space in your refrigerator, and get ready to create a dessert that looks like it came from a bakery but requires no baking at all. Your next celebration just got a whole lot sweeter!
Print-Friendly Recipe Card
STRAWBERRY BANANA PUDDING
Prep: 20 min | Chill: 4 hours | Total: 4h 20m | Serves: 12-15
INGREDIENTS:
- 2 boxes instant vanilla pudding
- 3 cups cold milk
- 1 can sweetened condensed milk
- 8 oz Cool Whip
- 1 box vanilla wafers
- 4 cups sliced strawberries
- 4 sliced bananas + 2 tbsp lemon juice
- Whipped cream for topping
INSTRUCTIONS:
- Mix pudding with milk (2 min), add condensed milk
- Fold in Cool Whip
- Toss bananas with lemon juice
- Layer: cookies, pudding, bananas, strawberries (repeat)
- Chill 4+ hours
- Top with whipped cream and fresh fruit before serving
NUTRITION (per serving): 385 cal | 15g fat | 58g carbs | 6g protein
Tags: no-bake dessert, strawberry banana pudding, layered dessert, summer desserts, potluck recipes, easy desserts, crowd-pleasing desserts, make-ahead desserts, Southern desserts, banana pudding recipe, strawberry desserts, vanilla wafer dessert, trifle recipe, party desserts, family-friendly recipes
Keywords: strawberry banana pudding, easy no-bake dessert, layered pudding recipe, summer dessert ideas, strawberry dessert recipes, banana pudding with strawberries, vanilla wafer dessert, make-ahead desserts for parties, crowd-pleasing dessert recipes, no-bake summer treats
Introduction
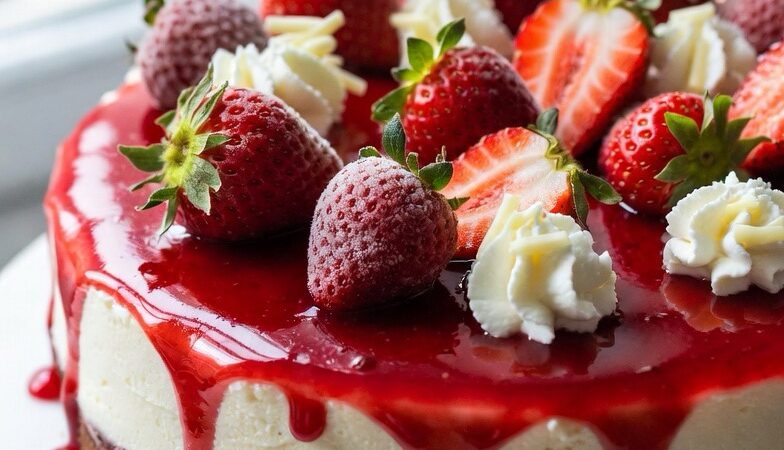
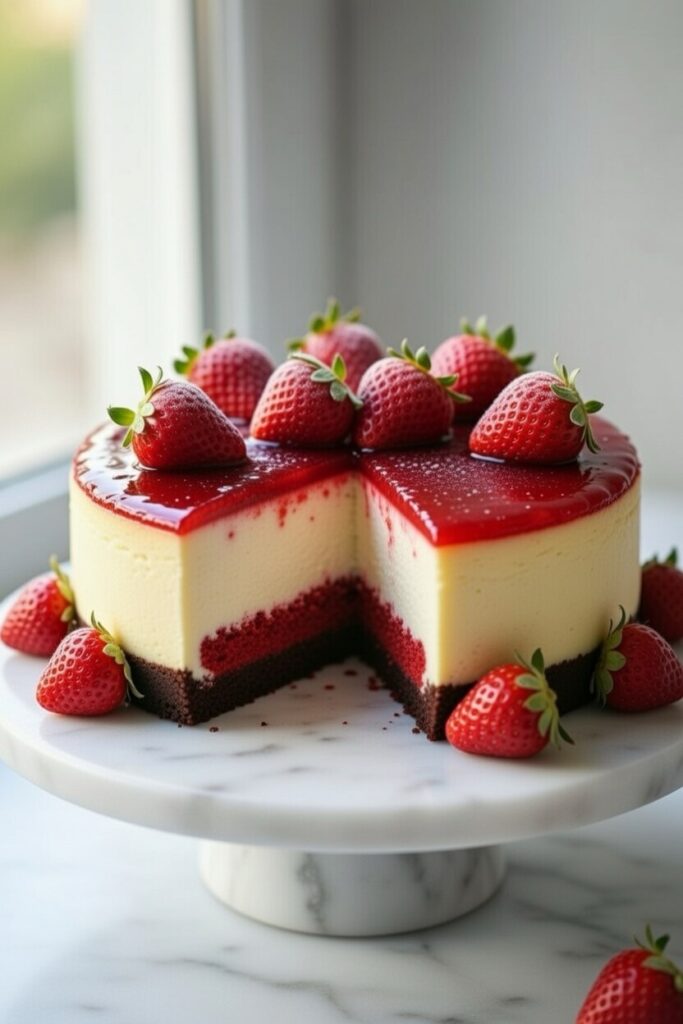
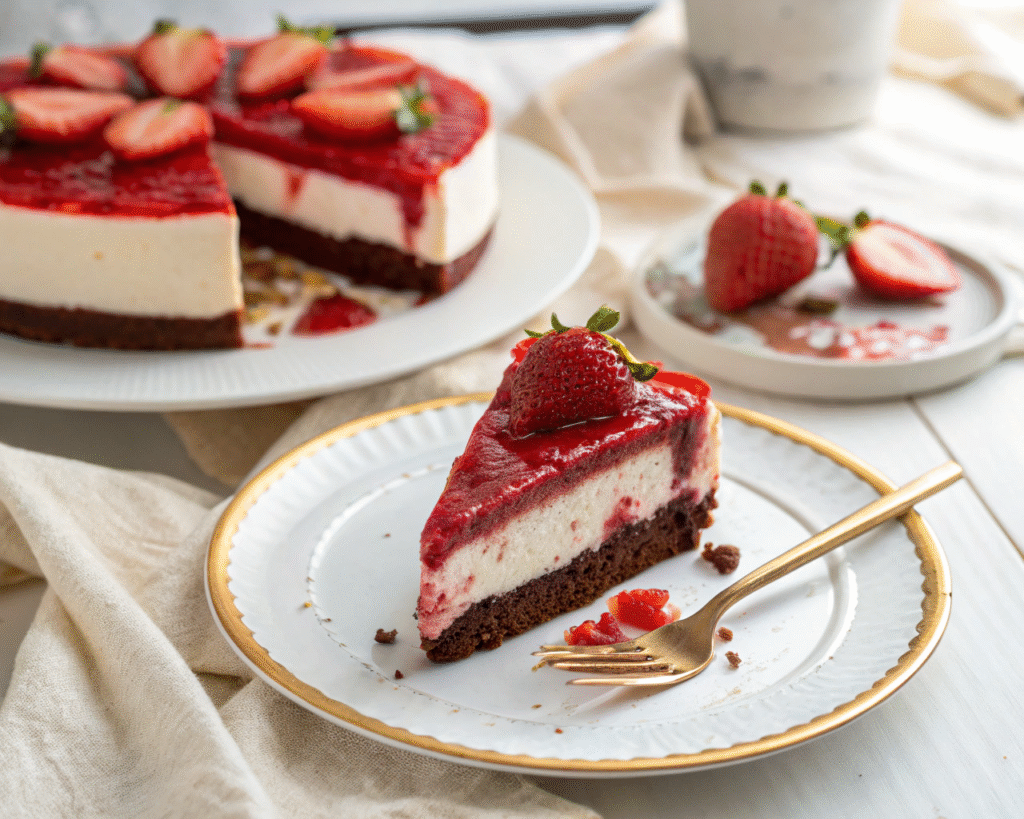
Get ready to create the dessert that stops conversations and captures hearts: Strawberry Red Velvet Cheesecake! This jaw-dropping masterpiece combines three beloved desserts into one spectacular creation—rich red velvet cake, creamy cheesecake, and fresh strawberry glaze, all layered into gorgeous crimson-and-cream perfection. Each slice reveals stunning layers: a dark chocolate cookie crust, vibrant red velvet cake layer, silky white cheesecake filling, and a glossy strawberry glaze crowned with fresh berries. It’s the kind of dessert that makes people pull out their phones before taking the first bite.
What makes Strawberry Red Velvet Cheesecake absolutely irresistible is the brilliant combination of textures and flavors. The slight cocoa richness of red velvet pairs beautifully with tangy cream cheese, while fresh strawberries add bright, fruity freshness that cuts through the richness. Unlike traditional cheesecakes that can feel heavy, the red velvet layer adds a tender, cake-like element that creates perfect balance. And visually? Those vibrant red and pristine white layers create a color contrast that’s absolutely Instagram-worthy.
Whether you’re celebrating Valentine’s Day, an anniversary, a bridal shower, or simply want to create something extraordinary, this Strawberry Red Velvet Cheesecake delivers on every level. The technique is surprisingly straightforward—no complicated tempering or tricky assembly—and the results are consistently spectacular. Let’s create this showstopper together!
Why Strawberry Red Velvet Cheesecake is the Ultimate Hybrid Dessert
Red velvet and cheesecake are both crowd-pleasers on their own, but together they create something even more magical. The red velvet layer provides that signature subtle chocolate flavor with its distinctive tender crumb, while the cheesecake adds luxurious creaminess. The strawberry component ties everything together with fresh, fruity brightness that prevents the dessert from being too rich.
The layered presentation is what really sets this dessert apart. Unlike swirled or marbled cheesecakes, these distinct layers create visual drama when you slice into it. The crimson red velvet against pristine white cheesecake, topped with jewel-toned strawberry glaze—it’s a feast for the eyes before it ever touches your lips.
This dessert also solves some common baking challenges. Red velvet cake can sometimes be dry when made on its own, but incorporating it as a layer with cream cheese keeps it moist and tender. Traditional cheesecakes can crack or be temperamental, but this version is forgiving and less prone to surface imperfections since it’s topped with glaze and berries anyway.
The flavor combination is both nostalgic and sophisticated. Red velvet reminds us of special occasion cakes, cream cheese brings comfort and richness, and fresh strawberries add elegance and freshness. It’s fancy enough for the most formal celebrations yet approachable enough that everyone from kids to grandparents will love it.
Essential Ingredients for Strawberry Red Velvet Cheesecake (12 Servings)

For the chocolate cookie crust:
- 2 cups (200g) chocolate cookie crumbs (about 24 Oreos, filling removed, or chocolate graham crackers)
- 6 tablespoons (85g) unsalted butter, melted
- 2 tablespoons (25g) granulated sugar
- Pinch of salt
For the red velvet layer:
- 1½ cups (150g) red velvet cake crumbs (from prepared red velvet cake or box mix)
- ½ cup (120g) cream cheese, softened
- ¼ cup (60ml) strawberry purée (fresh or frozen strawberries blended)
- 2 tablespoons (30ml) milk, if needed for consistency
For the classic cheesecake layer:
- 24 oz (680g) cream cheese, full-fat, at room temperature (three 8-oz blocks)
- ⅔ cup (135g) granulated sugar
- 3 large eggs, at room temperature
- 2 teaspoons vanilla extract
- ½ cup (120ml) heavy cream or sour cream
- 2 tablespoons (15g) all-purpose flour (optional, for extra stability)
For the strawberry glaze and topping:
- 2 cups (300g) fresh strawberries, divided
- ¼ cup (50g) granulated sugar
- 1 tablespoon fresh lemon juice
- 1 tablespoon cornstarch mixed with 2 tablespoons water
- 1 teaspoon vanilla extract
- Additional whole fresh strawberries for decoration
Optional garnish:
- Whipped cream rosettes
- White chocolate shavings
- Fresh mint leaves
- Powdered sugar for dusting
Detailed Step-by-Step Instructions
Step 1: Prepare Pan and Make Red Velvet Cake
Preheat oven to 325°F (165°C). Wrap the outside of a 9-inch springform pan tightly with heavy-duty aluminum foil to prevent leaks. Grease the inside lightly with butter or cooking spray.
If you don’t have red velvet cake already prepared, make a simple red velvet cake using your favorite recipe or a box mix. You only need about 1½ cups of crumbled cake, so you can bake it in an 8-inch round pan or make cupcakes and use a few. Let the cake cool completely before proceeding.
Bring all cream cheese and eggs to room temperature—this is crucial for smooth, lump-free cheesecake filling! Leave them out for 1-2 hours, or warm eggs gently in a bowl of warm water for 10 minutes.
Step 2: Create the Chocolate Cookie Crust
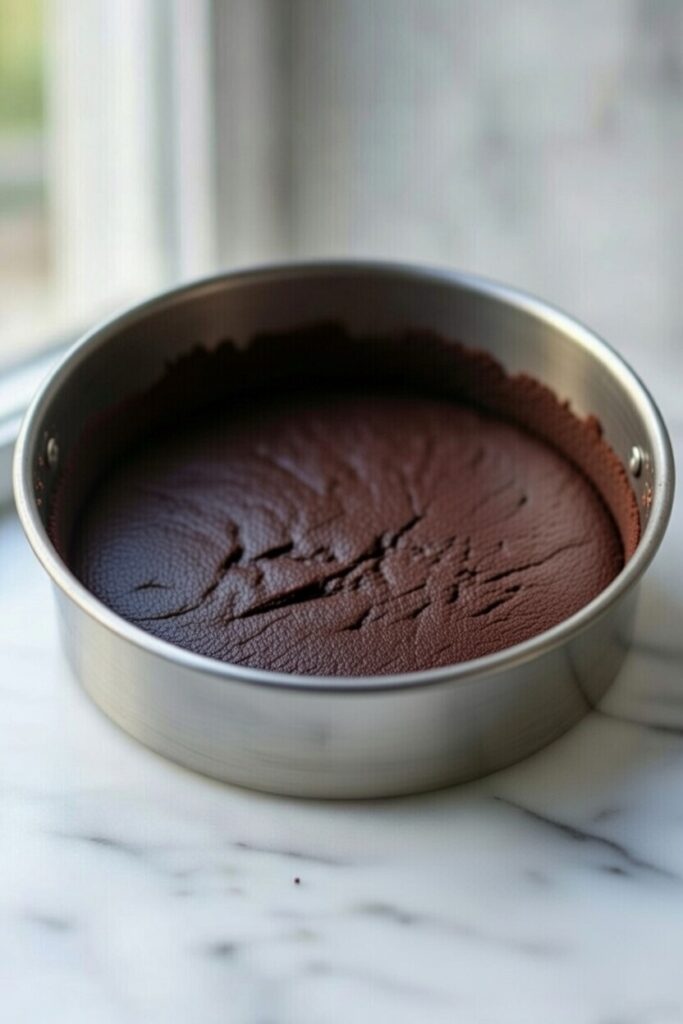
In a food processor, pulse chocolate cookies (Oreos work perfectly—remove the filling first) until you have fine, even crumbs. You need 2 cups of crumbs total.
Transfer crumbs to a medium bowl. Add melted butter, sugar, and a pinch of salt. Mix thoroughly with a fork until the mixture resembles wet sand and holds together when squeezed in your hand.
Pour the crumb mixture into your prepared springform pan. Using the bottom of a measuring cup or a flat-bottomed glass, press the crumbs firmly and evenly across the bottom and about 1 inch up the sides of the pan. Pack it tightly—a well-compacted crust won’t crumble when you slice.
Bake the crust for 10 minutes to set it. Remove from oven and let cool while you prepare the next layer. This pre-baking step prevents sogginess and creates a sturdy foundation.
Step 3: Prepare the Red Velvet Layer
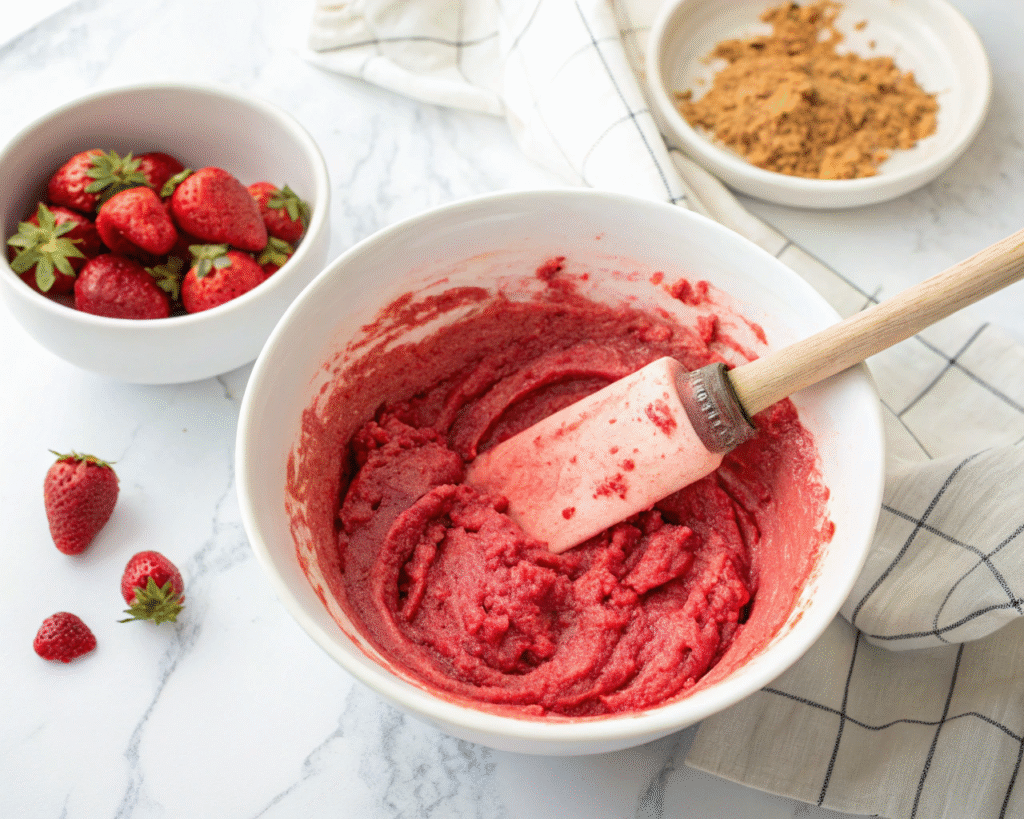
Crumble your cooled red velvet cake into fine crumbs using your hands or a food processor. You want a texture similar to coarse breadcrumbs—not too fine, but no large chunks.
In a medium bowl, beat the softened cream cheese until smooth and fluffy, about 1-2 minutes. Add the strawberry purée and mix until fully incorporated and the mixture turns a beautiful pink color.
Add the red velvet cake crumbs to the cream cheese mixture. Fold gently but thoroughly until everything is evenly combined. The mixture should be spreadable but hold its shape—like thick frosting. If it’s too dry, add 1-2 tablespoons of milk; if too wet, add more cake crumbs.
Spread the red velvet mixture evenly over the cooled chocolate crust, smoothing the top with a spatula. Press gently to eliminate air pockets. This layer should be about ½-inch thick. Set aside while you prepare the cheesecake filling.
Step 4: Make the Silky Cheesecake Filling
In a large mixing bowl, beat the room-temperature cream cheese with an electric mixer on medium speed for 2-3 minutes until completely smooth, fluffy, and lump-free. Scrape down the bowl several times to ensure even mixing.
Add the sugar and beat on medium speed for another 2 minutes until light and creamy. The mixture should look pale and airy.
Add eggs one at a time, beating on low speed just until each egg is incorporated. Don’t overbeat after adding eggs—this incorporates too much air and can cause cracks. Mix just until the yellow streaks disappear.
Add vanilla extract and heavy cream (or sour cream for extra tanginess). Beat on low speed until smooth and uniform. If using flour for extra stability, add it now and mix just until incorporated.
The finished cheesecake batter should be silky, smooth, and pourable—like thick pancake batter.
Step 5: Assemble and Bake
Carefully pour the cheesecake filling over the red velvet layer in the pan. Pour slowly and evenly to avoid disturbing the red velvet layer underneath. Use a spatula to spread the filling gently to the edges, smoothing the top.
Gently tap the pan on the counter 3-4 times to release any large air bubbles trapped in the batter.
Place the springform pan on a baking sheet (to catch any potential drips) and bake at 325°F (165°C) for 55-65 minutes. The cheesecake is done when the edges are set and slightly puffed, but the center still jiggles slightly when you gently shake the pan—about a 2-inch diameter wobbly area in the center is perfect.
Don’t overbake! The center will firm up completely as it cools. An overbaked cheesecake will be dry, grainy, and prone to cracking.
Step 6: Cool Slowly to Prevent Cracks

Turn off the oven and crack the door open about 4 inches. Leave the cheesecake inside for 1 hour. This gradual cooling prevents the dramatic temperature change that causes cracking and sinking.
After 1 hour, remove the cheesecake from the oven and place it on a wire cooling rack. Immediately run a thin knife or offset spatula around the edge to loosen it from the pan—this prevents pulling and cracking as the cheesecake contracts while cooling.
Let the cheesecake cool completely at room temperature, about 2-3 hours. Then cover loosely with plastic wrap and refrigerate for at least 4 hours, preferably overnight. This chilling is essential—the cheesecake needs time to set properly and develop its creamy, sliceable texture.
Step 7: Make Fresh Strawberry Glaze
Hull and slice 1½ cups of fresh strawberries. In a medium saucepan, combine the sliced strawberries, sugar, and lemon juice. Cook over medium heat, stirring occasionally, until the strawberries break down and release their juices, about 5-7 minutes.
For a smoother glaze, use an immersion blender to partially blend the mixture—you want some small strawberry pieces for texture but mostly smooth. For a chunkier glaze, simply mash with a fork.
Add the cornstarch slurry (cornstarch mixed with water) to the simmering strawberry mixture. Stir constantly and cook for 1-2 minutes until the glaze thickens to a syrupy consistency that coats the back of a spoon.
Remove from heat and stir in vanilla extract. Transfer to a bowl and let cool to room temperature. The glaze will thicken more as it cools. If it becomes too thick, thin with a tablespoon of water.
Step 8: Glaze and Decorate
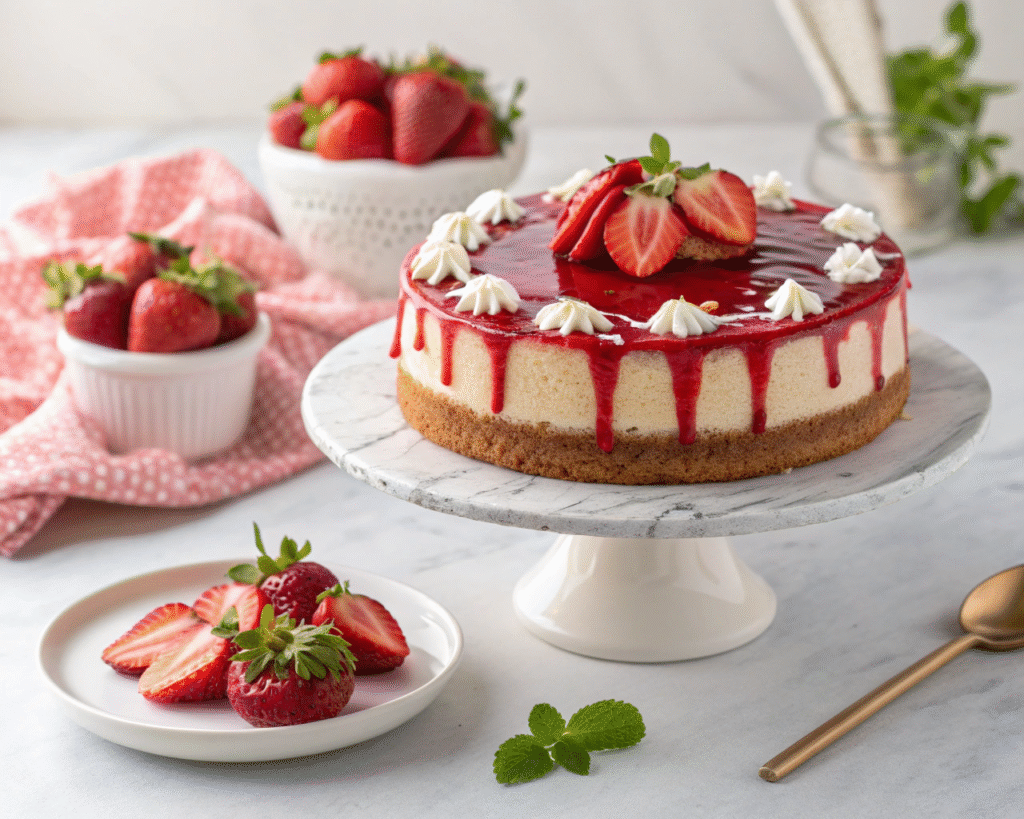
Remove the thoroughly chilled cheesecake from the refrigerator. Run a thin knife around the edge one more time, then carefully remove the springform pan sides. Leave the cheesecake on the pan base, or use a large offset spatula to carefully transfer it to a serving plate.
Pour the cooled strawberry glaze over the top of the cheesecake. Use a spatula to spread it evenly, letting some drip naturally down the sides for a beautiful rustic look. Don’t worry about perfection—the organic drips add charm!
Arrange whole fresh strawberries on top of the glaze while it’s still slightly wet. You can create a pattern (like a circle around the edge and cluster in the center) or arrange them artistically across the surface.
If desired, pipe whipped cream rosettes around the edge, add white chocolate shavings, or place fresh mint leaves between strawberries for extra elegance.
Step 9: Final Chill and Serve
Return the decorated cheesecake to the refrigerator for at least 30 minutes to allow the glaze to set fully. This makes slicing much neater.
For perfect slices, use a large, sharp knife. Dip the knife in very hot water, wipe it completely dry with a towel, then make one clean cut through the cheesecake. Wipe the knife clean, dip in hot water again, wipe dry, and make the next cut. This creates those picture-perfect slices with clean, distinct layers.
Serve chilled. Each slice will showcase the beautiful layers: dark chocolate crust, vibrant red velvet, pristine white cheesecake, and glossy strawberry topping.
Pro Tips for Perfect Strawberry Red Velvet Cheesecake
Room temperature ingredients are non-negotiable. Cold cream cheese creates lumps, and cold eggs don’t incorporate smoothly. Plan ahead and leave ingredients out for 2 hours before starting.
Use quality red velvet cake. Whether homemade or boxed, make sure your red velvet cake is moist and flavorful. Dry cake will create a dry, crumbly layer that doesn’t integrate well.
Don’t skip the crust pre-bake. Those 10 minutes make the difference between a crisp, sturdy crust and a soggy mess that falls apart when you slice.
Make your red velvet layer spreadable. It should have the consistency of thick frosting—easy to spread but not runny. The cream cheese and strawberry purée provide moisture and help bind the crumbs.
Pour cheesecake filling gently. A rushed pour can disturb the red velvet layer underneath. Pour slowly in the center and let it spread outward naturally, then smooth the edges carefully.
Cool gradually for crack-free results. The slow oven cooling (door cracked open) is your best defense against cracks. Resist the urge to rush this step!
Let it chill completely before glazing. A fully set, cold cheesecake provides the perfect base for glaze and won’t absorb excess moisture.
Fresh strawberries make the best glaze. Frozen work in a pinch, but fresh strawberries create a brighter, more vibrant flavor and color.
Freeze for ultra-clean slices. If you want those Instagram-perfect slices with razor-sharp layer definition, freeze the cheesecake for 20-30 minutes before slicing, then let slices come to cool (not cold) temperature before serving.
Strawberry Variations and Flavor Twists
Classic Strawberry Version (as written)
Fresh strawberry glaze with whole berry decoration. Bright, fruity, and beautiful.
Mixed Berry Red Velvet Cheesecake
Use a combination of strawberries, raspberries, and blueberries in the glaze and as topping. Gorgeous color variation!
Strawberry White Chocolate Version
Fold 4 oz melted white chocolate into the cheesecake filling. Add white chocolate shavings on top with strawberries.
Strawberry Lemon Red Velvet Cheesecake
Add 1 tablespoon lemon zest to the cheesecake filling and 1 teaspoon to the strawberry glaze. Bright and refreshing!
No-Bake Strawberry Red Velvet Cheesecake
Skip baking the cheesecake layer. Instead, make a no-bake filling with cream cheese, whipped cream, and gelatin. Chill until set.
Individual Red Velvet Cheesecake Cups
Layer the components in clear glass jars or cups for individual servings. Perfect for parties!
Chocolate Ganache Version
Top with chocolate ganache instead of strawberry glaze, then add fresh strawberries. Decadent chocolate-strawberry combination.
Strawberry Swirl Red Velvet Cheesecake
Swirl strawberry purée through the cheesecake filling before baking for a marbled effect, then top with fresh strawberries.
Make-Ahead and Storage Guide
Strawberry Red Velvet Cheesecake is perfect for advance preparation:
Timeline:
- 3 days ahead: Bake red velvet cake, prepare and store in airtight container
- 2 days ahead: Bake and cool cheesecake (without glaze), wrap tightly and refrigerate
- 1 day ahead: Make strawberry glaze, store refrigerated in airtight container
- 4-6 hours ahead: Add glaze and fresh strawberry decoration, refrigerate
- Just before serving: Add any final garnishes (whipped cream, mint)
Storage:
- Unglazed cheesecake: 5 days refrigerated, tightly wrapped
- Fully decorated cheesecake: 2-3 days refrigerated (strawberries stay freshest)
- Freeze unglazed cheesecake: Up to 2 months, wrapped in plastic then foil
- Don’t freeze with fresh strawberry glaze (texture changes upon thawing)
Best Practices:
- Store covered in the refrigerator, away from strong-smelling foods
- If making ahead, add fresh strawberry decoration within 6-8 hours of serving
- Reglaze if the original glaze is absorbed (rare, but can happen if made too far ahead)
- Freeze individual slices wrapped separately for easy single servings later
Frequently Asked Questions (FAQ)
Can I use a boxed red velvet cake mix?
Absolutely! Boxed red velvet mix works perfectly for this recipe. Follow package directions, bake, cool completely, and crumble as directed.
Do I need to make the red velvet cake from scratch?
No. You can use leftover red velvet cake, store-bought red velvet cake, or even red velvet cake crumbs if you can find them. The key is having about 1½ cups of crumbled cake.
Can I make this without the red velvet layer?
Yes, but it wouldn’t be the same! You could make a strawberry cheesecake by using graham cracker crust, plain cheesecake filling, and strawberry topping. Still delicious but different.
Why did my cheesecake crack?
Common causes: overbaking, cooling too quickly, cold ingredients creating lumps and air pockets, or over-beating after adding eggs. Follow the slow-cooling method for best results.
Can I use frozen strawberries for the glaze?
Yes! Thaw them first and drain excess liquid, or cook them from frozen and reduce the liquid more. Fresh strawberries provide brighter flavor and color, but frozen work in a pinch.
How do I know when the cheesecake is done baking?
The edges should be set and slightly puffed, while the center (about 2-3 inches in diameter) still jiggles like gelatin when gently shaken. It will firm completely as it cools.
Can I make this gluten-free?
Yes! Use gluten-free chocolate cookies for the crust and a gluten-free red velvet cake mix or recipe. The cheesecake filling is naturally gluten-free.
My red velvet layer is too dry and crumbly, what do I do?
Add more cream cheese (1-2 tablespoons) or a splash of milk until the mixture becomes spreadable. It should hold together like thick frosting.
Can I make mini versions?
Absolutely! Make in muffin tins lined with cupcake liners. Layer crust, red velvet, and cheesecake filling. Bake at 325°F for 18-22 minutes. Top with glaze when cool.
How far ahead can I decorate with fresh strawberries?
For best appearance and freshness, add fresh strawberry decoration within 6-8 hours of serving. The berries stay vibrant and the glaze remains glossy.
Troubleshooting Common Issues
Layers mixing together:
Cause: Red velvet layer too wet, or cheesecake filling poured too quickly
Solution: Ensure red velvet layer is spreadable but not runny; pour cheesecake filling slowly and gently
Cheesecake sinking in the middle:
Cause: Overbaking, opening oven door during baking, or cooling too quickly
Solution: Don’t open oven door while baking; follow slow-cooling method; bake just until center jiggles
Strawberry glaze too runny:
Cause: Not enough cornstarch, or not cooked long enough
Solution: Add more cornstarch slurry (1 tsp cornstarch + 2 tsp water) and cook until thickened
Strawberry glaze too thick:
Cause: Too much cornstarch, or over-reduced
Solution: Thin with 1-2 tablespoons water or strawberry juice, stir until desired consistency
Crust falling apart when slicing:
Cause: Not enough butter, or not pressed firmly enough
Solution: Ensure proper butter ratio and pack crust very firmly; pre-baking helps too
Red velvet layer too thick or thin:
Cause: Incorrect amount of cake crumbs
Solution: Aim for about ½-inch thick layer; adjust cake crumbs as needed for even coverage
Cheesecake sticking to pan:
Cause: Didn’t run knife around edge before cooling, or pan not greased
Solution: Always grease pan lightly; run thin knife around edge immediately after baking and again before removing sides
People Also Ask (PAA)
What is Strawberry Red Velvet Cheesecake?
Strawberry Red Velvet Cheesecake is a layered dessert combining chocolate cookie crust, red velvet cake layer, classic cheesecake filling, and fresh strawberry glaze. It merges three popular desserts into one stunning creation with vibrant red and white layers.
How many calories are in Strawberry Red Velvet Cheesecake?
A typical slice (1/12 of a 9-inch cheesecake) contains approximately 420-480 calories, depending on exact ingredients and portion size. The rich layers make it an indulgent treat best enjoyed in moderation.
Can you freeze red velvet cheesecake?
Yes, freeze the unglazed cheesecake for up to 2 months. Wrap tightly in plastic wrap then aluminum foil. Thaw overnight in the refrigerator and add fresh strawberry glaze and toppings before serving.
How long does Strawberry Red Velvet Cheesecake last?
Properly stored in the refrigerator, it lasts 3-5 days. For best quality and freshest strawberries, consume within 2-3 days of decorating with fresh fruit.
Is red velvet cheesecake the same as regular cheesecake?
No. Red velvet cheesecake incorporates red velvet cake as a distinct layer, adding cocoa flavor and tender cake texture. Regular cheesecake has only the creamy filling without cake layers.
What makes red velvet cake red?
Red velvet cake gets its distinctive color from red food coloring (or historically from a reaction between cocoa and acidic ingredients). It has a subtle cocoa flavor and tender, velvety crumb texture.
Can I make Strawberry Red Velvet Cheesecake without baking?
You can make a no-bake version by using a no-bake cheesecake filling (cream cheese, whipped cream, and gelatin) over the red velvet layer and unbaked crust. Chill until set instead of baking.
Why is my cheesecake grainy?
Graininess usually comes from cold cream cheese that wasn’t fully beaten smooth, overbaking, or overbeating after adding eggs. Always use room temperature ingredients and don’t overbeat.
Conclusion
Strawberry Red Velvet Cheesecake represents the pinnacle of creative baking—taking beloved classics and reimagining them into something even more spectacular. This stunning dessert proves that with quality ingredients, patience, and proper technique, you can create bakery-worthy masterpieces in your own kitchen. The vibrant layers, contrasting textures, and perfect balance of chocolate, cream cheese, and fresh strawberries come together in pure harmony.
What makes this dessert truly exceptional is its wow factor combined with achievability. Yes, it looks incredibly impressive with those dramatic red and white layers, but the actual technique is straightforward and forgiving. It’s fancy enough for the most special celebrations—Valentine’s Day, anniversaries, weddings, birthdays—yet reliable enough to become your signature dessert. The make-ahead nature means you can prepare it stress-free, enjoying your event rather than spending it in the kitchen.
The combination of red velvet and strawberry cheesecake creates something that appeals to virtually everyone. Chocolate lovers adore the cocoa notes, cheesecake enthusiasts can’t resist the creamy filling, and fruit dessert fans celebrate the fresh strawberry brightness. It’s a crowd-pleaser that transcends age, preferences, and occasions.
Make this Strawberry Red Velvet Cheesecake for someone special, or treat yourself to something extraordinary. Watch faces light up when you bring it to the table and reveal those gorgeous layers when you slice it. Photograph it for posterity (because you absolutely will want to), then savor every creamy, fruity, velvety bite. This is dessert artistry at its finest—beautiful, delicious, and unforgettable. 🍓❤️✨
Prep Time: 40 minutes
Bake Time: 55-65 minutes (plus 10 min crust)
Cooling/Chill Time: 6+ hours (overnight recommended)
Total Time: 8+ hours
Servings: 12-14 slices
Difficulty: Intermediate
Cuisine: American Fusion
Course: Dessert
Calories: ~420-450 kcal per slice
Diet: Vegetarian
Keywords: strawberry red velvet cheesecake, red velvet cheesecake recipe, strawberry cheesecake, layered cheesecake, red velvet dessert, strawberry dessert, special occasion cake, valentines day dessert
Introduction
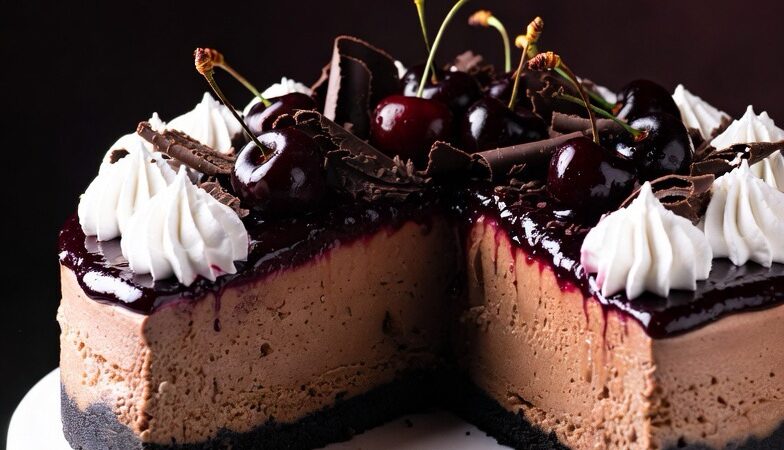
Prepare to fall in love with the most decadent fusion dessert ever created: Black Forest Cheesecake! This showstopping masterpiece takes everything you adore about classic German Black Forest Cake—rich chocolate, sweet-tart cherries, clouds of whipped cream—and marries it with the creamy, luxurious texture of New York-style cheesecake. Each slice reveals dramatic layers: a dark chocolate cookie crust, velvety chocolate cheesecake filling, glossy cherry topping, billows of whipped cream, and a cascade of chocolate shavings. It’s pure indulgence that makes every special occasion unforgettable.
What makes Black Forest Cheesecake absolutely irresistible is how it combines the best of both dessert worlds. The chocolate cheesecake filling is impossibly smooth and rich, with deep cocoa flavor that’s not overly sweet. The cherry topping adds bright, fruity contrast that cuts through the richness perfectly. And unlike traditional Black Forest Cake with its layers of sponge, this version has that signature creamy cheesecake texture that melts on your tongue. It’s elegant enough for the fanciest dinner party yet beloved enough that everyone asks for seconds.
Whether you’re a cheesecake devotee, a Black Forest Cake fanatic, or simply someone who believes chocolate and cherries are a match made in heaven, this recipe delivers on every level. The technique is straightforward—no water bath required—and the results are consistently spectacular. Let’s create this chocolate-cherry dream together!
Why Black Forest Cheesecake is the Perfect Fusion Dessert
Black Forest Cheesecake brilliantly solves one of traditional Black Forest Cake’s biggest challenges: the delicate sponge layers can dry out or become soggy. By replacing sponge with rich cheesecake, you get a dessert that stays perfectly moist and creamy for days. The chocolate cheesecake provides a stable, luxurious base that holds up beautifully under the cherry topping and whipped cream.
The flavor combination is iconic for a reason. Chocolate and cherry is one of those timeless pairings that feels both sophisticated and comforting. The slight tartness of cherries balances the richness of chocolate and cream cheese, preventing the dessert from being cloying. It’s indulgent but not heavy, rich but refreshing.
Visually, this cheesecake is absolutely stunning. The dark chocolate base contrasts dramatically with white cream and ruby-red cherries. When you slice it, those distinct layers create a gorgeous cross-section that photographs like a dream. It’s the kind of dessert that makes people gasp when you bring it to the table—and then go silent when they taste it because they’re too busy savoring every bite.
The practical advantages are significant too. Unlike traditional Black Forest Cake which requires multiple components prepared separately and carefully assembled, this cheesecake streamlines the process. One crust, one filling, bake, top with cherries and cream—done. It also keeps beautifully refrigerated for up to 5 days, making it perfect for advance preparation.
Essential Ingredients for Black Forest Cheesecake (12 Servings)
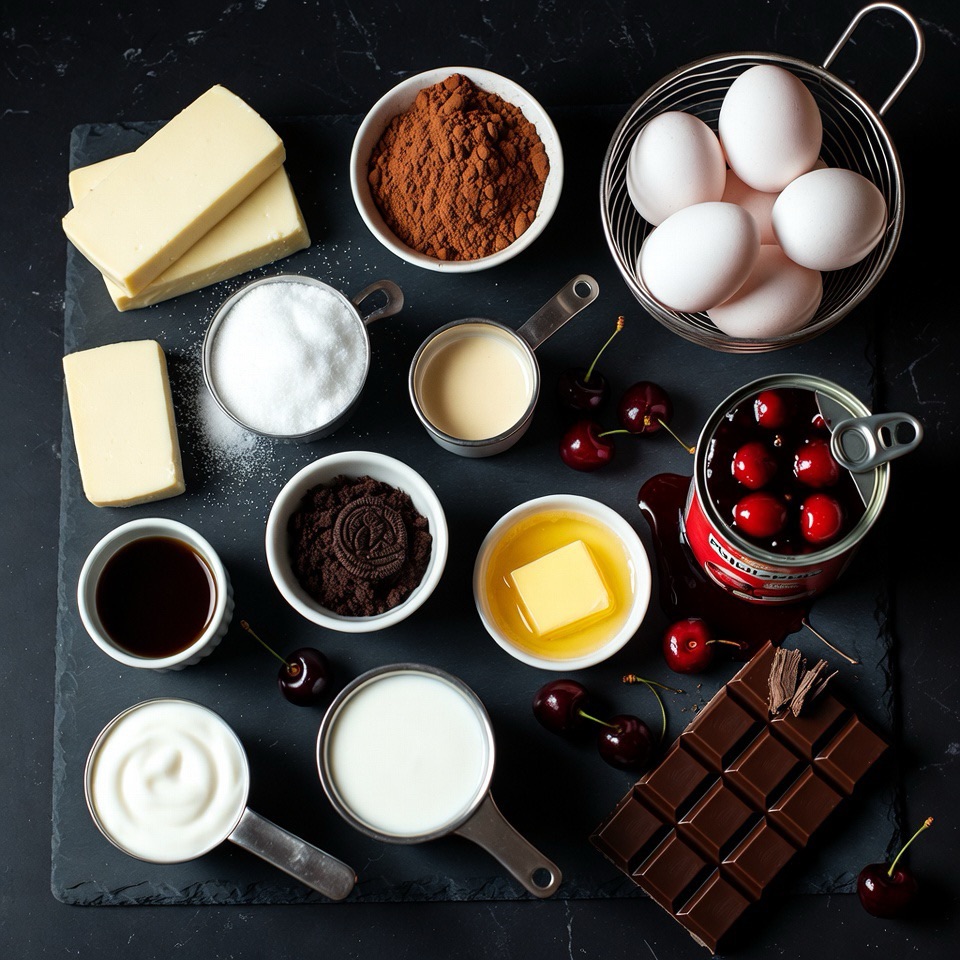
For the chocolate cookie crust:
- 2 cups (200g) chocolate cookie crumbs (about 24 Oreos, filling removed, or chocolate graham crackers)
- ¼ cup (50g) granulated sugar
- 6 tablespoons (85g) unsalted butter, melted
- Pinch of salt
For the chocolate cheesecake filling:
- 24 oz (680g) cream cheese, full-fat, at room temperature (three 8-oz blocks)
- 1 cup (200g) granulated sugar
- ½ cup (50g) unsweetened cocoa powder, Dutch-process preferred
- 3 large eggs, at room temperature
- 1 cup (240g) sour cream, at room temperature
- 2 teaspoons vanilla extract
- ¼ teaspoon salt
- 4 oz (115g) semi-sweet or dark chocolate, melted and slightly cooled
For the cherry topping:
- 21 oz (595g) cherry pie filling (one can), or 2 cups homemade
- 1 tablespoon kirsch (cherry brandy), optional but traditional
- 1 teaspoon vanilla extract
For decoration:
- 1½ cups (360ml) heavy whipping cream, cold
- 3 tablespoons (25g) powdered sugar
- 1 teaspoon vanilla extract
- 4 oz (115g) dark chocolate, for shavings
- Fresh dark cherries with stems (optional, for garnish)
Detailed Step-by-Step Instructions
Step 1: Prepare Pan and Preheat
Preheat oven to 325°F (165°C). Wrap the outside of a 9-inch springform pan tightly with heavy-duty aluminum foil—this prevents leaks and protects the crust. Grease the inside of the pan lightly with butter or cooking spray.
Bring cream cheese, eggs, and sour cream to room temperature—this is crucial! Cold ingredients create lumps in the batter and can cause cracking. Leave them out for 1-2 hours, or quick-warm eggs in a bowl of warm water for 10 minutes.
Step 2: Make the Chocolate Cookie Crust
In a food processor, pulse chocolate cookies (Oreos with filling removed work perfectly) until fine crumbs form. You need 2 cups of crumbs. If using chocolate graham crackers, crush them the same way.
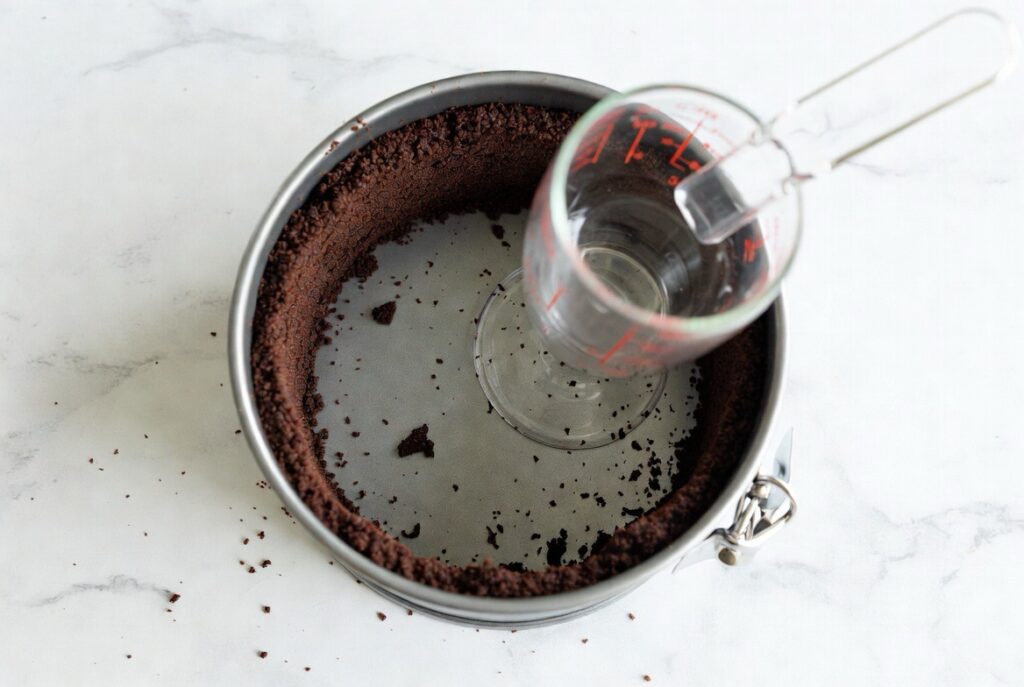
Transfer crumbs to a medium bowl. Add sugar and salt, then pour in melted butter. Mix with a fork until the mixture resembles wet sand and holds together when squeezed.
Pour crumb mixture into prepared springform pan. Press firmly and evenly across the bottom and about 1 inch up the sides using the bottom of a measuring cup or glass. Pack it tightly—a compact crust won’t crumble when you slice.
Bake crust for 10 minutes. Remove and let cool while you prepare the filling. This pre-baking sets the crust and prevents sogginess.
Step 3: Make the Chocolate Cheesecake Filling
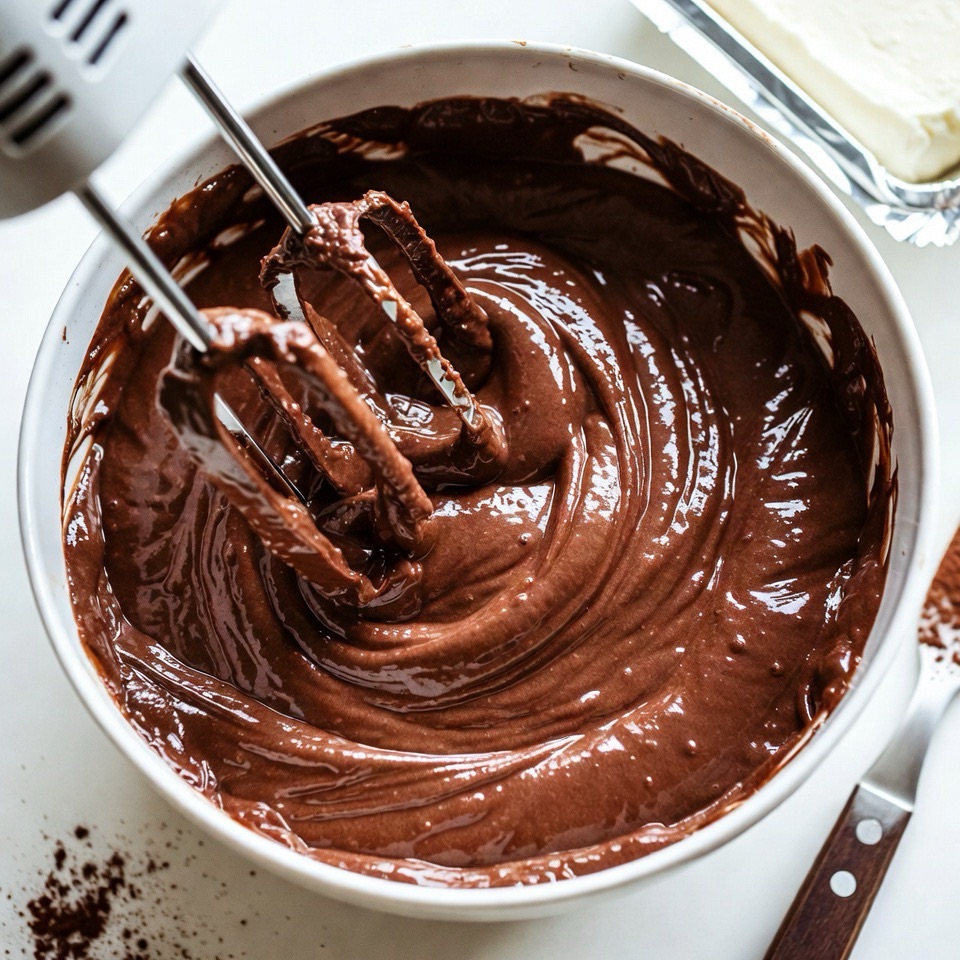
In a large mixing bowl, beat room-temperature cream cheese with an electric mixer on medium speed for 2-3 minutes until completely smooth and fluffy, with no lumps. Scrape down the bowl several times.
Add sugar and cocoa powder. Beat on medium-low speed until fully incorporated and smooth, about 1-2 minutes. The cocoa should be completely dissolved with no dry pockets. Scrape the bowl.
Add eggs one at a time, beating on low speed just until each is incorporated. Don’t overbeat after adding eggs—this incorporates too much air and can cause cracks. Mix just until the yellow disappears.
Add sour cream, vanilla extract, and salt. Beat on low speed until smooth and creamy. Finally, pour in the melted and slightly cooled chocolate. Mix on low until fully incorporated and the batter is uniformly dark and silky.
Step 4: Bake the Cheesecake (No Water Bath!)
Pour the chocolate cheesecake batter over the pre-baked crust. Smooth the top with a spatula. Gently tap the pan on the counter a few times to release any large air bubbles.
Place springform pan on a baking sheet (catches any drips) and bake at 325°F (165°C) for 60-75 minutes. The cheesecake is done when the edges are set and slightly puffed, but the center still jiggles slightly when you gently shake the pan—about a 2-inch diameter wobbly area in the center.
Don’t overbake! The center will firm up as it cools. An overbaked cheesecake will crack and have a dry, grainy texture.
Step 5: Cool Slowly (Critical for Preventing Cracks!)
Turn off the oven and crack the door open about 4 inches. Leave the cheesecake inside for 1 hour. This gradual temperature change prevents the dramatic shrinking that causes cracks.
After 1 hour in the oven, remove the cheesecake and place it on a wire rack. Run a thin knife around the edge to loosen it from the pan—this prevents cracking as it cools and contracts.
Let the cheesecake cool completely at room temperature, about 2-3 hours. Then cover loosely with plastic wrap and refrigerate for at least 6 hours, preferably overnight. This chilling is essential—the cheesecake needs time to set properly and develop its creamy texture.
Step 6: Prepare Cherry Topping
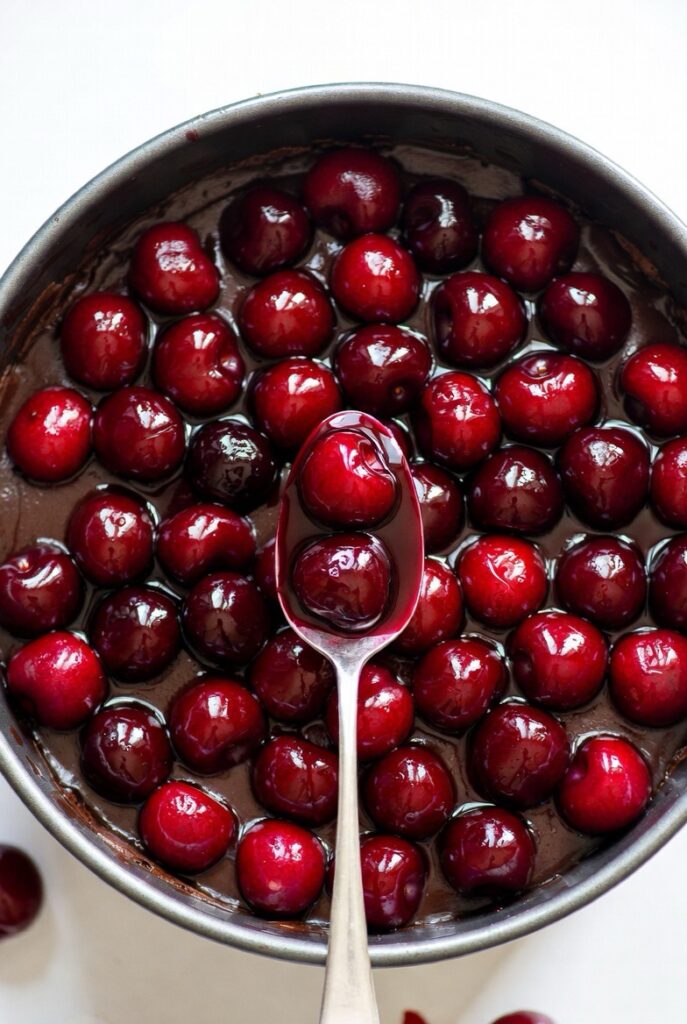
If using canned cherry pie filling, transfer it to a bowl and stir in kirsch (if using) and vanilla extract. This brightens the flavor and adds that traditional Black Forest touch.
For homemade cherry topping: In a saucepan, combine 2 cups pitted fresh or frozen cherries, ½ cup sugar, 2 tablespoons cornstarch, ¼ cup water, and 1 tablespoon lemon juice. Cook over medium heat, stirring, until thickened and glossy, about 8-10 minutes. Remove from heat, stir in kirsch and vanilla. Cool completely before using.
Step 7: Make Whipped Cream
In a cold bowl with cold beaters, whip heavy cream, powdered sugar, and vanilla on medium-high speed until stiff peaks form—the cream should stand straight up when you lift the beaters. Don’t overwhip or it will become grainy.
For extra stability (especially in warm weather), add 1 tablespoon of powdered gelatin bloomed in 2 tablespoons cold water, then microwaved for 10 seconds, to the cream as you whip.
Keep whipped cream refrigerated until ready to decorate.
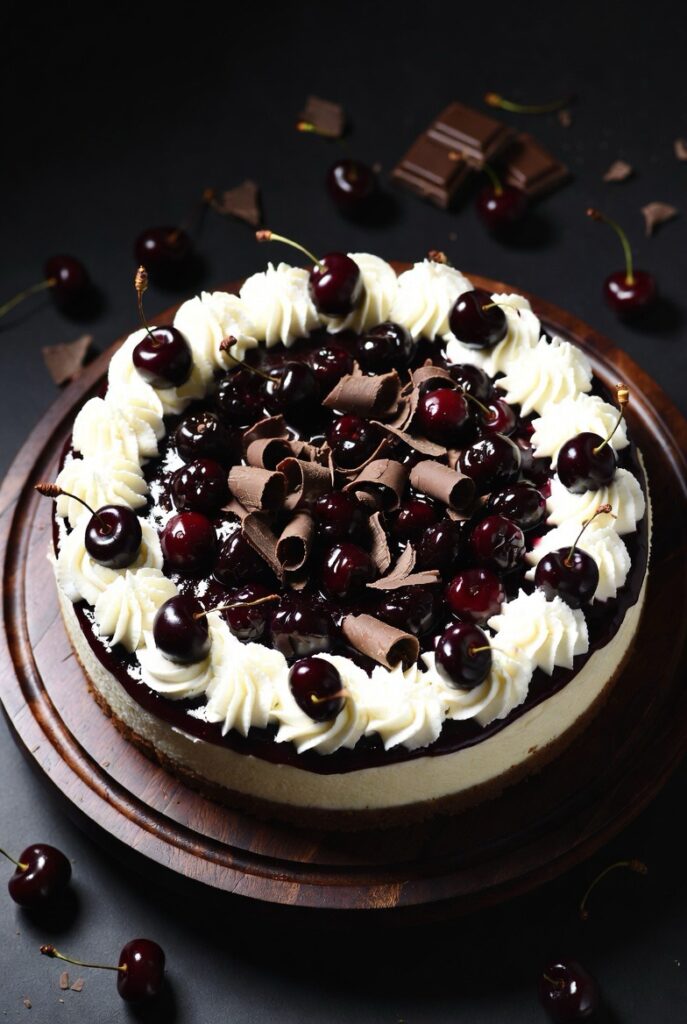
Step 8: Assemble and Decorate
Remove the thoroughly chilled cheesecake from the refrigerator. Run a knife around the edge again, then carefully remove the springform pan sides.
Spread cherry topping evenly over the top of the cheesecake, leaving a small border around the edge if you want to see some chocolate showing.
Transfer whipped cream to a piping bag fitted with a large star tip. Pipe rosettes or swirls around the outer edge of the cheesecake. Alternatively, dollop spoonfuls of whipped cream around the border.
Using a vegetable peeler, shave dark chocolate over the cherries and cream to create beautiful curls and shavings. Let the shavings fall naturally for an elegant, casual look.
Top each whipped cream rosette with a fresh cherry (with stem attached for drama), if desired. Add a few more chocolate curls if you want extra decadence.
Step 9: Slice and Serve
For perfect slices, use a large, sharp knife. Dip the knife in hot water, wipe dry, then make one clean cut. Wipe the knife clean, dip in hot water again, wipe, and make the next cut. This creates those picture-perfect slices with clean edges.
Serve chilled. This cheesecake is rich, so slices can be slightly smaller than regular cake—12-16 slices from one 9-inch cheesecake is typical.
Pro Tips for Perfect Black Forest Cheesecake
Use room temperature ingredients. This cannot be stressed enough! Cold cream cheese creates lumps, and the batter won’t be smooth. Plan ahead and leave ingredients out for 1-2 hours.
Don’t overbeat after adding eggs. Excessive beating incorporates too much air, which expands during baking and causes cracks when cooling. Mix on low speed just until incorporated.
Use Dutch-process cocoa for deeper, richer chocolate flavor. Natural cocoa works too but will taste slightly more acidic and lighter in color.
Let it cool gradually. The slow cooling process (in the turned-off oven with door cracked) is your best defense against cracks. Resist the urge to rush it!
Chill completely before topping. A fully set, cold cheesecake provides a stable base for the cherry topping and won’t make the cherries sink or slide.
Use quality chocolate for shavings. A good dark chocolate (60-70% cocoa) creates beautiful, elegant curls and tastes phenomenal against the sweet cherries.
Add kirsch for authentic flavor. That hint of cherry brandy is traditional in Black Forest desserts and elevates the cherry flavor beautifully. Just 1 tablespoon makes a difference!
Make it a day ahead. Cheesecake actually tastes better the next day after flavors have melded. It’s the perfect make-ahead dessert for entertaining.
Cherry Topping Options: Fresh vs. Canned vs. Homemade
Canned Cherry Pie Filling (Easiest):
Convenient, consistent, and perfectly thick. Look for brands with whole cherries and not too much gloopy sauce. Lucky Leaf and Comstock are good choices. Enhance with kirsch and vanilla.
Homemade Cherry Topping (Best Flavor):
Use fresh or frozen pitted cherries cooked with sugar and cornstarch. You control sweetness and consistency. Fresh cherries during summer months create an absolutely incredible topping with bright, pure cherry flavor.
Fresh Cherries (Most Beautiful):
Pit and halve fresh dark cherries, macerate with sugar for 30 minutes, then simmer briefly with a touch of cornstarch to create a light glaze. Stunning for special occasions!
Quick Kirsch-Soaked Cherries:
For adults only! Drain canned cherries, toss with 2-3 tablespoons kirsch and 1 tablespoon sugar. Let macerate for 2 hours. Thicken the liquid with cornstarch if needed. Boozy and delicious!
Make-Ahead and Storage
Black Forest Cheesecake is ideal for advance preparation:
Timeline:
- 3 days ahead: Bake cheesecake, cool, and refrigerate (covered, without topping)
- 1 day ahead: Make cherry topping and whipped cream (store separately)
- 4-6 hours ahead: Assemble with cherries and whipped cream, refrigerate
- Just before serving: Add chocolate shavings and fresh cherry garnishes
Storage:
- Unfrosted cheesecake: 5 days refrigerated, well-wrapped
- Fully decorated cheesecake: 2-3 days refrigerated
- Freeze unfrosted cheesecake up to 2 months (wrap tightly in plastic then foil)
- Don’t freeze with whipped cream topping (it weeps when thawed)
Best Practices:
- Store in an airtight container or cover tightly with plastic wrap
- Keep away from strong-smelling foods—cheesecake absorbs odors
- Add chocolate shavings just before serving (they can bleed color into cream)
- If freezing, thaw overnight in refrigerator, then add toppings fresh
Creative Black Forest Cheesecake Variations
No-Bake Black Forest Cheesecake
Use the same crust, don’t bake it. Make filling with whipped cream folded into cream cheese mixture instead of eggs. Set with gelatin. Chill 6+ hours.
Mini Black Forest Cheesecakes
Make in muffin tins lined with cupcake liners. Bake at 325°F for 18-22 minutes. Perfect for parties and portion control!
Black Forest Cheesecake Bars
Use a 9×13-inch pan. Press crust across bottom, pour filling, bake 35-40 minutes. Cool, top with cherries, cut into squares.
White Chocolate Black Forest Cheesecake
Replace cocoa powder and dark chocolate with 8 oz melted white chocolate in the filling. Still top with cherries and dark chocolate shavings for contrast.
Chocolate Cherry Swirl Cheesecake
Make half the batter chocolate, half vanilla (plain). Layer in pan, swirl with a knife. Top with cherries as usual.
Vegan Black Forest Cheesecake
Use vegan cream cheese, coconut cream instead of sour cream, flax eggs, and dairy-free chocolate. Surprisingly delicious!
Black Forest Cheesecake Trifle
Cube baked cheesecake, layer with cherry topping, whipped cream, and chocolate shavings in individual glasses. Stunning presentation!
Boozy Adult Version
Add 3 tablespoons kirsch to the cheesecake filling. Soak cherries in kirsch. Use kirsch-flavored whipped cream. Decadent!
Frequently Asked Questions (FAQ)
Do I need a water bath for this cheesecake?
No! This recipe is designed to bake without a water bath. The slow cooling method prevents cracks just as effectively and is much easier.
Why did my cheesecake crack?
Common causes: overbaking, cooling too quickly, overbeating after adding eggs, or opening the oven door during baking. Follow the slow-cooling method carefully.
Can I use milk chocolate instead of dark?
Yes, but the result will be sweeter and less intensely chocolate. Semi-sweet or dark chocolate (60-70%) provides the best flavor balance.
How do I know when the cheesecake is done?
The edges should be set and slightly puffed, while the center (about 2-3 inches diameter) still jiggles like jello when gently shaken. It will firm as it cools.
Can I make this gluten-free?
Absolutely! Use gluten-free chocolate cookies or chocolate graham crackers for the crust. The filling is naturally gluten-free.
My cheesecake sank in the middle, what happened?
Likely overbaked or cooled too quickly. The center can also sink slightly if you open the oven door during baking, releasing heat suddenly.
Can I use frozen cherries for homemade topping?
Yes! Frozen cherries work beautifully. Don’t thaw them first—cook from frozen and they’ll release the perfect amount of juice.
How far ahead can I make the whipped cream?
Stabilized whipped cream (with gelatin) keeps 2-3 days. Regular whipped cream is best made the same day, up to 8 hours ahead.
What’s the best way to remove the springform pan?
Run a thin knife around the edge first. Then unclasp and gently lift the ring straight up. Use a large spatula to transfer the cheesecake to a serving plate if desired.
Can I make this in a regular cake pan?
Not ideal—you need a springform pan to remove the cheesecake without damaging it. In a pinch, line a regular pan with parchment overhang to lift it out.
Troubleshooting: Preventing Cracks and Other Issues
Surface cracks appearing:
Cause: Overbaking, cooling too quickly, or too much air in the batter
Solution: Use the slow-cooling method, don’t overbeat, and watch for the jiggle test
Grainy or curdled texture:
Cause: Cold ingredients not properly mixed, or overbaking
Solution: Ensure all ingredients are room temperature, don’t overbake past the jiggle stage
Soggy crust:
Cause: Not pre-baking the crust, or moisture from the filling
Solution: Always pre-bake crust for 10 minutes, and ensure it’s packed tightly
Cheesecake won’t set:
Cause: Underbaking, or not chilling long enough
Solution: Bake until only the center jiggles, then chill at least 6 hours (overnight is best)
Cherry topping sliding off:
Cause: Cheesecake not fully chilled, or topping too thin/runny
Solution: Chill cheesecake completely, thicken topping with cornstarch if needed
Chocolate shavings melting into cream:
Cause: Adding shavings too early, or warm environment
Solution: Add chocolate shavings just before serving, keep cheesecake well-chilled
People Also Ask (PAA)
What is the difference between Black Forest Cake and Black Forest Cheesecake?
Black Forest Cake is a traditional German layer cake with chocolate sponge, whipped cream, and cherries. Black Forest Cheesecake replaces the sponge layers with rich, creamy chocolate cheesecake filling, creating a denser, more indulgent dessert with the same iconic flavors.
How long does Black Forest Cheesecake last in the fridge?
Properly stored in an airtight container, Black Forest Cheesecake lasts 3-5 days refrigerated. For best quality, consume within 3 days of adding the whipped cream topping.
Can you freeze Black Forest Cheesecake?
Yes, freeze the unfrosted cheesecake (without cherry topping or whipped cream) for up to 2 months. Wrap tightly in plastic wrap then aluminum foil. Thaw overnight in the refrigerator and add fresh toppings before serving.
Do you need to use kirsch in Black Forest Cheesecake?
Kirsch (cherry brandy) is traditional and adds authentic Black Forest flavor, but it’s optional. You can omit it entirely or substitute with cherry or almond extract for a non-alcoholic version.
Why is it called Black Forest Cheesecake?
Named after the Black Forest region in Germany, famous for its traditional Schwarzwälder Kirschtorte (Black Forest Cherry Cake). The “black” refers to the dark chocolate, and the cherries and kirsch are signature ingredients from that region.
What kind of cherries are best for Black Forest Cheesecake?
Dark sweet cherries are traditional—either fresh Bing cherries, canned cherry pie filling, or jarred Morello cherries (tart variety). Avoid maraschino cherries, which are too sweet and artificially colored.
Can I make Black Forest Cheesecake without a springform pan?
It’s challenging but possible. Use a regular cake pan lined completely with parchment paper with overhang. You’ll lift the entire cheesecake out using the parchment. A springform pan is strongly recommended for best results.
How do you keep cheesecake from cracking?
Use room temperature ingredients, don’t overbeat after adding eggs, don’t overbake (center should still jiggle), cool slowly in the turned-off oven with door cracked, and run a knife around the edge immediately after baking.
Conclusion
Black Forest Cheesecake represents the pinnacle of fusion desserts—taking two beloved classics and creating something even more spectacular than the sum of its parts. This recipe proves that with quality ingredients, proper technique, and a little patience, you can create restaurant-quality desserts right in your home kitchen. The rich chocolate cheesecake, sweet-tart cherries, billowy whipped cream, and dark chocolate shavings come together in perfect harmony.
What makes this dessert truly special is its versatility and reliability. It’s impressive enough for the most formal celebrations—weddings, anniversaries, milestone birthdays—yet approachable enough for casual family gatherings. The make-ahead nature means you can prepare it days in advance, leaving you stress-free when entertaining. And unlike temperamental layer cakes, this cheesecake is forgiving and consistent, delivering perfect results every time you make it.
The Black Forest flavor combination has stood the test of time for good reason. Chocolate and cherry is one of those magical pairings that feels both comforting and luxurious, familiar yet special. Whether you’re a longtime Black Forest Cake devotee or a cheesecake purist trying something new, this fusion will win your heart. Each creamy, chocolate-cherry bite reminds you why classic flavors become classics—they’re simply irresistible.
Make this Black Forest Cheesecake for someone you love, or simply to treat yourself to something extraordinary. Serve it at your next dinner party and watch it steal the show. Share slices with neighbors and become the designated dessert-bringer. However you enjoy it, know that you’ve mastered a showstopper that combines elegance, flavor, and pure indulgence. This is dessert done right—beautiful, delicious, and unforgettable. 🍰🍒✨
Prep Time: 40 minutes
Bake Time: 60-75 minutes
Cooling/Chill Time: 8+ hours (overnight recommended)
Total Time: 10 hours
Servings: 12-16 slices
Difficulty: Intermediate
Cuisine: German-American Fusion
Course: Dessert
Diet: Vegetarian
Keywords: black forest cheesecake, chocolate cherry cheesecake, black forest dessert, german cheesecake, chocolate cheesecake recipe, cherry pie filling cheesecake, black forest cake cheesecake
Introduction
Discover pure elegance in dessert form: Raspberry Roll Cake! This stunning creation features a light, fluffy vanilla sponge cake rolled around clouds of sweetened whipped cream and fresh, juicy raspberries. Each slice reveals a beautiful spiral with whole berries nestled in cream, dusted with powdered sugar and crowned with more fresh raspberries. It’s the dessert that makes people gasp when you slice it—gorgeous, delicious, and surprisingly achievable at home.
What makes this raspberry roll cake absolutely special is the combination of delicate textures and bright, fresh flavors. The vanilla sponge is impossibly light and tender, with just enough structure to roll perfectly without cracking. Fresh raspberries bring tart-sweet flavor and gorgeous color that pops against the white cream. Unlike heavier cakes, this feels elegant and refined—perfect for afternoon tea, bridal showers, Mother’s Day, or any celebration that calls for something beautiful.
Whether you’re a berry lover, looking to master the art of roll cakes, or need an impressive dessert that photographs like a dream, this raspberry roll cake delivers on every level. The technique is the same as other roll cakes, but the raspberry-cream combination creates something uniquely sophisticated. Let’s create this showstopper together!
Why Raspberries Make the Perfect Roll Cake Filling
Raspberries are the ideal fruit for roll cakes, and here’s why: their natural tartness balances the sweetness of the cream and cake perfectly, preventing the dessert from being cloying. Their jewel-like red color creates stunning visual contrast against white cream and golden cake. And their size is just right—whole raspberries fit beautifully in the roll without being too bulky or making it difficult to slice.
Fresh raspberries also have a tender texture that doesn’t interfere with the soft cake and cream. Unlike firmer fruits that might make the roll lumpy, raspberries nestle perfectly into the cream filling. Their slight seediness adds textural interest without being unpleasant.
The flavor pairing is classic for a reason. Raspberry and vanilla is one of those timeless combinations that feels both familiar and elegant. It’s sophisticated enough for fancy occasions but approachable enough for family gatherings. The bright berry flavor also makes this cake feel lighter and more refreshing than chocolate or caramel versions.
Visually, few things are more beautiful than the cross-section of a raspberry roll cake. Those whole red berries scattered throughout the white cream spiral create an almost stained-glass effect that photographs beautifully. It’s the kind of dessert people want to capture before eating—and then eat every last crumb.
Ingredients for One 10-inch Roll Cake (8-10 Servings)
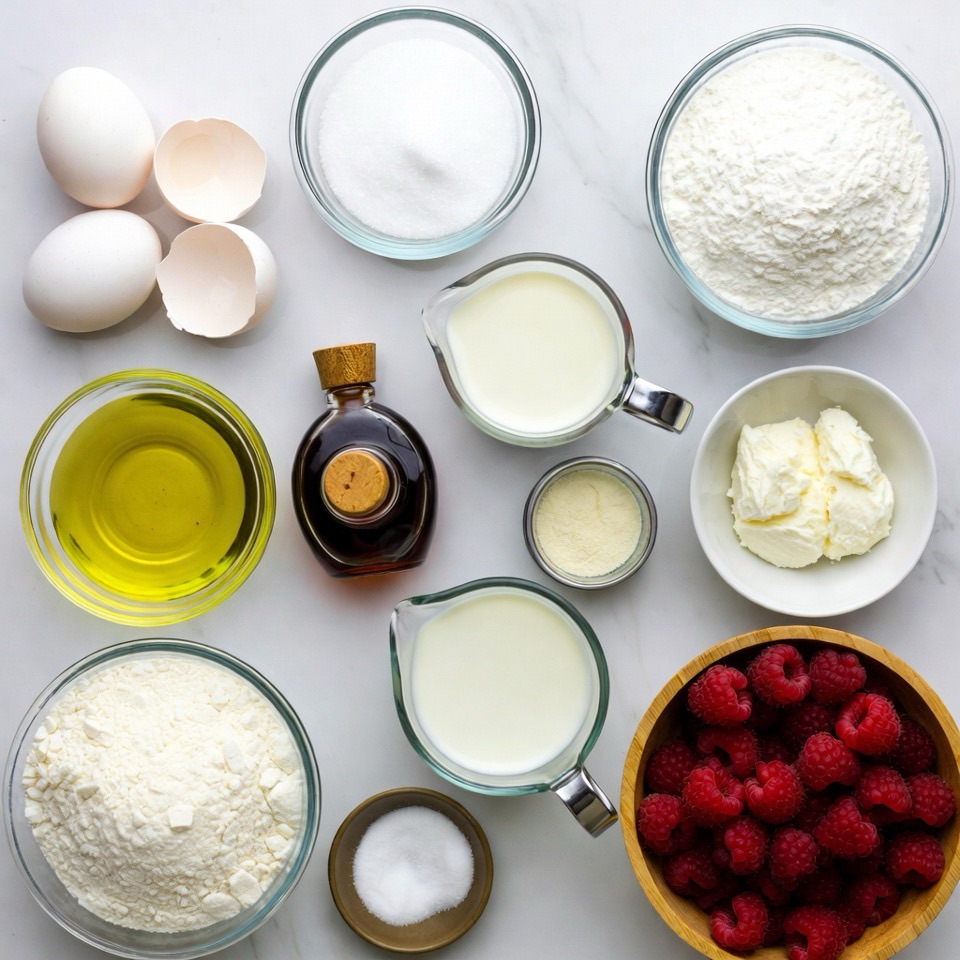
For the vanilla sponge cake:
- 4 large eggs, separated (room temperature)
- ⅔ cup (130g) granulated sugar, divided
- ¼ cup (60ml) whole milk, warmed
- 2 tablespoons (30ml) vegetable oil or melted butter
- 1½ teaspoons vanilla extract
- ¾ cup (95g) cake flour (or all-purpose flour)
- ¼ teaspoon salt
- ¼ teaspoon cream of tartar
For the raspberry cream filling:
- 1½ cups (360ml) heavy whipping cream, cold
- 3 tablespoons (25g) powdered sugar
- 1 teaspoon vanilla extract
- 2 tablespoons cream cheese, softened (optional, for stability)
- 2 cups fresh raspberries
For assembly and decoration:
- Powdered sugar for dusting
- 1 cup additional fresh raspberries for topping
- Optional: fresh mint leaves, edible flowers
Detailed Step-by-Step Instructions
Step 1: Prepare and Preheat
Preheat oven to 350°F (175°C). Line a 10×15-inch jelly roll pan with parchment paper, extending over the edges. Lightly grease the parchment. Have a clean kitchen towel ready, dusted generously with powdered sugar.
Bring eggs to room temperature—place in warm water for 5 minutes if needed. Room temperature eggs whip to much greater volume, creating the light texture essential for a rollable sponge.
Step 2: Make the Sponge Batter
In a large bowl, whisk egg yolks with ⅓ cup (65g) sugar until pale, thick, and ribbony—about 2 minutes. Add warmed milk, oil, and vanilla extract. Whisk until smooth and emulsified.
Sift the cake flour and salt over the yolk mixture. Fold gently with a spatula until just combined—a few small lumps are fine. Don’t overmix. Set aside.
Step 3: Whip Egg Whites
In a spotlessly clean bowl, beat egg whites with an electric mixer on medium speed until foamy. Add cream of tartar and continue beating. Gradually add remaining ⅓ cup (65g) sugar, one tablespoon at a time.
Increase to high speed and beat until stiff, glossy peaks form—the peaks should stand straight up when you lift the beaters, about 3-4 minutes total. This meringue creates the cake’s light, airy structure.
Step 4: Fold Whites Into Batter
Add about ⅓ of the whipped whites to the yolk mixture. Fold gently but thoroughly—this lightens the batter. Add remaining whites in two additions, folding carefully after each. Use a scooping motion from bottom to top, rotating the bowl.
Fold until no white streaks remain, but don’t overmix. The batter should be light, airy, and voluminous. Overmixing deflates the whites and creates a dense cake.
Step 5: Bake the Sponge
Pour batter into prepared pan and spread evenly to all corners with an offset spatula. Gently tap pan on counter twice to release large air bubbles.
Bake 12-15 minutes, until the top springs back when lightly touched and a toothpick comes out clean. The cake should be pale golden, not dark. Watch carefully—overbaking makes it crack when rolling.
Step 6: Roll While Hot (Critical!)
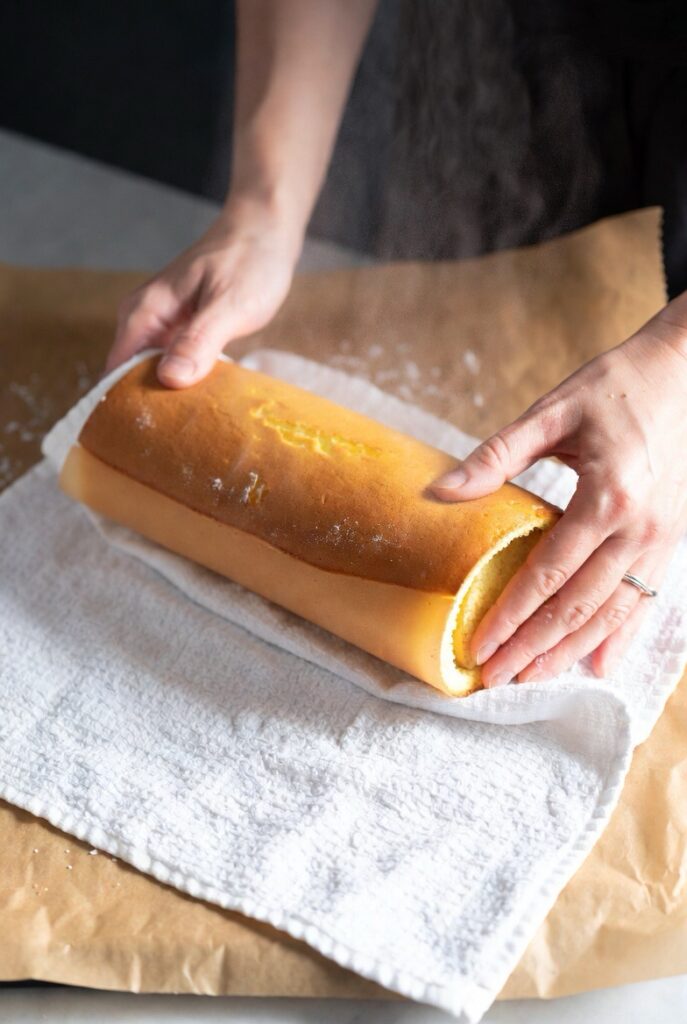
The moment the cake exits the oven, run a knife around edges. Immediately flip onto your powdered sugar-dusted towel. Peel off parchment paper carefully.
While still hot, roll the cake tightly in the towel starting from the short end, with the towel inside the roll. This sets the cake’s “memory” so it won’t crack later when filled. Let cool completely rolled up, about 45 minutes.
Step 7: Make Stabilized Whipped Cream
In a cold bowl with cold beaters, whip heavy cream, powdered sugar, and vanilla on medium-high speed. If using cream cheese for stability, beat it smooth first, then add cream and whip together.
Beat until stiff peaks form—the cream should hold its shape firmly but still be spreadable. Keep refrigerated until ready to use.
Step 8: Prepare Fresh Raspberries
Gently rinse raspberries and pat completely dry with paper towels. Excess moisture will make the filling weep and potentially soak the cake. Sort through and reserve the most beautiful berries for the top decoration.
Step 9: Assemble the Roll
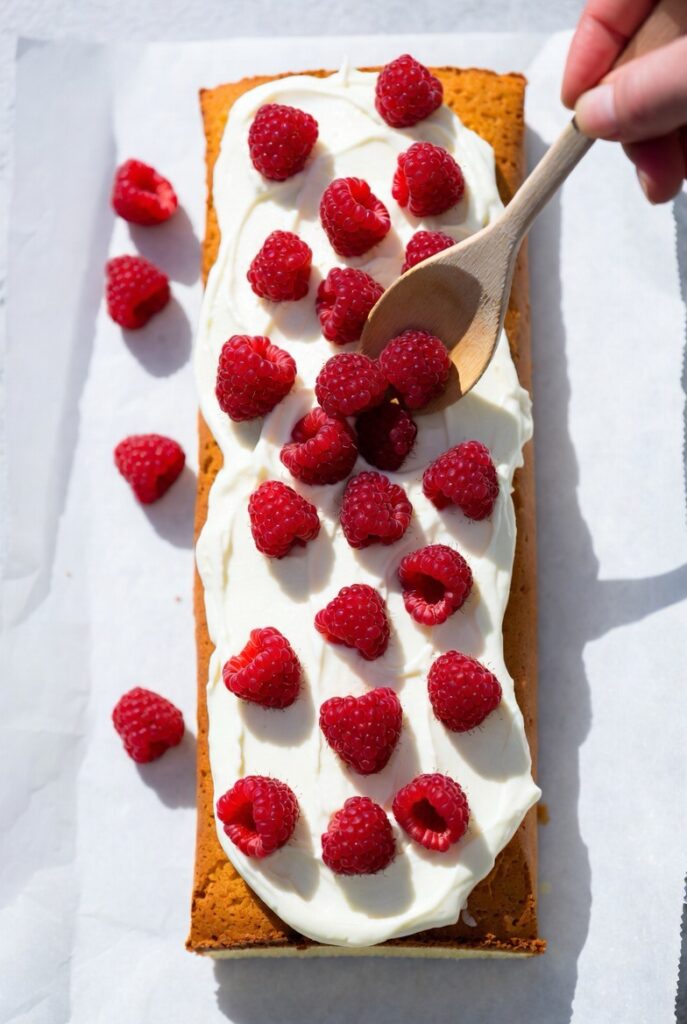
Carefully unroll the cooled cake—it will naturally want to stay curved. Spread whipped cream evenly over the entire surface, leaving a ½-inch border at the far edge.
Scatter whole raspberries over the cream. Place them more densely at the starting edge for a prettier cross-section. Gently press berries into cream so they adhere.
Step 10: Roll, Chill, and Decorate
Using the towel as a guide, lift the starting edge and begin rolling the cake away from you. Keep it tight but don’t squeeze out the filling. Roll to the end, finishing seam-side down.
Wrap tightly in plastic wrap and refrigerate at least 2 hours, or up to 24 hours. This firms the filling and makes clean slicing possible.
To serve: Unwrap and place seam-down on a platter. Dust generously with powdered sugar. Pipe or dollop whipped cream on top, arrange fresh raspberries, and add mint leaves if desired. Slice with a sharp knife, wiping between cuts.
Pro Tips for Perfect Raspberry Roll Cake
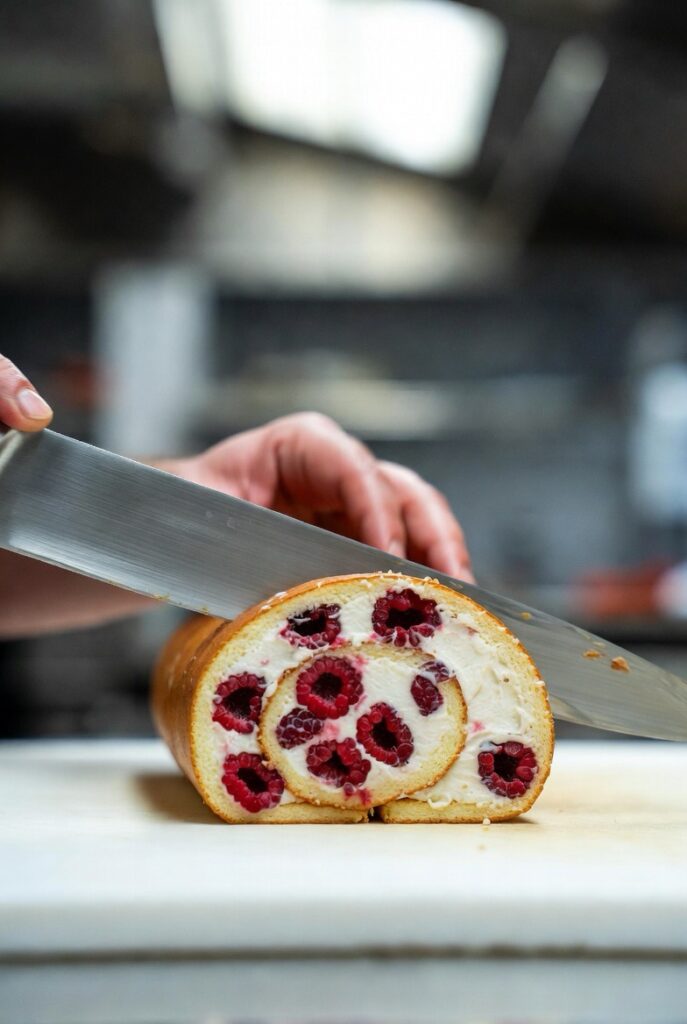
Choose firm, fresh raspberries. Avoid mushy or leaking berries—they’ll make the filling watery. Fresh is essential; frozen raspberries release too much liquid when thawed.
Don’t skip the hot-roll step. This is THE secret to crack-free rolls. Have your towel ready before the cake comes out of the oven.
Use cake flour if possible. It creates a more delicate, tender crumb. If using all-purpose flour, subtract 1½ tablespoons and replace with cornstarch.
Dry raspberries thoroughly. Even a little surface moisture can thin the cream and create sogginess. Pat them dry and let them air-dry a few minutes.
Whip cream to stiff peaks. Under-whipped cream will slide out when you roll. Stiff peaks hold shape better and create cleaner slices.
Chill before slicing. A well-chilled roll slices beautifully with distinct layers. Warm rolls squish and look messy.
Wipe knife between cuts. Clean cuts showcase those gorgeous raspberries. A messy knife = messy slices.
Dust with powdered sugar just before serving. Sugar will absorb moisture and clump if added too far ahead.
Make-Ahead and Storage
This raspberry roll cake is ideal for advance preparation:
Timeline:
- 2 days ahead: Bake and roll cake, store wrapped and refrigerated
- 1 day ahead: Make whipped cream filling
- 4-6 hours ahead: Fill, roll, and chill
- Just before serving: Add final decorations and powdered sugar
Storage:
- Unfilled rolled cake: 2 days refrigerated, wrapped tightly
- Filled roll: 2-3 days refrigerated (best within 24 hours)
- Freeze unfilled cake up to 1 month; don’t freeze with cream filling
Best Practices:
- Assemble no more than 8 hours before serving for freshest raspberries
- Store extra raspberries separately, add just before serving
- Transport chilled in a cake carrier with ice packs
Creative Variations
Mixed Berry Roll
Use combination of raspberries, blueberries, and blackberries for colorful cross-section.
Lemon Raspberry Roll
Add 1 tablespoon lemon zest to cake batter and 2 teaspoons to whipped cream. Bright and refreshing!
Chocolate Raspberry Roll
Make chocolate sponge (replace 2 tablespoons flour with cocoa powder). Classic pairing!
Raspberry Mascarpone Roll
Replace half the whipped cream with mascarpone for richer, more luxurious filling.
White Chocolate Raspberry Roll
Fold 2 oz melted white chocolate into whipped cream. Decadent and elegant.
Almond Raspberry Roll
Add ½ teaspoon almond extract to cake batter. Use sliced almonds as garnish.
Frequently Asked Questions (FAQ)
Can I use frozen raspberries?
Fresh raspberries work much better. Frozen release too much liquid when thawed, making the filling watery and potentially soaking the cake.
Why did my cake crack when rolling?
Most likely it wasn’t rolled while hot enough, was overbaked, or you didn’t roll it with the towel initially to set its shape.
How do I prevent the cream from sliding out?
Whip cream to stiff peaks, leave a border at the far edge when spreading, and don’t overfill. Roll snugly but don’t squeeze.
Can I make this dairy-free?
Yes! Use coconut cream (chilled overnight, whip only the solid part) for filling. Use non-dairy milk in cake.
How far ahead can I assemble the roll?
4-8 hours is ideal. Longer and raspberries may start to weep moisture. Definitely make the same day you’ll serve.
What if I don’t have cream of tartar?
You can substitute ½ teaspoon lemon juice or white vinegar, or simply omit (though peaks won’t be quite as stable).
Can I add raspberry jam to the filling?
Yes! Spread a thin layer (2-3 tablespoons) before adding whipped cream. Adds extra berry flavor.
How do I get perfect slices?
Chill completely, use a sharp knife, wipe between cuts, and don’t press hard—let the knife do the work.
My sponge is too dense, what happened?
Egg whites weren’t whipped enough, batter was overmixed (deflating whites), or eggs were too cold to whip properly.
Can I make mini rolls?
Yes! Cut the baked cake into thirds before rolling. Reduce filling amounts. Perfect for individual servings.
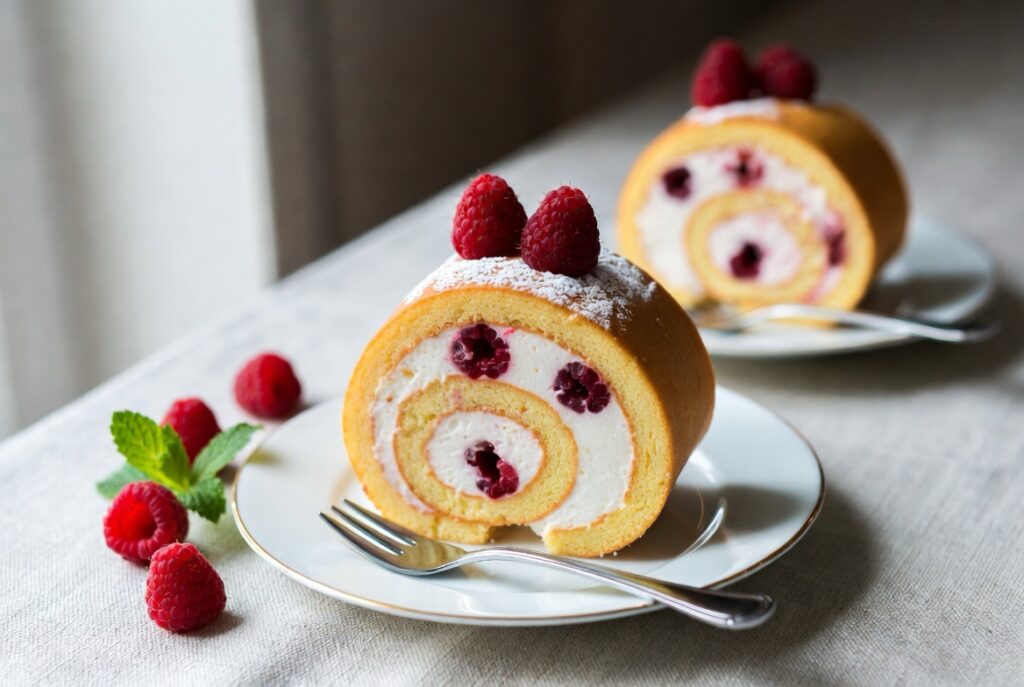
People Also Ask (PAA)
What makes a roll cake different from regular cake?
Roll cakes use a sponge method that whips eggs for leavening rather than using baking powder, creating a flexible, light texture that can roll without cracking.
How long does raspberry roll cake last?
2-3 days refrigerated, though best within 24 hours of assembly for the freshest raspberries and most stable whipped cream.
Can you freeze raspberry cake roll?
Freeze the unfilled sponge for up to 1 month. Don’t freeze assembled roll—whipped cream and fresh raspberries don’t freeze well.
What’s the best cream for roll cakes?
Heavy whipping cream whipped to stiff peaks, optionally stabilized with cream cheese or gelatin. It’s light enough not to weigh down the cake.
Do raspberries need to be cooked for cake?
No! Fresh raspberries are used raw in this roll cake, providing bright color and fresh flavor. Cooking would make them mushy.
How do you roll a cake without it cracking?
Roll while still hot from the oven in a towel to set its shape, don’t overbake, and use proper sponge technique with whipped egg whites.
What causes cake to crack when rolling?
Over-baking (makes it dry and brittle), rolling when cold, or using a dense cake recipe not designed for rolling.
Is roll cake the same as Swiss roll?
Yes, they’re the same concept—thin sponge cake spread with filling and rolled into a spiral. “Swiss roll” is more common in UK, “roll cake” in US/Japan.
Conclusion
Raspberry Roll Cake represents elegance, freshness, and the joy of beautiful homemade desserts. This stunning creation proves that the most impressive desserts often come from simple, quality ingredients treated with care. Fresh raspberries, light whipped cream, and tender vanilla sponge—nothing complicated, just perfect execution and gorgeous presentation.
What makes this recipe truly special is its versatility. It’s fancy enough for the most formal occasions yet approachable enough for casual family celebrations. It photographs beautifully for special events but tastes so good you’ll want to make it “just because.” The fresh berry flavor makes it perfect for spring and summer, yet those jewel-toned raspberries feel festive enough for winter holidays too.
The rolling technique might seem intimidating at first, but once you master it (and you will!), you’ll find yourself making roll cakes regularly. It’s one of those skills that looks incredibly impressive but becomes second nature with practice. The hot-roll method is the key—follow that step and success is virtually guaranteed.
Beyond technique and taste, there’s something deeply satisfying about slicing into this cake and revealing those perfect spirals with whole raspberries nestled in cream. It’s a dessert that creates moments—gasps of delight when you cut the first slice, “how did you make this?” questions, and genuine appreciation for homemade beauty.
Make this Raspberry Roll Cake for someone you love, or simply to treat yourself to something special. Serve it with tea or coffee, champagne or dessert wine. Watch faces light up when they see the cross-section. Enjoy every bite of fresh berries, light cream, and tender cake. This is dessert as it should be—beautiful, delicious, and made with care. 🍰✨
Prep Time: 30 minutes
Bake Time: 12-15 minutes
Cooling/Chill Time: 2 hours
Total Time: 2 hours 45 minutes
Servings: 8-10 slices
Difficulty: Intermediate
Cuisine: Japanese-inspired
Course: Dessert
Diet: Vegetarian
Keywords: raspberry roll cake, raspberry Swiss roll, berry roll cake, raspberry cream cake, elegant dessert, beautiful cake
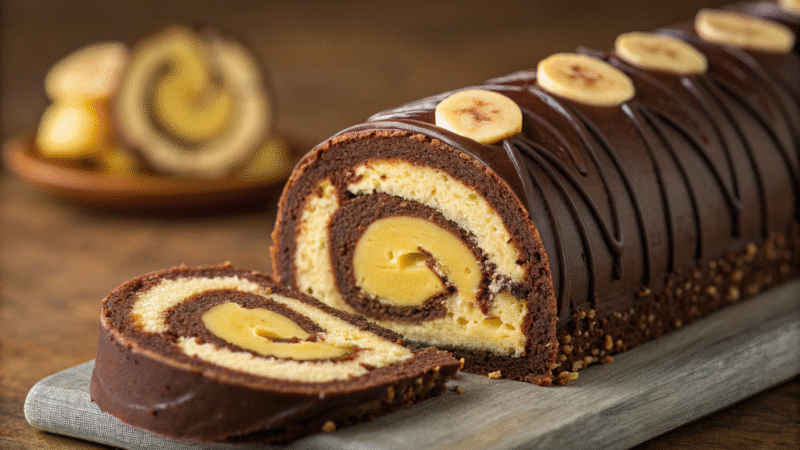
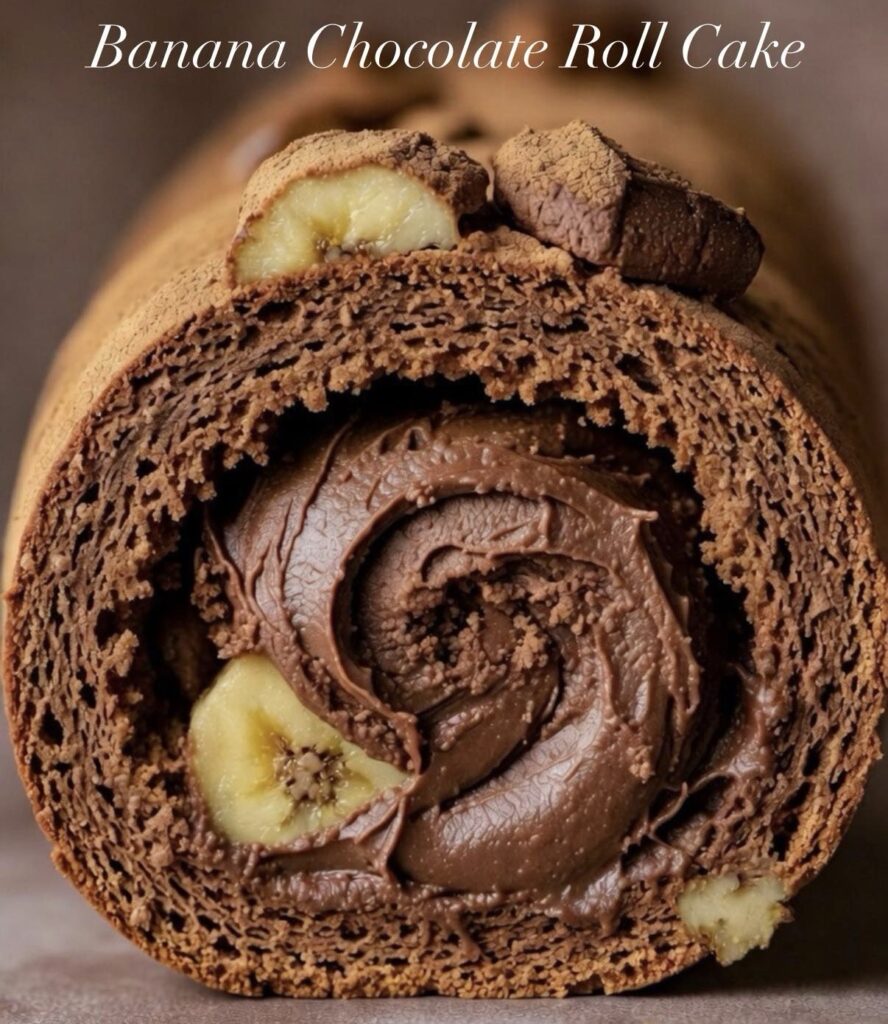
Introduction
Get ready for pure dessert heaven: Banana Chocolate Roll Cake! This stunning creation combines everything you love about chocolate and banana in one elegant, rolled masterpiece. Imagine a light, fluffy chocolate sponge cake wrapped around silky chocolate ganache or frosting with fresh banana slices nestled inside, creating a beautiful spiral pattern when sliced. It’s the grown-up version of chocolate-covered bananas, elevated to bakery-quality sophistication.
What makes this banana chocolate roll cake absolutely irresistible is the perfect balance of flavors and textures. The chocolate sponge is moist but not heavy, with deep cocoa flavor in every bite. The chocolate filling is rich and creamy, providing indulgent chocolate intensity. Fresh banana slices add natural sweetness, tropical flavor, and a tender texture that complements the chocolate beautifully. It’s like banana bread met chocolate cake and they created something magical.
Whether you’re a chocolate-banana fanatic, looking for an impressive dessert for special occasions, or want to master the art of roll cakes, this recipe delivers on every level. The cross-section reveals layers of chocolate cake spiraling around chocolate cream and banana—it’s visually stunning and tastes even better than it looks. This is the dessert that makes people stop mid-conversation and say “wow.” Let’s make it!
Why Chocolate and Banana Are the Perfect Pairing
Chocolate and banana is one of the most beloved flavor combinations in the dessert world, and for good reason. The chemistry between them is real: bananas contain compounds that enhance the perception of chocolate’s flavor, making it taste even more chocolatey. Meanwhile, chocolate’s richness balances banana’s natural sweetness and tropical notes.
Bananas also bring practical benefits to baking. Their natural sugars caramelize slightly when baked or combined with warm chocolate, adding depth. Their soft texture contrasts beautifully with crispy or creamy elements. And their moisture helps keep cakes tender without making them soggy when used correctly.
This roll cake format showcases the pairing perfectly. Unlike a simple banana chocolate cake where flavors might blend together, the roll allows you to experience distinct layers: chocolate cake, then chocolate cream, then banana, creating a more complex, interesting eating experience. Each element shines while harmonizing with the others.
The visual appeal is undeniable too. The yellow banana slices against dark chocolate create beautiful contrast in the cross-section, making this one of the most photogenic desserts you can make. It’s the kind of cake people photograph before eating—and then eat every last crumb.
Ingredients for One 10-inch Roll Cake (8-10 Servings)
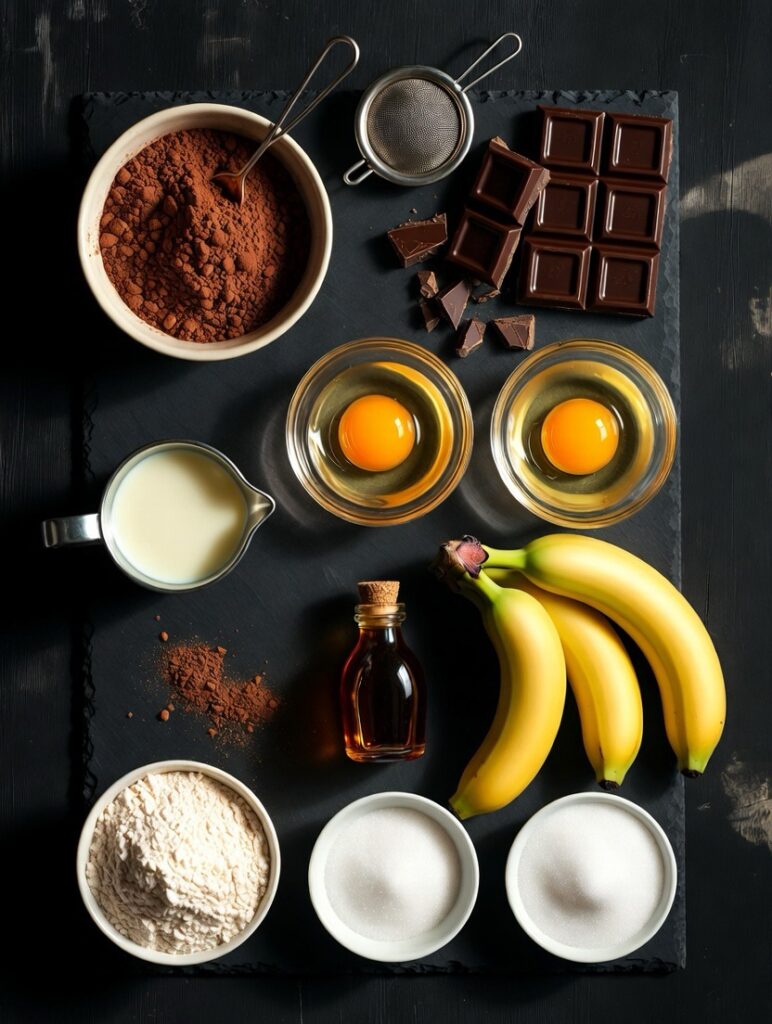
For the chocolate sponge cake:
- 4 large eggs, separated (room temperature)
- ⅔ cup (130g) granulated sugar, divided
- ¼ cup (60ml) whole milk, warmed
- 3 tablespoons (45ml) vegetable oil or melted butter
- 1 teaspoon vanilla extract
- ½ cup (65g) all-purpose flour
- ¼ cup (25g) unsweetened cocoa powder (Dutch-process preferred)
- ½ teaspoon baking powder
- ¼ teaspoon salt
- ¼ teaspoon cream of tartar
For the chocolate filling:
Option 1 – Chocolate Ganache:
- 8 oz (225g) semi-sweet or dark chocolate, chopped
- 1 cup (240ml) heavy cream
- 2 tablespoons (30g) butter
- 1 tablespoon powdered sugar
Option 2 – Chocolate Buttercream:
- ½ cup (115g) butter, softened
- 2 cups (250g) powdered sugar
- ⅓ cup (35g) unsweetened cocoa powder
- 3-4 tablespoons heavy cream or milk
- 1 teaspoon vanilla extract
- Pinch of salt
For assembly:
- 2-3 ripe but firm bananas, sliced
- Cocoa powder for dusting
- Optional: chocolate shavings, chocolate chips, or chopped nuts for topping
Detailed Step-by-Step Instructions
Step 1: Prepare Pan and Preheat Oven
Preheat oven to 350°F (175°C). Line a 10×15-inch jelly roll pan with parchment paper, extending it slightly over edges. Lightly grease the parchment. Have a clean kitchen towel ready, dusted with cocoa powder (not powdered sugar—we want chocolate aesthetics!).
Bring eggs to room temperature by placing them in warm water for 5 minutes if needed. Room temperature eggs whip to greater volume, which is crucial for a light sponge.
Step 2: Make the Chocolate Sponge Batter
Sift together flour, cocoa powder, baking powder, and salt. Set aside. This removes lumps and aerates the dry ingredients.
In a large bowl, whisk egg yolks with ⅓ cup (65g) sugar until pale and thick, about 2 minutes. Add warmed milk, oil, and vanilla extract. Whisk until smooth and emulsified.
Add the sifted dry ingredients and fold gently with a spatula until just combined. The batter will be thick. Set aside while you whip the whites.
Step 3: Whip Egg Whites to Stiff Peaks
In a completely clean, grease-free bowl, beat egg whites with an electric mixer on medium speed until foamy. Add cream of tartar and continue beating. Gradually add the remaining ⅓ cup (65g) sugar, one tablespoon at a time, while beating.
Increase to high speed and beat until stiff, glossy peaks form—the peaks should stand straight up when you lift the beaters. This takes about 3-4 minutes total. These whipped whites are what make the cake light enough to roll without cracking.
Step 4: Fold Whites Into Chocolate Batter
Add about ⅓ of the whipped egg whites to the chocolate batter. Fold gently but thoroughly to lighten the batter. This makes it easier to incorporate the remaining whites.
Add the rest of the egg whites in two additions, folding carefully after each. Use a scooping motion from bottom to top, rotating the bowl. Fold until no white streaks remain, but don’t overmix—you want to maintain as much air as possible.
Step 5: Bake the Chocolate Sponge
Pour batter into prepared pan and spread evenly with an offset spatula, reaching all corners. Gently tap the pan on the counter to release large air bubbles.
Bake for 12-15 minutes, until the top springs back when lightly touched and a toothpick inserted in center comes out clean. Don’t overbake—chocolate cake can go from perfect to dry quickly.
Step 6: Roll the Cake While Hot
The moment the cake comes out of the oven, run a knife around the edges. Immediately flip it onto your cocoa-dusted towel. Peel off the parchment paper carefully.
While still hot, roll the cake tightly in the towel starting from the short end, with the towel inside the roll. This “sets” the cake’s memory so it won’t crack later. Let it cool completely rolled up, about 45 minutes. This step is non-negotiable for a crack-free roll!
Step 7: Make the Chocolate Filling
For Ganache: Place chopped chocolate in a bowl. Heat cream until just simmering (not boiling). Pour hot cream over chocolate and let sit 2 minutes. Whisk until smooth, then whisk in butter and powdered sugar. Let cool to spreadable consistency, stirring occasionally (about 30 minutes at room temperature or 15 minutes refrigerated).
For Buttercream: Beat softened butter until fluffy. Sift in powdered sugar and cocoa powder. Add cream one tablespoon at a time, beating until light and fluffy. Mix in vanilla and salt. Adjust consistency with more cream if needed.
Step 8: Prepare the Bananas
Peel and slice bananas into ¼-inch thick rounds. Choose bananas that are ripe (yellow with small brown spots) but still firm—overly ripe bananas will be too mushy. Pat the slices dry with paper towels to remove excess moisture.
You can lightly brush banana slices with lemon juice to prevent browning, though they’ll be covered with chocolate so browning is less of an issue.
Step 9: Unroll and Fill the Cake
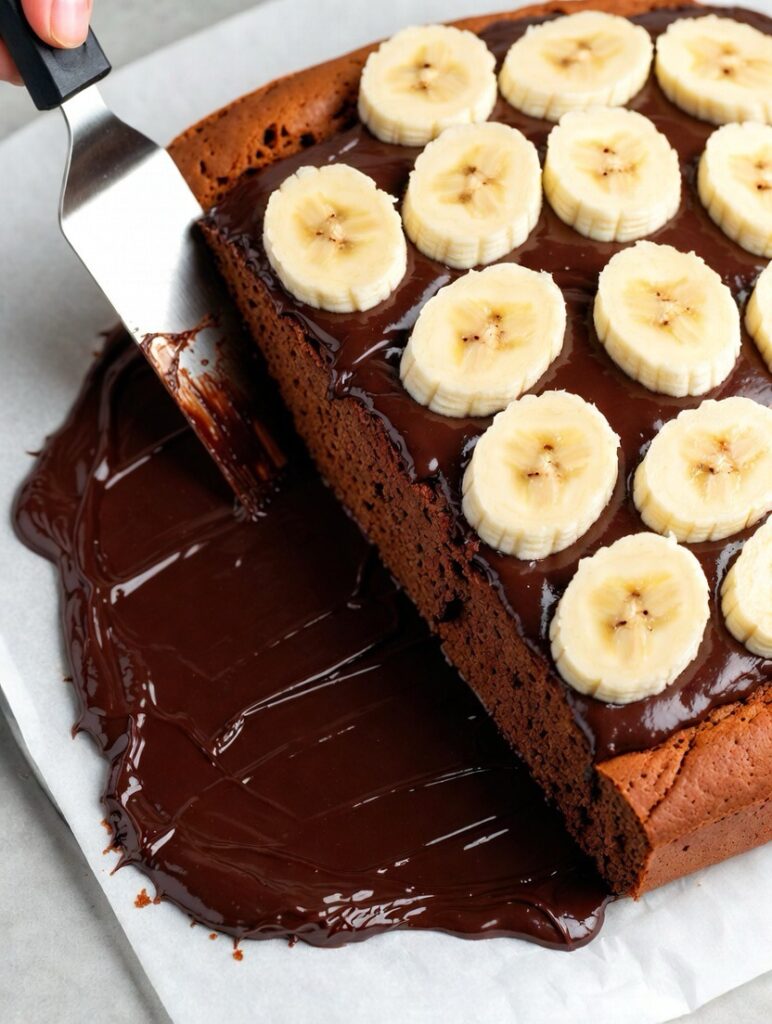
Carefully unroll the cooled cake—it will naturally want to stay curved, which is perfect. Spread your chocolate filling evenly over the entire surface, leaving a ½-inch border at the far edge to prevent squeezing out.
Arrange banana slices over the chocolate filling. Place them more densely at the starting edge (where you’ll begin rolling) for a prettier cross-section. Slightly overlap slices and press gently into the filling so they adhere.
Step 10: Roll, Chill, and Decorate
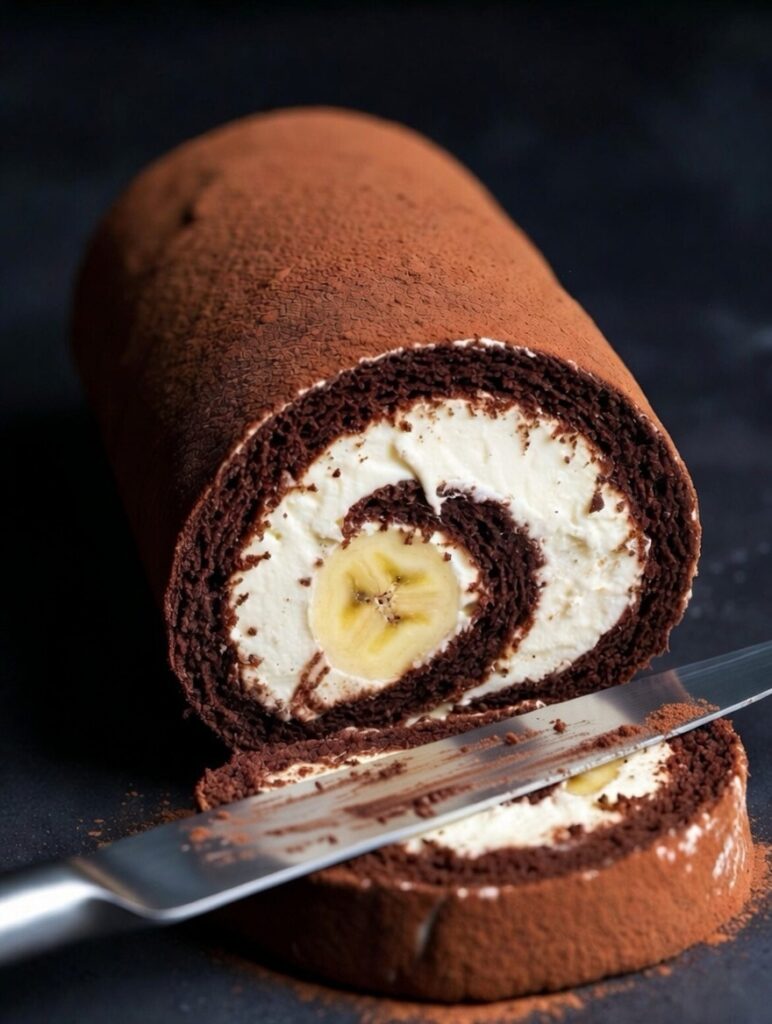
Using the towel as a guide, lift the starting edge and begin rolling the cake away from you, keeping it tight but not squeezing out the filling. Roll all the way to the end, finishing seam-side down.
Wrap the rolled cake tightly in plastic wrap and refrigerate for at least 2 hours, or up to 24 hours. This chilling firms up the filling and makes clean slicing possible.
When ready to serve, unwrap and place seam-side down on a serving platter. Dust the top generously with cocoa powder using a fine-mesh sieve. You can also pipe additional chocolate frosting, add chocolate shavings, or sprinkle with chopped nuts.
Slice with a sharp knife, wiping clean between cuts, to reveal those gorgeous chocolate-and-banana spirals!
Pro Tips for Perfect Chocolate Roll Cake
Use Dutch-process cocoa if possible. It has a deeper, smoother chocolate flavor and darker color than natural cocoa. If using natural cocoa, add ⅛ teaspoon baking soda to neutralize acidity.
Don’t skip warming the milk. Warm milk incorporates more easily into the batter and helps create a more tender crumb. Just warm to body temperature, not hot.
Fold gently but thoroughly. The folding technique is crucial—you want to maintain the air in the whipped whites while ensuring no flour pockets or white streaks remain.
Roll while truly hot. Waiting even 5 minutes can mean the difference between a perfect roll and a cracked one. Have your cocoa-dusted towel ready before the cake comes out of the oven.
Use firm-ripe bananas. Overly ripe, mushy bananas will make the filling too wet and can cause sogginess. You want bananas that are sweet but still hold their shape when sliced.
Let ganache cool properly. If it’s too warm, it will soak into the cake and slide out when you roll. If too cold, it will be hard to spread. Aim for thick peanut butter consistency.
Chill before slicing. A well-chilled roll slices cleanly with distinct layers. A warm roll will squish and look messy. Patience is rewarded with beautiful slices.
Make-Ahead and Storage Tips
This banana chocolate roll cake actually benefits from being made ahead, as the flavors meld and the texture improves:
Make-Ahead Timeline:
- Up to 2 days before: Bake and roll the cake, keep wrapped and refrigerated
- Day before: Make filling, prepare but don’t slice bananas
- 4-6 hours before serving: Unroll, fill, re-roll, chill
- Just before serving: Dust with cocoa and add final decorations
Storage:
- Unfilled rolled cake: 2 days refrigerated, wrapped tightly
- Filled roll cake: 2-3 days refrigerated (best within 24 hours)
- Freezing: Freeze unfilled cake for up to 1 month; don’t freeze with banana filling
Preventing Banana Browning:
Assemble the roll no more than 6-8 hours before serving for the freshest-looking bananas. The chocolate coating helps prevent browning, but bananas will eventually darken. Brushing with lemon juice extends freshness.
Creative Variations
Peanut Butter Banana Chocolate Roll
Add 3 tablespoons peanut butter to the chocolate filling. Incredibly indulgent Elvis-inspired combination.
Nutella Banana Roll
Replace chocolate filling with Nutella (warmed slightly for easier spreading). Add chopped hazelnuts with the bananas.
Salted Caramel Banana Chocolate Roll
Drizzle salted caramel sauce over the chocolate filling before adding bananas. Sprinkle with flaky sea salt.
Mocha Banana Roll
Add 1 tablespoon instant espresso powder to the cake batter. Use coffee-flavored ganache (add 1 tablespoon espresso to cream).
Coconut Banana Chocolate Roll
Toast ½ cup shredded coconut and sprinkle over chocolate filling with the bananas. Add coconut extract to the filling.
Mint Chocolate Banana Roll
Add ½ teaspoon mint extract to chocolate filling. Garnish with crushed peppermint candies.
Frequently Asked Questions (FAQ)
Can I use frozen bananas?
Fresh bananas work much better. Frozen bananas release too much moisture when thawed, making the filling watery and potentially soaking the cake.
Why did my chocolate roll cake crack?
Most likely it wasn’t rolled while hot enough, was overbaked, or wasn’t rolled with the towel initially. These are the three main causes of cracking.
Can I make this without eggs?
Eggs are structurally essential to this recipe. There’s no reliable substitute that will create the same light, rollable texture.
How do I keep bananas from turning brown?
Assemble the roll no more than 6-8 hours before serving. Brush banana slices with lemon juice. The chocolate coating also helps prevent oxidation.
What if my chocolate filling is too stiff?
Ganache: Gently warm it over a double boiler or in 10-second microwave bursts, stirring between. Buttercream: Add a tablespoon of cream or milk and beat until smooth.
Can I use cocoa powder from a mix?
No, use pure unsweetened cocoa powder. Cocoa mixes contain sugar and milk powder, which will throw off the recipe balance.
How do I get clean slices?
Chill the roll completely. Use a sharp knife. Wipe the blade clean between each cut. Let the knife do the work—don’t press hard.
Can I make mini rolls instead of one large?
Yes! Cut the baked cake into thirds before rolling. Reduce filling amounts accordingly
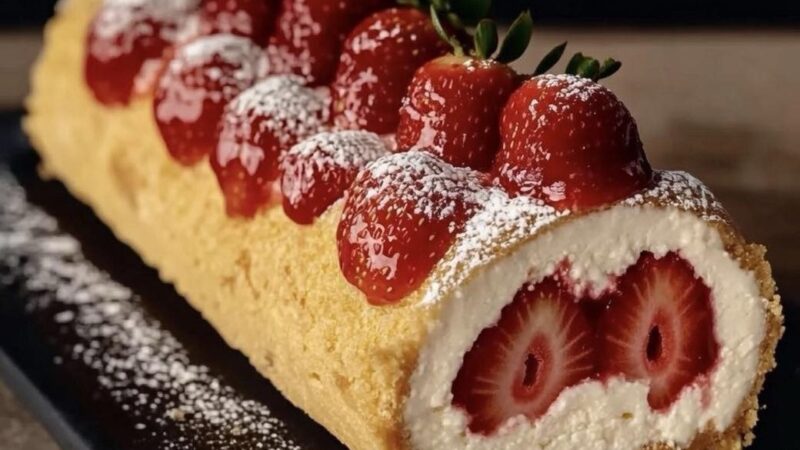
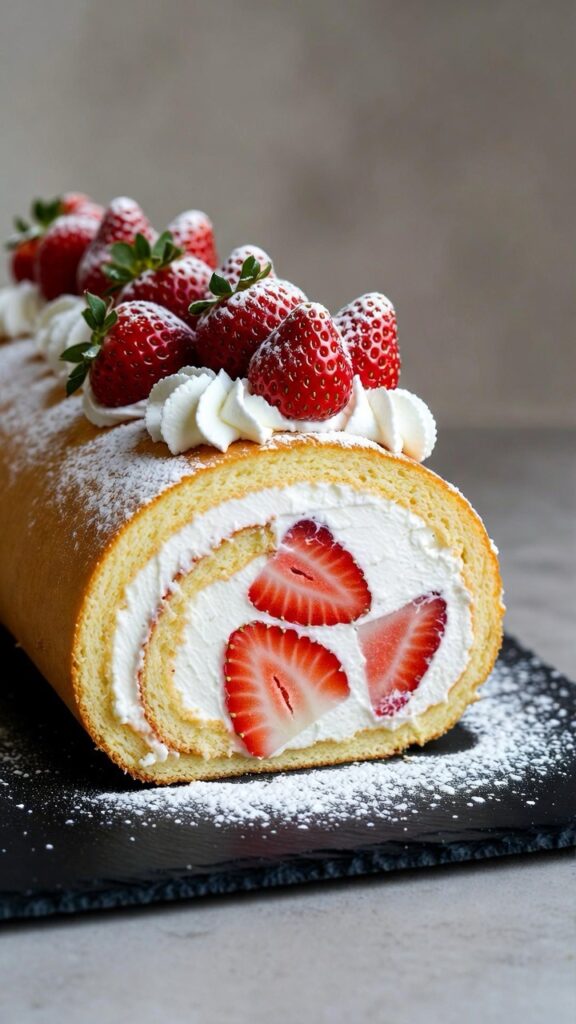
Introduction
Prepare to fall in love with the most elegant, show-stopping dessert: Strawberry Roll Cake! This stunning Japanese-inspired Swiss roll features a light, fluffy sponge cake rolled around clouds of sweetened whipped cream and fresh strawberries, then topped with more berries and a delicate dusting of powdered sugar. It’s the dessert that looks like it came from a fancy bakery but is surprisingly achievable at home with the right technique.
What makes this strawberry roll cake absolutely irresistible is the perfect balance of textures and flavors. The sponge cake is impossibly light and airy—almost cloud-like—with just enough structure to roll without cracking. The whipped cream filling is sweet but not cloying, providing the perfect canvas for juicy, fresh strawberries. Each slice reveals a beautiful spiral pattern with whole strawberry slices creating a stunning visual that’s pure Instagram gold.
Whether you’re celebrating a birthday, hosting a tea party, impressing dinner guests, or simply treating yourself to something special, this strawberry roll cake delivers on every level. It tastes as incredible as it looks, and once you master the rolling technique (easier than you think!), you’ll be making this showstopper for every special occasion. Get ready to receive endless compliments and recipe requests!
Why Japanese-Style Roll Cakes Are So Special
Japanese roll cakes (or roulade cakes) have taken the dessert world by storm, and for good reason. Unlike traditional American sheet cakes that can be dense and heavy, Japanese sponge cakes are remarkably light and delicate, made with a technique that incorporates whipped eggs for maximum airiness.
The key difference is in the method: separating eggs, whipping the whites to stiff peaks, and carefully folding them into the batter creates a sponge with tiny air bubbles throughout. This airy structure not only tastes incredible but also makes the cake flexible enough to roll without cracking—a common problem with denser cakes.
The filling philosophy is also different. Rather than heavy buttercream or thick frosting, Japanese roll cakes typically use stabilized whipped cream that’s light, fresh, and lets the fruit shine. This creates a dessert that feels indulgent but not overwhelming—you can eat a generous slice and still feel satisfied rather than stuffed.
The visual presentation is equally important in Japanese baking culture. The cross-section of a perfectly rolled cake with visible fruit creates an almost architectural beauty. It’s dessert as art, and that’s exactly what makes it so special and share-worthy.
Ingredients for One 10-inch Roll Cake (8-10 Servings)
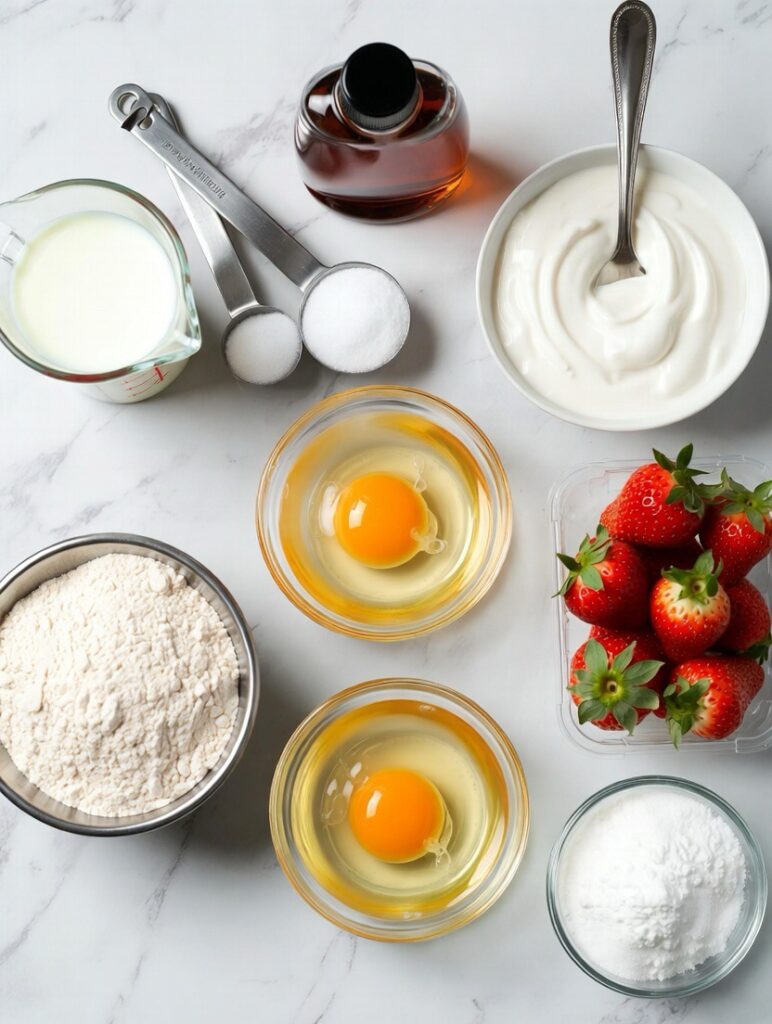
For the sponge cake:
- 4 large eggs, separated (room temperature)
- ⅔ cup (130g) granulated sugar, divided
- ¼ cup (60ml) whole milk, warmed
- 2 tablespoons (30ml) vegetable oil or melted butter
- 1 teaspoon vanilla extract
- ¾ cup (95g) cake flour (or all-purpose flour)
- ¼ teaspoon salt
- ¼ teaspoon cream of tartar
For the whipped cream filling:
- 1½ cups (360ml) heavy whipping cream, cold
- 3 tablespoons (25g) powdered sugar
- 1 teaspoon vanilla extract
- 2 tablespoons (15g) cream cheese, softened (optional, for stability)
For assembly:
- 1½ cups fresh strawberries, hulled and sliced
- 6-8 whole strawberries for topping
- Powdered sugar for dusting
- Optional: strawberry jam (2-3 tablespoons)
Detailed Step-by-Step Instructions
Step 1: Prepare Your Pan and Preheat Oven
Preheat your oven to 350°F (175°C). Line a 10×15-inch jelly roll pan or baking sheet with parchment paper, making sure it extends slightly over the edges for easy removal. Lightly grease the parchment with cooking spray or butter—this helps the cake release smoothly later.
Have a clean kitchen towel ready, dusted generously with powdered sugar. This will be crucial for rolling the cake immediately after baking. Room temperature is important for eggs, so if yours are cold, place them in warm water for 5 minutes.
Step 2: Make the Sponge Cake Batter
Separate the eggs carefully—no yolk in the whites or they won’t whip properly. In a large bowl, whisk egg yolks with ⅓ cup (65g) sugar until pale and thick, about 2 minutes. Add the warmed milk, oil (or melted butter), and vanilla extract. Whisk until smooth and fully combined.
Sift the cake flour and salt over the yolk mixture. Gently fold with a spatula until just combined—don’t overmix. A few small lumps are fine. Set aside while you whip the egg whites.
Step 3: Whip the Egg Whites to Stiff Peaks
In a completely clean, dry bowl (any grease will prevent proper whipping), beat the egg whites with an electric mixer on medium speed until foamy. Add the cream of tartar and continue beating while gradually adding the remaining ⅓ cup (65g) sugar, one tablespoon at a time.
Increase speed to high and beat until stiff, glossy peaks form—about 3-4 minutes total. When you lift the beaters, the peaks should stand straight up without drooping. This meringue is what makes the cake light and rollable.
Step 4: Fold Egg Whites Into Batter
This is the most important step for texture. Add about ⅓ of the whipped egg whites to the yolk mixture. Fold gently with a spatula using a scooping motion from the bottom up and over. This lightens the batter and makes it easier to incorporate the remaining whites.
Add the remaining egg whites in two additions, folding gently but thoroughly after each. The key is to maintain as much air as possible while ensuring no white streaks remain. The batter should be light, airy, and voluminous.
Step 5: Bake the Sponge
Pour the batter into your prepared pan and spread evenly with an offset spatula, reaching all corners. Gently tap the pan on the counter twice to release any large air bubbles.
Bake for 12-15 minutes, until the top springs back when lightly touched and a toothpick inserted in the center comes out clean. The cake should be pale golden, not dark brown. Don’t overbake or it will crack when rolled.
Step 6: Roll the Cake While Hot (Critical Step!)
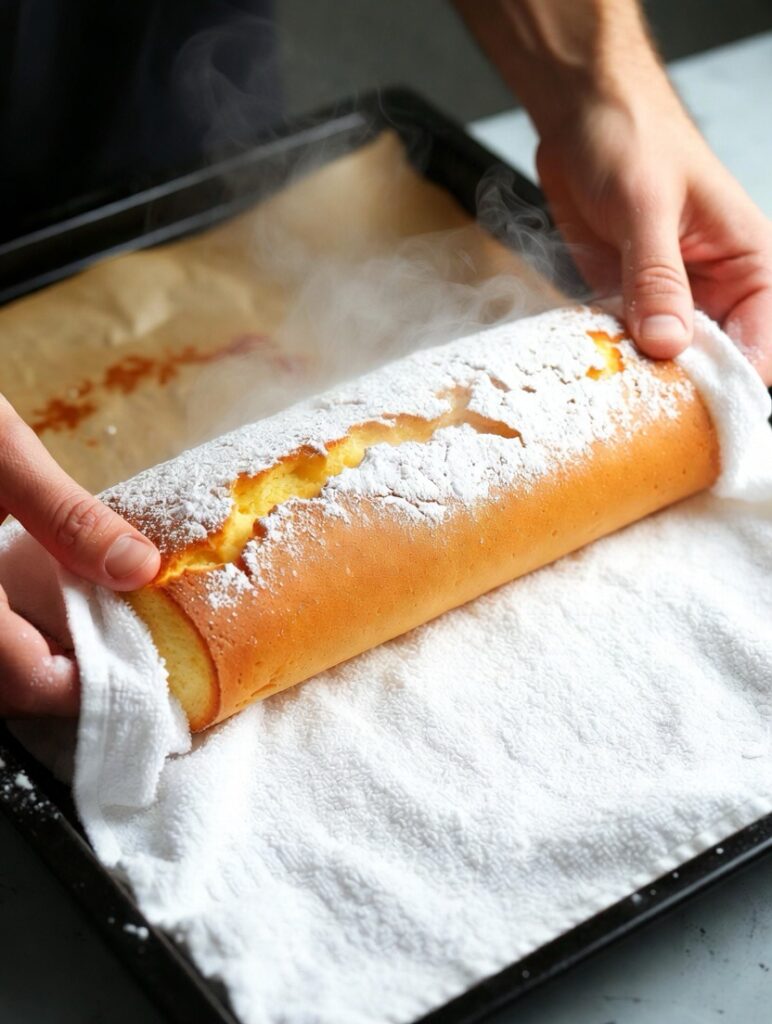
The moment the cake comes out of the oven, run a knife around the edges to loosen it. Immediately flip the cake onto your powdered sugar-dusted towel. Carefully peel off the parchment paper.
While the cake is still hot and pliable, roll it up tightly in the towel, starting from the short end. The towel stays inside the roll. This “sets” the cake’s memory so it won’t crack when you fill and re-roll it later.
Let the rolled cake cool completely in the towel on a wire rack, about 30-45 minutes. This step is crucial—skipping it will result in a cracked cake.
Step 7: Make the Stabilized Whipped Cream
While the cake cools, make your filling. In a cold bowl with cold beaters, whip the heavy cream, powdered sugar, and vanilla on medium-high speed. If using cream cheese for stability, beat it into the cream at the beginning until smooth.
Whip until stiff peaks form—the cream should hold its shape but still be spreadable, not grainy or over-whipped. Keep refrigerated until ready to use.
Step 8: Prepare the Strawberries
Hull and slice your strawberries lengthwise into ¼-inch thick slices. Pat them dry with paper towels to remove excess moisture—this prevents the filling from becoming watery. Reserve the most beautiful whole strawberries for the top decoration.
If using strawberry jam, warm it slightly and strain out any large pieces for a smooth spread.
Step 9: Assemble the Roll Cake
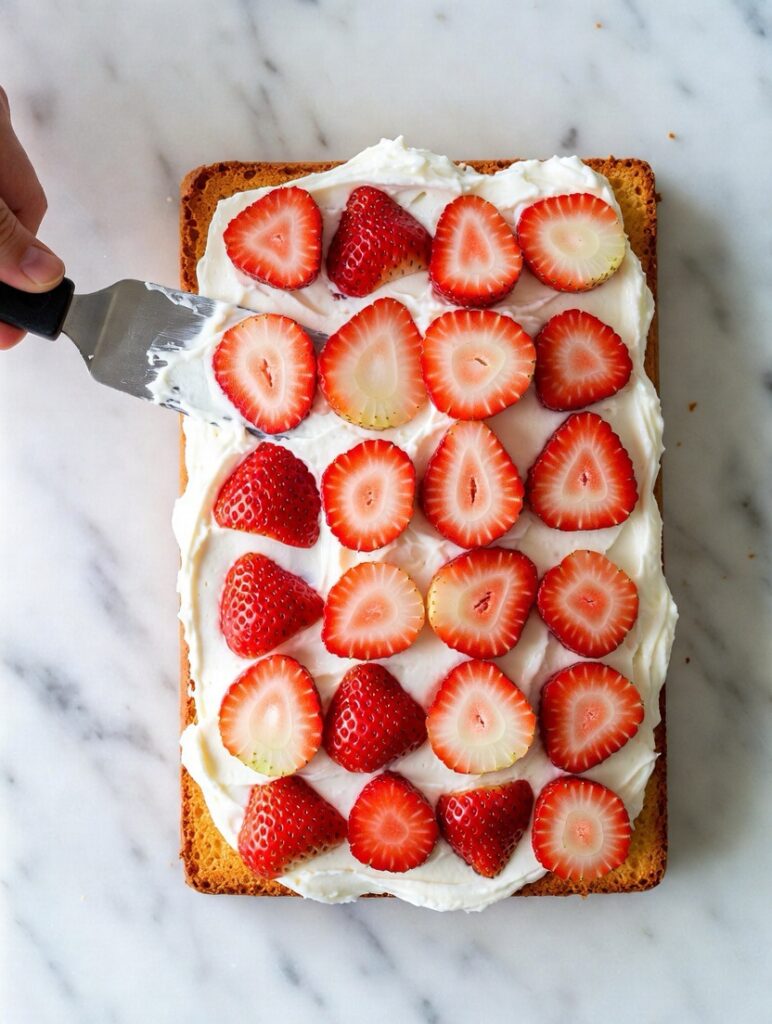
Carefully unroll the cooled cake—it will naturally want to stay in a spiral shape, which is perfect. Spread the jam thinly over the cake if using (this adds flavor and helps the cream adhere).
Spread the whipped cream evenly over the entire surface, leaving a ½-inch border at the far edge. This prevents cream from squeezing out when you roll.
Arrange strawberry slices in rows across the cream, focusing more slices toward the starting edge where you’ll begin rolling. This creates a beautiful pattern in the cross-section.
Step 10: Roll and Decorate
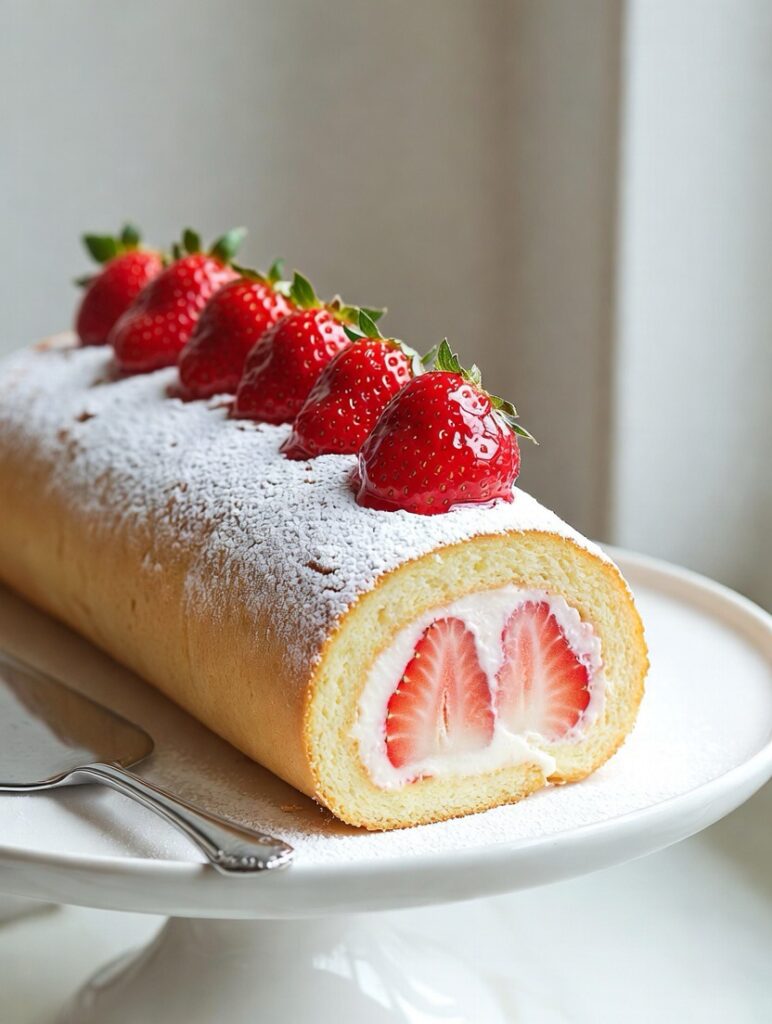
Using the towel as a guide, lift the starting edge and begin rolling the cake away from you, keeping it tight but not squeezing out the filling. Continue rolling until you reach the end, finishing with the seam on the bottom.
Wrap the rolled cake tightly in plastic wrap and refrigerate for at least 1 hour (or up to 24 hours) to set. This chilling makes it much easier to slice cleanly.
When ready to serve, unwrap and place on a serving platter seam-side down. Pipe or spoon whipped cream along the top, arrange whole strawberries, and dust generously with powdered sugar. Slice with a sharp, clean knife (wipe between cuts) to reveal those beautiful spirals!
Pro Tips for Perfect Roll Cake Every Time
Don’t skip separating eggs properly. Even a tiny bit of yolk in your egg whites will prevent them from whipping to stiff peaks. Use three bowls: one for yolks, one for whites, and one “safety bowl” to separate each egg into before adding to the whites bowl.
Roll while hot. This cannot be emphasized enough. The cake must be rolled immediately after baking while still warm and flexible. Letting it cool flat will guarantee cracks.
Use cake flour if possible. It creates a more delicate, tender crumb than all-purpose flour. If you only have all-purpose, subtract 2 tablespoons of flour and replace with 2 tablespoons of cornstarch.
Don’t overwhip the cream. Stop as soon as stiff peaks form. Over-whipped cream becomes grainy and eventually turns to butter—not what you want in your filling.
Pat strawberries dry. Excess moisture will make the cream weep and the cake soggy. Taking 30 seconds to dry them makes a huge difference.
Chill before slicing. A well-chilled roll slices cleanly with beautiful, defined layers. A warm roll will squish and look messy.
Use a sharp knife. Wipe the blade clean between each slice for the most professional-looking pieces. A serrated knife works well too.
Make-Ahead and Storage Tips
This strawberry roll cake is actually better made a day ahead, as the flavors meld and the cake stays moist from the cream. Here’s how to plan:
Make-Ahead Timeline:
- Day before: Bake cake, roll it to set shape, cool, wrap, and refrigerate
- Morning of serving: Prepare whipped cream and strawberries
- 2-3 hours before: Unroll, fill, re-roll, and chill
- Just before serving: Add final decorations and dust with powdered sugar
Storage:
- Refrigerate unfilled rolled cake (wrapped tightly): up to 2 days
- Refrigerate filled roll cake: 2-3 days (best within 24 hours)
- Freeze unfilled cake (wrapped well): up to 1 month
- Don’t freeze filled cake (cream and strawberries don’t freeze well)
Transportation Tips:
If taking to a party, transport in a cake carrier or sturdy box. Keep cold with ice packs. Add final strawberry decorations and powdered sugar at destination for the freshest look.
Creative Variations
Chocolate Strawberry Roll
Add 2 tablespoons cocoa powder to the flour mixture. Use chocolate shavings on top with the strawberries for a decadent twist.
Matcha Strawberry Roll
Replace 1 tablespoon of flour with ceremonial grade matcha powder. The green tea flavor pairs beautifully with strawberries and cream.
Lemon Strawberry Roll
Add 1 tablespoon lemon zest to the cake batter and 2 teaspoons to the whipped cream. The citrus brightens the berries.
Mixed Berry Roll
Use a combination of strawberries, blueberries, and raspberries for a colorful, flavorful filling.
Strawberry Shortcake Roll
Fold small pieces of pound cake or ladyfinger cookies into the whipped cream for a strawberry shortcake-inspired version.
Tiramisu Strawberry Roll
Brush the cake with coffee syrup and use mascarpone-whipped cream filling. Dust with cocoa powder instead of powdered sugar.
Frequently Asked Questions (FAQ)
Why did my roll cake crack?
Most commonly: the cake cooled too much before rolling, the cake was overbaked, or you didn’t roll it while hot. Always roll immediately after baking while the cake is still warm and flexible.
Can I use frozen strawberries?
Fresh is strongly recommended. Frozen strawberries release too much moisture when thawed, making the filling watery and potentially making the cake soggy.
How do I know when the sponge is done baking?
It should spring back when lightly touched and a toothpick inserted in the center should come out clean. The edges will just start pulling away from the pan.
Can I make this without eggs?
Eggs are essential to this recipe’s structure and texture. There’s no reliable substitute that will create the same airy, rollable sponge.
My whipped cream is runny, what happened?
The cream wasn’t cold enough, the bowl and beaters weren’t cold, or you didn’t whip it long enough. Cream should come straight from the fridge and be whipped to stiff peaks.
How far ahead can I assemble the roll?
Best assembled 2-24 hours before serving. The cake needs time to set in the refrigerator, but you don’t want strawberries sitting in cream for more than a day.
Can I use regular flour instead of cake flour?
Yes, but the texture will be slightly denser. For best results, make a substitute: ¾ cup all-purpose flour minus 1½ tablespoons, plus 1½ tablespoons cornstarch.
Why is my cake sticking to the parchment?
The parchment wasn’t greased, or you let the cake cool too long before removing the paper. Always grease the parchment and peel it off while the cake is still warm.
Can I freeze the finished roll cake?
Not recommended. The whipped cream and fresh strawberries don’t freeze well. You can freeze the unfilled sponge for up to 1 month, then thaw and fill fresh.
How do I get clean slices?
Chill the roll completely, use a sharp knife, and wipe the blade clean between each slice. Warming the knife slightly under hot water helps too.
People Also Ask (PAA)
What is a roll cake?
A roll cake (or Swiss roll/jelly roll) is a thin sponge cake spread with filling and rolled into a spiral. When sliced, it reveals a beautiful pinwheel pattern of cake and filling.
How do you keep a roll cake from cracking?
Roll it while still hot from the oven, don’t overbake it, use the proper flour ratio, and include cream of tartar in your egg whites for stability.
Can you make roll cake the day before?
Yes! Roll cakes are actually better made 1 day ahead. The cake stays moist and flavors develop. Just wait to add final decorations until serving time.
Why is my roll cake dry?
Overbaking is the most common cause. Bake just until the center springs back. Also, make sure to roll the cake with the towel immediately to trap moisture.
What kind of cream is best for roll cakes?
Stabilized whipped cream with a touch of cream cheese or gelatin works best. It’s light enough not to weigh down the cake but stable enough not to weep.
How long does strawberry roll cake last?
2-3 days refrigerated, though it’s best within 24 hours of assembly. The strawberries and cream are most fresh on day one.
Is roll cake the same as Swiss roll?
Yes, they’re the same basic concept. “Swiss roll” is the British term, while “roll cake” is more commonly used in American and Japanese baking.
What’s the difference between sponge cake and regular cake?
Sponge cake relies on whipped eggs for leavening rather than baking powder, creating a lighter, airier texture that’s more flexible for rolling.
Conclusion
Strawberry Roll Cake represents the perfect marriage of Japanese precision and Western dessert tradition—a light, elegant creation that looks as stunning as it tastes. This recipe proves that with the right technique and a bit of patience, you can create bakery-quality desserts at home that will genuinely wow your family and friends.
What makes this roll cake so special is its versatility. It’s fancy enough for the most important celebrations yet approachable enough for a weekend baking project. The skills you learn making this—proper egg whipping, gentle folding, the hot-roll technique—transfer to countless other recipes and elevate your overall baking game.
The visual impact of this dessert cannot be overstated. When you slice into that spiral and reveal the layers of cream and strawberries, there’s always an audible gasp. It’s the kind of dessert people photograph before eating, the kind they remember long after the party ends, and the kind they ask you to make again and again.
Beyond the impressive presentation, the actual eating experience is pure delight. The light-as-air sponge dissolves on your tongue, the whipped cream provides richness without heaviness, and the strawberries add bursts of fresh, fruity flavor. It’s a dessert that satisfies without feeling too sweet or overwhelming—you can genuinely enjoy a generous slice and still feel light.
Make this Strawberry Roll Cake for your next special occasion and prepare to become the designated dessert person in your circle. Once people taste your homemade roll cake, boxed cakes and store-bought desserts will pale in comparison. This is the recipe that turns casual bakers into confident pastry enthusiasts, and ordinary celebrations into extraordinary memories. Your most beautiful dessert awaits! 🍓✨
Prep Time: 30 minutes
Bake Time: 15 minutes
Cooling/Assembly Time: 1 hour
Total Time: 1 hour 45 minutes
Servings: 8-10 slices
Difficulty: Intermediate
Cuisine: Japanese-inspired
Course: Dessert
Diet: Vegetarian
Keywords: strawberry roll cake, Swiss roll recipe, Japanese roll cake, strawberry cake roll, sponge cake roll, elegant dessert, beautiful cake