
There’s something absolutely magical about pulling a tray of golden, pillowy strawberry bread rolls from your oven. The sweet aroma of fresh strawberries mingling with buttery dough fills your kitchen, and suddenly you’re transported to your favorite bakery—except you made these beauties yourself! If you’ve been intimidated by bread baking, let me tell you a secret: strawberry bread rolls are actually one of the most forgiving and rewarding recipes for beginners.
Today, I’m walking you through everything you need to know to create these delightful treats. Whether you’re baking for a special brunch, looking to impress your family, or simply craving something sweet and homemade, these strawberry bread rolls are about to become your new favorite recipe.
Table of Contents
Why You’ll Fall in Love with Strawberry Bread Rolls
Before we dive into the recipe, let me share why strawberry bread rolls deserve a spot in your baking repertoire. Unlike traditional dinner rolls, these beauties strike the perfect balance between bread and pastry. They’re not quite as sweet as a dessert, but they’re definitely more indulgent than your average breakfast bread.
The combination of soft, fluffy dough with pockets of juicy strawberries creates an irresistible texture. Each bite offers that satisfying pull of fresh bread with bursts of fruity sweetness. Plus, they look absolutely stunning on any breakfast table or dessert spread—your guests will think you spent hours at a fancy bakery!
What Makes These Rolls Special
The secret to amazing strawberry bread rolls lies in the technique and the quality of ingredients. We’re using fresh strawberries rather than jam or preserves, which gives these rolls a more authentic, less-processed flavor. The natural juices from the strawberries seep into the dough as they bake, creating little pockets of concentrated strawberry goodness.
Another game-changer? We’re incorporating a touch of vanilla and a hint of lemon zest into the dough. These subtle additions enhance the strawberry flavor without overpowering it, creating a more complex and sophisticated taste profile that’ll have everyone asking for your secret recipe.
Essential Ingredients for Perfect Strawberry Bread Rolls

Let’s talk about what you’ll need to gather before starting. The beauty of this recipe is that most ingredients are pantry staples you probably already have:
For the Dough:
- 3½ cups all-purpose flour (plus extra for dusting)
- ¼ cup granulated sugar
- 1 packet (2¼ teaspoons) active dry yeast
- 1 teaspoon salt
- 1 cup whole milk, warmed to about 110°F
- ¼ cup unsalted butter, melted
- 2 large eggs, room temperature
- 1 teaspoon vanilla extract
- 1 teaspoon lemon zest (optional but highly recommended)
For the Strawberry Filling:
- 2 cups fresh strawberries, diced small
- 3 tablespoons granulated sugar
- 1 tablespoon cornstarch
- 1 tablespoon lemon juice
For the Glaze:
- 1 cup powdered sugar
- 2-3 tablespoons milk
- ½ teaspoon vanilla extract
Preparing Your Strawberry Filling
Here’s a pro tip that’ll save your rolls from becoming soggy: we need to prepare our strawberries before adding them to the dough. Fresh strawberries contain a lot of moisture, and if we add them raw, they’ll release too much liquid during baking.
Start by dicing your strawberries into small, uniform pieces—about ¼-inch cubes work perfectly. Toss them in a bowl with the sugar, cornstarch, and lemon juice. Let this mixture sit for about 15-20 minutes. You’ll notice the strawberries releasing their juices. This is exactly what we want! The cornstarch will help thicken these juices, creating a jammy consistency that won’t make your dough soggy.
After the waiting period, gently cook the mixture in a small saucepan over medium heat for about 3-4 minutes, stirring constantly. The mixture should thicken slightly. Remove from heat and let it cool completely before using. This step is crucial—adding warm filling to your dough will kill the yeast!
Making the Perfect Dough
Now for the fun part—making our dough! Don’t let the word “yeast” intimidate you. I promise this is easier than you think.
Start by warming your milk to about 110°F—that’s warm to the touch but not hot. Think baby bottle temperature. Pour it into a large mixing bowl and sprinkle the yeast over the top along with a pinch of the sugar. Let it sit for about 5 minutes until it becomes foamy. This is called “proofing” the yeast, and it’s your way of making sure your yeast is alive and ready to work its magic.
Once your yeast is foamy and happy, add the melted butter, eggs, vanilla extract, remaining sugar, lemon zest, and salt. Whisk everything together until well combined. Now gradually add the flour, one cup at a time, mixing with a wooden spoon or your hands until a shaggy dough forms.
Turn the dough out onto a lightly floured surface and knead for about 8-10 minutes. You’re looking for a smooth, elastic dough that springs back when you poke it. If the dough feels too sticky, add flour one tablespoon at a time. If it’s too dry, add a tiny splash of milk. Don’t worry about getting it perfect—bread dough is incredibly forgiving!
The Rise and Shine Moment
Place your kneaded dough in a greased bowl, turning it once to coat all sides with oil. Cover with a clean kitchen towel or plastic wrap and let it rise in a warm, draft-free spot for about 1-1.5 hours, or until it’s doubled in size. I like to turn on my oven for just 1 minute, then turn it off and place the bowl inside with the door slightly open—instant proofing box!
Shaping Your Strawberry Bread Rolls
Once your dough has doubled, punch it down gently to release the air (so satisfying!). Turn it out onto a lightly floured surface and roll it into a large rectangle, about 12×16 inches.
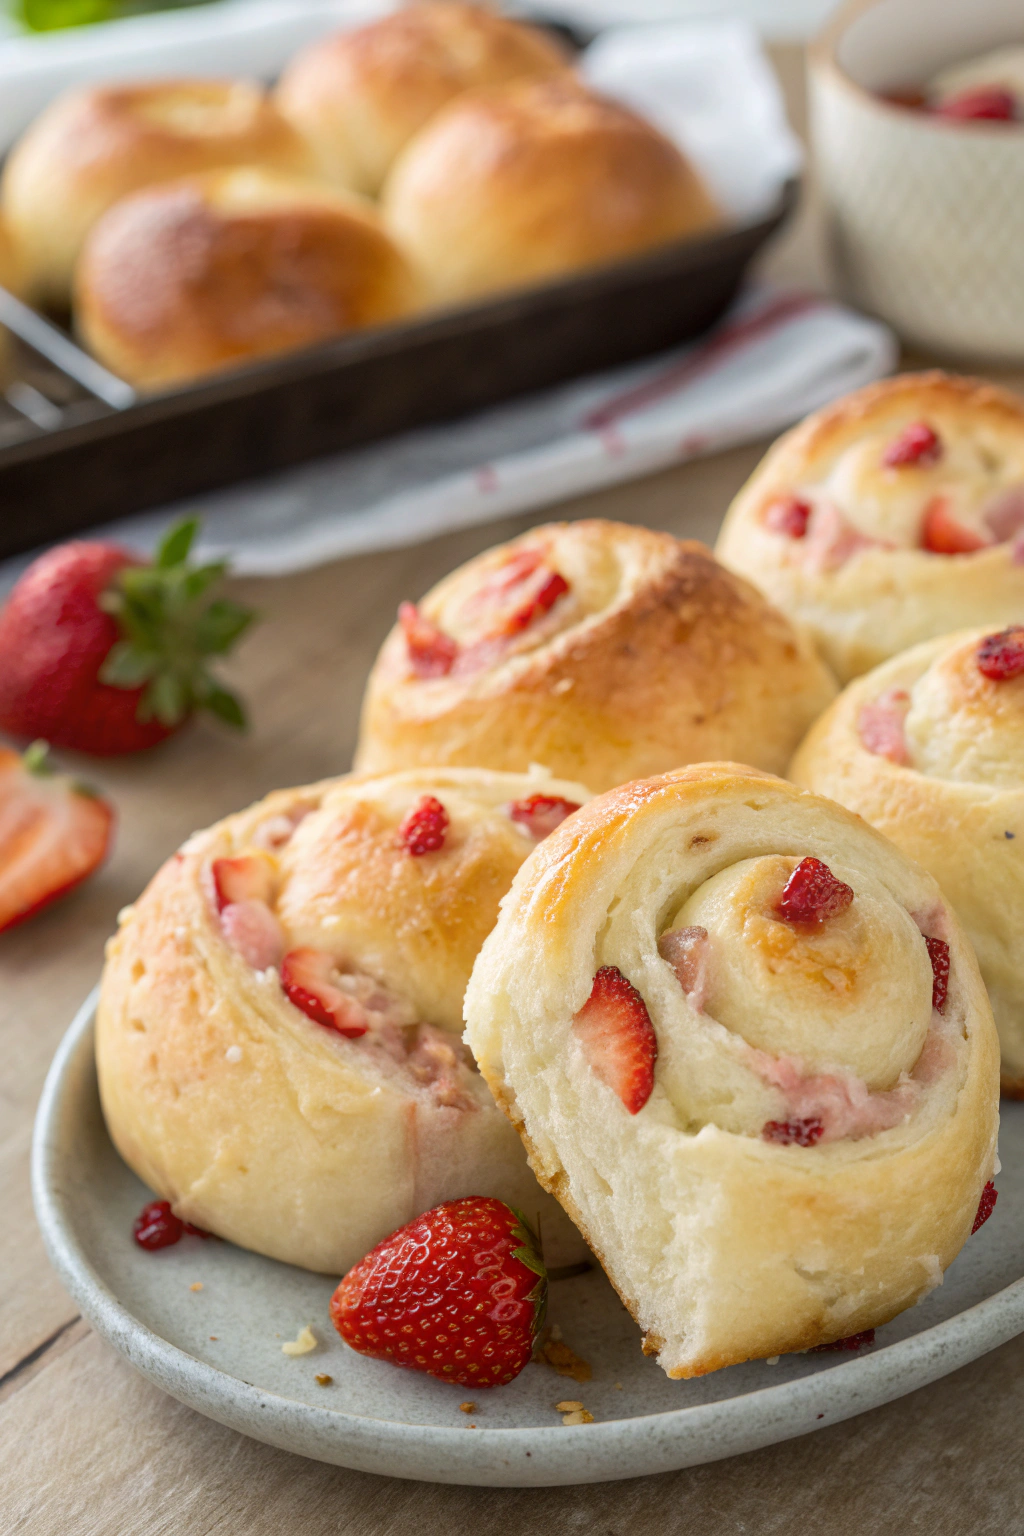
Now spread your cooled strawberry filling evenly over the dough, leaving about a ½-inch border around the edges. Starting from one long side, tightly roll the dough into a log, pinching the seam to seal. Using a sharp knife or dental floss (yes, really—it works perfectly!), cut the log into 12 equal pieces.
Arrange your rolls in a greased 9×13-inch baking pan, leaving a little space between each one. Cover again and let them rise for another 30-45 minutes until puffy.
Baking to Golden Perfection
Preheat your oven to 350°F. Once your rolls have completed their second rise, bake them for 25-30 minutes, or until they’re golden brown on top and sound hollow when tapped. The internal temperature should reach about 190°F if you want to be precise.
Let them cool in the pan for about 10 minutes—I know it’s tempting to dive right in, but patience pays off here!
The Final Touch: Sweet Glaze
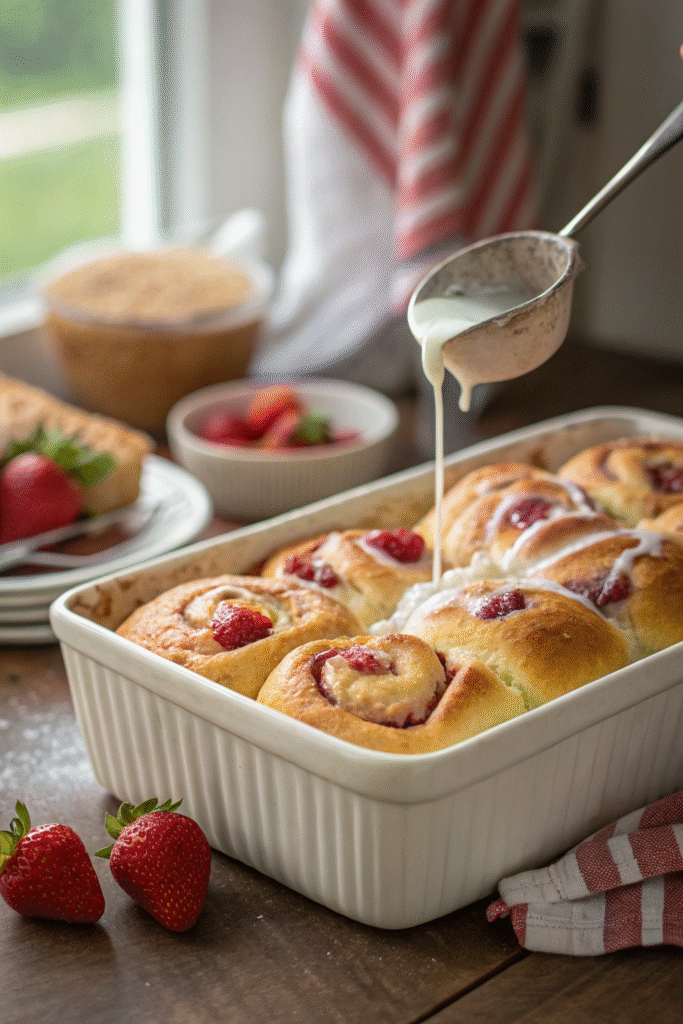
While your rolls cool slightly, whisk together the powdered sugar, milk, and vanilla extract until smooth. Drizzle this gorgeous glaze over the warm rolls, letting it seep into all the crevices. The combination of warm bread and sweet glaze is absolutely heavenly.
Tips for Success
Storage: These strawberry bread rolls stay fresh in an airtight container at room temperature for 2-3 days, or refrigerated for up to a week. Warm them briefly in the microwave before serving.
Freezer-Friendly: You can freeze unbaked rolls after shaping. Just thaw in the refrigerator overnight and let them come to room temperature and complete their second rise before baking.
Customization: Try adding a cream cheese filling layer, swap strawberries for blueberries or raspberries, or add white chocolate chips to the filling.
Your New Favorite Recipe
These strawberry bread rolls are more than just a recipe—they’re an experience. The process of making them is therapeutic, the aroma while they bake is intoxicating, and the taste? Absolutely unforgettable. Don’t be surprised when your family starts requesting these for every special occasion!
Remember, bread baking is as much about the journey as the destination. If your first batch isn’t perfect, that’s completely okay. Each time you make these rolls, you’ll learn something new and get better at reading your dough. Before you know it, you’ll be making strawberry bread rolls with your eyes closed!
So grab those fresh strawberries, roll up your sleeves, and let’s get baking. Your kitchen is about to smell amazing, and your taste buds are in for a real treat. Happy baking, friends! 🍓
Frequently Asked Questions About Strawberry Bread Rolls
Can I use frozen strawberries instead of fresh?
Absolutely! If fresh strawberries aren’t in season, frozen ones work beautifully. Just make sure to thaw them completely and drain off excess liquid before preparing your filling. You might need to add an extra teaspoon of cornstarch to compensate for the additional moisture.
Why didn’t my dough rise?
This usually comes down to yeast issues. Make sure your yeast isn’t expired and that your milk wasn’t too hot (which kills yeast) or too cold (which prevents activation). The ideal temperature is around 110°F—warm but not uncomfortable to touch. Also check that your rising environment is warm and draft-free.
Can I make the dough the night before?
Yes! This is actually a great time-saving trick. After the first rise, punch down the dough, cover it tightly, and refrigerate overnight. The next morning, let it come to room temperature for about 30 minutes before rolling, filling, and shaping. The slow cold rise actually develops even better flavor!
My strawberry filling is too runny. What did I go wrong?
The cornstarch might not have activated properly. Make sure you cook the strawberry mixture long enough for the cornstarch to thicken it—you should see it become noticeably thicker and glossier. If it’s still runny, add another teaspoon of cornstarch mixed with a tablespoon of water and cook for another minute or two.
How do I know when the rolls are fully baked?
Look for a golden-brown color on top, and the rolls should sound hollow when tapped gently. If you have a thermometer, the internal temperature should reach 190-200°F. If the tops are browning too quickly but the centers aren’t done, tent them loosely with aluminum foil.
Can I make mini strawberry bread rolls instead?
Definitely! Just cut your log into 18-24 smaller pieces instead of 12. Reduce the baking time to 18-22 minutes. Mini rolls are perfect for parties and brunches!
What’s the best way to reheat leftover rolls?
For that fresh-from-the-oven taste, microwave individual rolls for 15-20 seconds, or warm them in a 300°F oven for 5-7 minutes. You can also split them and toast them lightly—they’re delicious with a bit of butter!
Can I substitute the all-purpose flour with whole wheat?
You can substitute up to half of the all-purpose flour with whole wheat for a heartier texture. Going 100% whole wheat will make the rolls denser and less fluffy. For best results, use white whole wheat flour if you want to add nutrition while keeping a lighter texture.
Do strawberry bread rolls need to be refrigerated?
If you’re eating them within 2-3 days, they’re fine at room temperature in an airtight container. For longer storage, refrigerate them (they’ll last up to a week) or freeze them for up to 3 months. The glaze may absorb into the rolls when refrigerated, but they’ll still taste amazing!
Can I add cream cheese to these rolls?
Oh yes! For a strawberry cream cheese version, spread softened cream cheese (about 4-6 oz, mixed with 2 tablespoons of sugar) over the dough before adding the strawberry filling. It creates an amazing cheesecake-like flavor that pairs perfectly with the strawberries.
Strawberry Bread Rolls: A Beginner’s Guide to Fluffy, Sweet Perfection
Ingredients
Equipment
Method
- Prepare strawberry filling: dice strawberries and mix with sugar, cornstarch, and lemon juice. Let sit 15–20 minutes, then cook until slightly thickened. Cool completely.
- Warm milk and proof yeast with a pinch of sugar until foamy.
- Mix butter, eggs, vanilla, sugar, lemon zest, and salt into yeast mixture. Gradually add flour until dough forms.
- Knead dough 8–10 minutes until smooth and elastic. Place in greased bowl, cover, and rise 1–1.5 hours until doubled.
- Punch down dough and roll into a 12×16-inch rectangle. Spread cooled filling evenly, roll tightly, and cut into 12 rolls.
- Arrange in greased 9×13-inch pan, cover, and let rise 30–45 minutes until puffy.
- Bake at 350°F (175°C) for 25–30 minutes until golden brown. Cool 10 minutes.
- Whisk powdered sugar, milk, and vanilla into a glaze. Drizzle over warm rolls before serving.
