
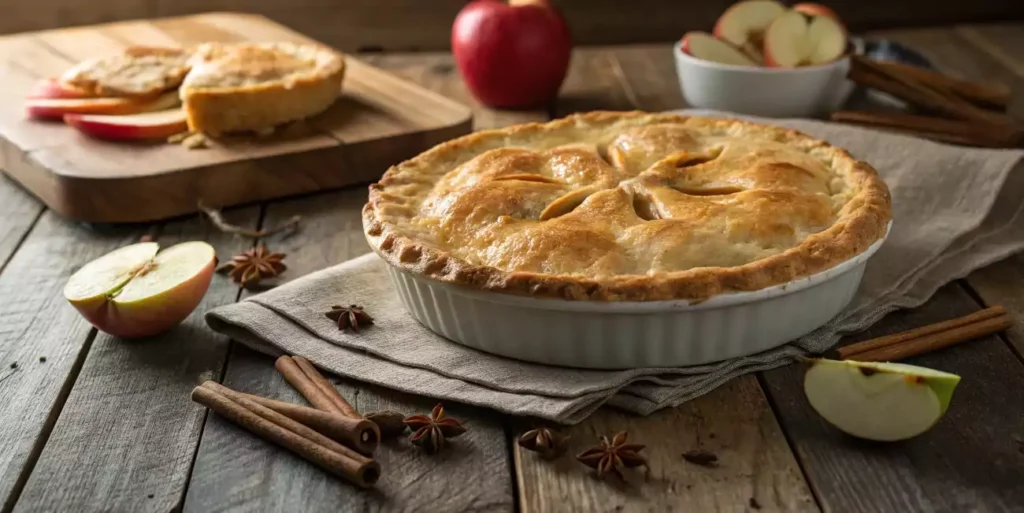
There’s nothing quite like the warm, comforting aroma of a freshly baked Pillsbury Apple Pie Recipe filling your kitchen. Whether it’s for a holiday feast, a weekend treat, or just because you’re craving something sweet, a homemade apple pie always hits the spot. And when you use Pillsbury™ Pie Crust, making the perfect apple pie becomes incredibly easy.
This guide covers everything you need to know about the Pillsbury Apple Pie Recipe. From selecting the best apples to mastering the flaky crust, we’ve got you covered. You’ll learn expert tips, creative variations, and common mistakes to avoid, so you can bake a pie that’s nothing short of perfection.
Now, let’s dive into the first part of our guide!
Table of Contents
Introduction to the Pillsbury Apple Pie Recipe
Pillsbury Apple Pie – A Timeless Dessert Everyone Loves
Apple pie has been a staple of American kitchens for centuries, and for good reason. Its golden, flaky crust and sweet, cinnamon-spiced apple filling make it a dessert that never goes out of style. While making pie from scratch can be intimidating, Pillsbury Pie Crust takes the hassle out of the process, allowing you to focus on flavor and presentation.
Whether you’re a baking pro or a first-time pie maker, this recipe is foolproof. With a few simple ingredients and a little patience, you’ll have a homemade apple pie that rivals any bakery’s.
Why Use Pillsbury Pie Crust?
Baking a pie from scratch typically involves making your own dough—a process that requires precision, patience, and just the right touch to get that perfect flakiness. But why go through all that trouble when Pillsbury Pie Crust does the job effortlessly? Here’s why it’s a game-changer:
- Saves time – No need to mix, knead, and roll out dough from scratch.
- Guaranteed flakiness – The pre-made crust bakes up perfectly every time.
- Easy to use – Just unroll, fill, and bake. No stress, no mess.
- Tastes homemade – Many people can’t even tell the difference!
Overview of This Recipe Guide
This article isn’t just about listing ingredients and instructions. We’re here to help you make the best apple pie possible. Here’s what you’ll find in the next sections:
- A step-by-step recipe to make a classic Pillsbury Apple Pie.
- A guide to choosing the best apples for maximum flavor.
- Pro tips for handling Pillsbury Pie Crust like a baking expert.
- Fun recipe variations, including caramel apple pie and Dutch apple pie.
- Solutions to common pie-making mistakes so you can avoid disaster.
- Storage and serving tips to keep your pie fresh and delicious.
Pillsbury Apple Pie Recipe – Step-by-Step Guide

Nothing beats the taste of a homemade apple pie, and using Pillsbury™ Pie Crust makes it even easier to achieve that perfect flaky texture. This step-by-step guide will walk you through making the Pillsbury Apple Pie Recipe, ensuring a golden crust and a flavorful apple filling every time.
Ingredients for the Perfect Apple Pie
Before you start, gather these ingredients:
Ingredient Quantity Pillsbury™ Refrigerated Pie Crusts 1 box (2 crusts) Thinly sliced apples (Granny Smith, Honeycrisp, or a mix) 6 cups Granulated sugar ¾ cup All-purpose flour 2 tablespoons Ground cinnamon ¾ teaspoon Salt ¼ teaspoon Ground nutmeg ⅛ teaspoon Lemon juice 1 tablespoon Butter, cut into small pieces 1 tablespoon Egg yolk + water (for egg wash) 1 egg yolk + 1 tablespoon water
Step 1: Preparing the Apple Filling
To get that rich, spiced apple flavor, follow these steps:
- In a large mixing bowl, combine the apples, sugar, flour, cinnamon, salt, and nutmeg.
- Drizzle in the lemon juice and mix well. This enhances the flavor and prevents the apples from turning brown.
- Let the filling sit for about 10 minutes. This allows the apples to release their natural juices, creating a more balanced pie filling.
Step 2: Rolling Out the Pillsbury Pie Crust
Using Pillsbury™ Pie Crust simplifies the pie-making process:
- Take the pie crust out of the refrigerator and let it sit for 10-15 minutes at room temperature.
- Unroll one crust and press it gently into a 9-inch pie plate, making sure it fits snugly against the bottom and sides.
- Trim any excess dough hanging over the edge of the plate.
Step 3: Assembling the Pie
Now, it’s time to bring everything together:
- Pour the prepared apple filling into the crust-lined pie plate.
- Dot the filling with small pieces of butter—this enhances the richness of the pie.
- Unroll the second pie crust and place it over the apples. Seal the edges by pinching the crusts together or using a fork to create a decorative edge.
- Cut a few small slits on the top crust to allow steam to escape while baking.
Step 4: Baking Instructions for a Golden Crust
- Preheat your oven to 425°F (220°C).
- Brush the top crust with an egg wash (egg yolk mixed with water) for a glossy, golden finish.
- Bake for 15 minutes at 425°F, then reduce the temperature to 375°F (190°C) and bake for another 35-40 minutes.
- If the edges start to brown too quickly, cover them with aluminum foil or a pie shield.
Step 5: Cooling and Serving Tips
- Once baked, let the pie cool on a wire rack for at least 2 hours before slicing.
- Serve warm with a scoop of vanilla ice cream or a dollop of whipped cream for an extra indulgent treat.
“After enjoying a warm slice of Pillsbury Apple Pie, why not try something savory? Check out this delicious Pepper Lunch Recipe for a sizzling, flavorful meal: Pepper Lunch Recipe!” By Chef Hanna
Best Apples for Pillsbury Apple Pie
One of the biggest factors in making the best apple pie is choosing the right apples. Some apples hold their shape better, while others turn too mushy when baked. The perfect apple pie has a balance of sweetness, tartness, and texture.
Which Apples Work Best?
For the Pillsbury Apple Pie Recipe, use a mix of tart and sweet apples to create depth of flavor:
- Tart apples: Granny Smith, Braeburn, or Northern Spy—these apples add a tangy contrast.
- Sweet apples: Honeycrisp, Fuji, or Golden Delicious—these balance the tartness and add natural sweetness.
A mix of two or more apple varieties creates a rich, complex pie flavor.
Sweet vs. Tart: Finding the Perfect Balance
If you prefer a more tart apple pie, increase the amount of Granny Smith apples and slightly reduce the sugar. For a sweeter pie, use more Honeycrisp or Fuji apples. Adjust the cinnamon and nutmeg to enhance the natural flavors.
Prepping Apples for Maximum Flavor
- Peel and slice apples thinly—about ¼ inch thick—to ensure they cook evenly.
- Toss apples with lemon juice to prevent browning and enhance brightness.
- Let them sit for a few minutes with sugar and spices to draw out excess moisture.
By choosing the best apples and prepping them correctly, you’ll get a perfectly balanced Pillsbury Apple Pie every time!
Tips for a Flaky and Delicious Pillsbury Pie Crust
A perfect apple pie isn’t just about the filling—it’s also about the crust. Pillsbury™ Pie Crust makes baking easier, but there are still a few tricks to ensure a flaky, golden-brown crust.
Should You Pre-Bake the Pillsbury Pie Crust?
For most apple pies, pre-baking (or blind baking) isn’t necessary. The filling’s moisture helps bake the crust evenly. However, if you prefer an extra crispy bottom crust, try this:
- Preheat the oven to 375°F (190°C).
- Line the pie crust with parchment paper and fill it with pie weights or dried beans.
- Bake for 10 minutes, then remove the weights and bake for another 5 minutes.
- Let it cool before adding the apple filling.
Keeping the Crust from Getting Soggy
No one likes a soggy-bottomed pie! To prevent this:
- Brush the bottom crust with an egg wash before adding the filling. This creates a barrier.
- Use a metal or glass pie plate—they conduct heat better than ceramic.
- Bake on the lower oven rack to crisp up the bottom crust faster.
Making a Decorative Lattice Crust
A lattice crust not only looks beautiful but also helps release excess moisture from the apples. Here’s how:
- Cut the second crust into ½-inch strips.
- Lay half of the strips across the pie in one direction.
- Weave the remaining strips over and under to create a crisscross pattern.
- Brush with egg wash and sprinkle with sugar for a golden finish.
Creative Twists on the Classic Pillsbury Apple Pie Recipe

Want to take your Pillsbury Apple Pie Recipe to the next level? Try these creative variations!
Caramel Apple Pie: Adding a Sweet Touch
If you love caramel, this version is a must-try!
- Drizzle caramel sauce over the apple filling before sealing the pie.
- Mix sea salt into the caramel for a sweet-and-salty contrast.
- Serve warm with extra caramel drizzle and a scoop of vanilla ice cream.
Dutch Apple Pie: The Crumbly Alternative
A Dutch apple pie swaps out the top crust for a sweet crumb topping.
- Topping ingredients: 1 cup flour, ½ cup brown sugar, ½ cup butter (softened).
- Mix until crumbly and sprinkle over the apples instead of using a second crust.
- Bake until golden brown for a crunchy, buttery topping.
Mini Apple Pies for Bite-Sized Delights
Perfect for parties, mini apple pies are easy to make!
- Use a muffin tin and cut the Pillsbury pie crust into small circles.
- Press the dough into each cup and fill with apple pie filling.
- Bake at 375°F (190°C) for 20-25 minutes, or until golden brown.
Gluten-Free and Vegan Pillsbury Pie Crust Options
Want to make your pie gluten-free or vegan? Try these tips:
- Pillsbury offers gluten-free pie crusts that bake up just as flaky.
- For a vegan pie, use coconut oil or plant-based butter instead of regular butter.
- Replace the egg wash with almond milk and maple syrup for a golden finish.
With these variations, you can enjoy apple pie in so many delicious ways!
Common Mistakes and How to Avoid Them
Even with an easy-to-follow recipe like the Pillsbury Apple Pie Recipe, mistakes can happen. Here are some common pitfalls and how to fix them.
Overloading the Pie with Apples
It might be tempting to pile in extra apples, but too many can cause:
- The filling to bubble over and make a mess.
- An undercooked center with a soggy bottom crust.
✅ Fix it: Stick to 6 cups of sliced apples for the best balance. If you want a deeper pie, use a deep-dish pie plate instead.
Baking at the Wrong Temperature
If the temperature is too low, your pie won’t bake properly. Too high, and the crust burns before the apples cook through.
✅ Fix it: Start baking at 425°F (220°C) for 15 minutes, then lower to 375°F (190°C) for 35-40 minutes. This method ensures a crisp crust and perfectly tender apples.
Preventing the Crust from Overbrowning
Ever had a pie with a beautiful center but burnt edges? That’s because the outer crust bakes faster.
✅ Fix it: Cover the edges with aluminum foil or a pie shield after the first 15 minutes of baking. This protects them while the rest of the pie bakes evenly.
How to Fix a Runny Apple Pie Filling
A watery filling can ruin even the best pie. This usually happens if:
- The apples weren’t mixed with enough flour or cornstarch.
- The pie was cut before fully cooling.
✅ Fix it: Use 2 tablespoons of flour or cornstarch in your filling. Let the pie cool for at least 2 hours before slicing—it thickens as it sets!
Serving and Storing Your Apple Pie
Once your Pillsbury Apple Pie Recipe is ready, it’s time to enjoy it! But how you serve and store it makes all the difference.
Best Ways to Serve Apple Pie
The beauty of apple pie is its versatility—it’s delicious warm, cold, or at room temperature!
- Warm: Heat a slice in the oven at 300°F for 10 minutes or microwave for 30 seconds.
- Cold: Some people love chilled apple pie for a refreshing twist.
- Room temperature: Perfect for serving guests without reheating.
Pairing Apple Pie with Ice Cream & Whipped Cream
A slice of pie is great on its own, but the right toppings make it even better!
- Vanilla ice cream – A classic, creamy pairing.
- Cinnamon whipped cream – Adds a lightly spiced touch.
- Cheddar cheese – A traditional, savory contrast (trust us, it’s delicious!).
How to Store Leftovers for Freshness
Want to keep your pie fresh for days? Follow these tips:
- Room temperature: Cover loosely with foil and eat within two days.
- Refrigerator: Store in an airtight container for up to five days.
- Freezer: Wrap slices in plastic wrap and foil and freeze for up to three months.
Freezing and Reheating Tips
If freezing, thaw overnight in the fridge. Reheat at 350°F for 15 minutes to restore that fresh-baked taste!
With these tips, you can enjoy Pillsbury Apple Pie anytime!
Frequently Asked Questions (FAQs)
When it comes to making the perfect Pillsbury Apple Pie Recipe, a few common questions pop up. Here are some quick answers to help you out!
Where Did the Apple Pie Recipe Come From?
Apple pie has been around for centuries! While many think of it as an American classic, its origins trace back to Europe. Early apple pie recipes appeared in England and the Netherlands as far back as the 1300s. When European settlers arrived in America, they brought their pie-making skills with them, adapting the recipe to the apples grown in the New World. Today, it’s a staple of American baking!
How Do You Use Pillsbury Pie Dough?
Pillsbury™ Pie Crust makes baking easy because it’s pre-made and ready to use. Simply:
- Let the dough sit at room temperature for 10-15 minutes before unrolling.
- Place one crust in a 9-inch pie pan and press gently into the bottom and sides.
- Fill with apple mixture, then place the second crust on top.
- Crimp the edges, cut small slits in the top, and bake as directed!
What Percentage of People Like Apple Pie?
Apple pie is one of the most loved desserts in the U.S. According to surveys, over 80% of Americans say they love apple pie! It’s often voted the most popular pie, followed closely by pumpkin and pecan.
Is Apple Pie from the Old World?
Yes! Apple pie existed long before America was founded. However, it became a true American classic due to its availability, simplicity, and nostalgic value. Today, it’s a favorite at Thanksgiving, holidays, and everyday desserts.
Conclusion – Why You Should Try the Pillsbury Apple Pie Recipe
If you’ve made it this far, you’re more than ready to bake a delicious Pillsbury Apple Pie Recipe! Whether you’re a beginner or an experienced baker, this recipe is foolproof, easy, and full of flavor.
Why This Recipe Works
- Saves time: Thanks to Pillsbury™ Pie Crust, there’s no need to make dough from scratch.
- Classic flavors: The perfect blend of apples, cinnamon, and sugar.
- Customizable: Try a lattice crust, a crumb topping, or even mini pies!
- Great for any occasion: Whether it’s a holiday, family gathering, or just a cozy night in, apple pie is always a winner.
Final Tips for Success
- Choose the right apples for a balanced flavor.
- Follow the baking temperature guide for a perfectly golden crust.
- Let the pie cool completely to avoid a runny filling.
- Serve with ice cream, whipped cream, or even cheddar cheese for a fun twist!
So what are you waiting for? Preheat your oven and start baking today! Your kitchen will be filled with the irresistible aroma of warm apples and buttery crust in no time.
Enjoy your homemade Pillsbury Apple Pie, and happy baking!