Table of Contents
Introduction
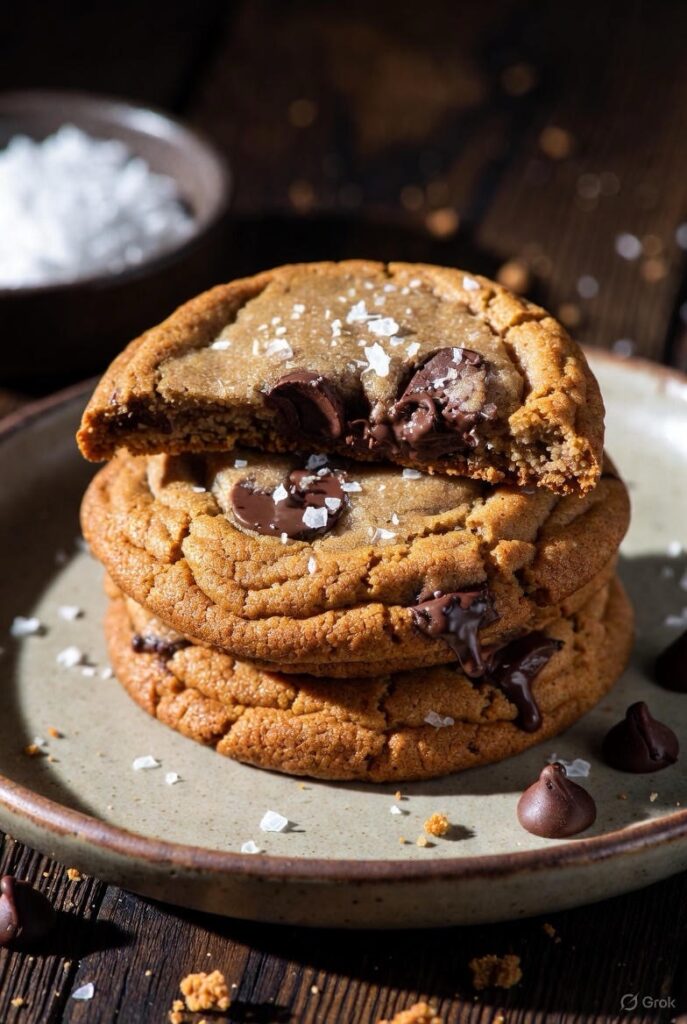
Get ready to meet your new favorite cookie obsession: miso brown butter cookies! These extraordinary cookies combine the nutty, caramelized richness of brown butter with the deep umami flavor of miso paste, creating a sweet and savory masterpiece that’s taken the baking world by storm. With their crispy edges, chewy centers, and complex flavor profile that keeps you reaching for “just one more,” these cookies prove that the best desserts push boundaries.
If you’ve never baked with miso before, prepare to be amazed. This Japanese fermented soybean paste adds incredible depth and a subtle saltiness that perfectly balances the sweetness of the cookie. Combined with nutty brown butter, these cookies deliver a sophisticated flavor that’s impossible to replicate with traditional ingredients. They’re elegant enough for dinner parties yet comforting enough for midnight snacking.
Why Miso and Brown Butter Are a Match Made in Cookie Heaven
The magic of these cookies lies in the combination of two powerhouse ingredients. Brown butter, created by cooking butter until the milk solids caramelize, brings nutty, toffee-like notes that add complexity to any baked good. It’s a simple technique that elevates cookies from good to extraordinary.
Miso paste, a staple in Japanese cuisine, might seem like an unusual addition to cookies, but it’s a secret weapon used by professional pastry chefs worldwide. The fermented soybeans create a savory-sweet depth that enhances other flavors rather than making the cookies taste like miso soup. Think of it like adding a pinch of salt to chocolate chip cookies—it doesn’t make them salty, it makes every other flavor more pronounced.
Together, brown butter and miso create a flavor profile that’s rich, complex, slightly salty, and utterly addictive. The umami from the miso balances the sweetness of the sugar, while the brown butter adds warmth and nuttiness. Add chocolate chips or chunks, and you have a cookie that’s simultaneously familiar and completely unique.
Ingredients for About 24 Cookies

For the brown butter:
- 1 cup (2 sticks or 226g) unsalted butter
- Note: You’ll lose some volume when browning, so start with the full amount
For the cookie dough:
- 2¼ cups (280g) all-purpose flour
- 1 teaspoon baking soda
- ¾ teaspoon salt (reduce to ½ teaspoon if your miso is very salty)
- 2 tablespoons white miso paste (shiro miso)
- ¾ cup (150g) granulated sugar
- ¾ cup (165g) packed light brown sugar
- 2 large eggs, at room temperature
- 2 teaspoons vanilla extract
- 1½ cups (270g) dark or semi-sweet chocolate chips or chunks
- Flaky sea salt for topping (Maldon or fleur de sel)
Optional add-ins:
- ½ cup chopped toasted walnuts or pecans
- White chocolate chips mixed with dark chocolate
- Sesame seeds sprinkled on top before baking
- Crystallized ginger pieces
Detailed Step-by-Step Instructions
Step 1: Brown the Butter (Most Important Step!)
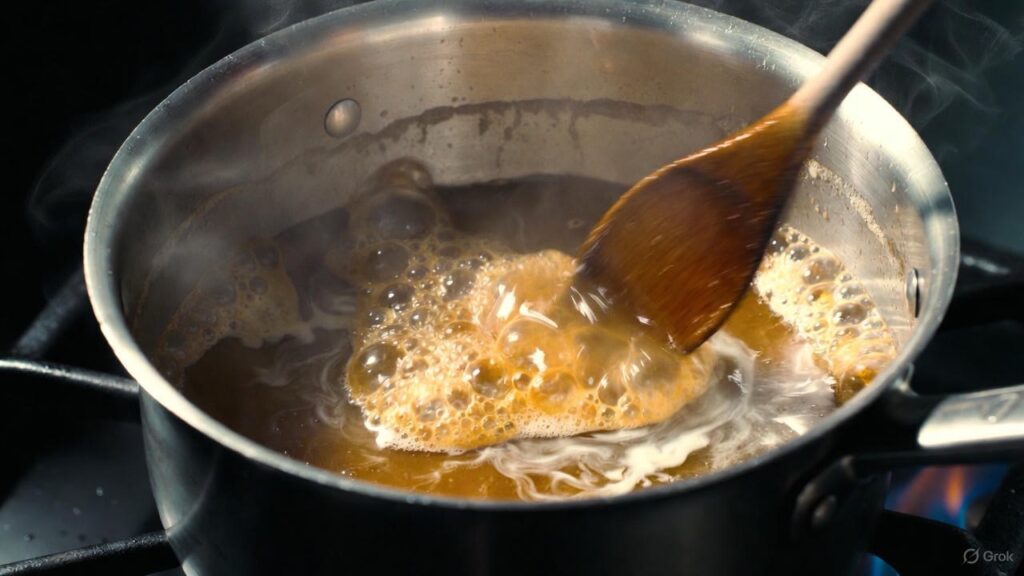
Cut the butter into tablespoon-sized pieces for even melting. Place them in a light-colored saucepan (this helps you see the browning) over medium heat. Let the butter melt completely, then continue cooking, stirring occasionally with a wooden spoon or heat-resistant spatula.
As the butter cooks, it will foam and bubble. Listen for the sizzling sound to quiet down—this indicates the water has evaporated. Watch carefully as the milk solids at the bottom begin to turn golden brown, then amber. You’ll notice a nutty, almost popcorn-like aroma filling your kitchen. This is your signal that the butter is nearly ready.
Once the milk solids turn a rich amber brown (about 5-7 minutes total), immediately remove from heat and pour into a heatproof bowl to stop the cooking process. Let the brown butter cool to room temperature, about 30-45 minutes. You can speed this up by placing the bowl in the refrigerator, stirring occasionally, but don’t let it solidify completely.
Step 2: Mix Dry Ingredients
While the butter cools, whisk together the flour, baking soda, and salt in a medium bowl. Set aside. This simple step ensures even distribution of the leavening agent and prevents pockets of baking soda in your cookies.
Step 3: Cream Miso with Sugars and Butter
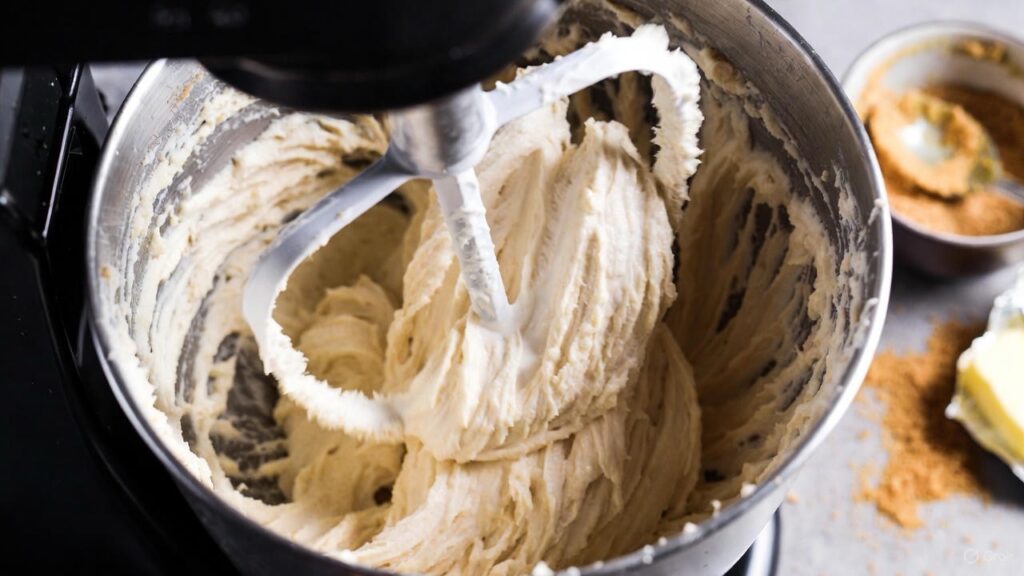
This is where the magic begins. In a large mixing bowl or stand mixer fitted with the paddle attachment, combine the cooled brown butter with both sugars. Add the miso paste. Beat on medium-high speed for 3-4 minutes until the mixture is light, fluffy, and well combined. The miso should be completely incorporated with no visible streaks.
Don’t rush this step—proper creaming creates air pockets that contribute to the cookie’s texture. The mixture should look lighter in color and increased in volume. Scrape down the sides of the bowl as needed to ensure everything is evenly mixed.
Step 4: Add Eggs and Vanilla
Add the eggs one at a time, beating well after each addition. This ensures proper emulsification and creates a smooth dough. Add the vanilla extract and mix until just combined. The mixture may look slightly separated at this point—that’s normal.
Step 5: Incorporate Dry Ingredients
With the mixer on low speed (or mixing by hand with a wooden spoon), gradually add the flour mixture to the wet ingredients. Mix just until no flour streaks remain. Be careful not to overmix, as this can lead to tough cookies. The dough should be thick and slightly sticky.
Step 6: Fold in Chocolate Chips
Using a spatula or wooden spoon, fold in the chocolate chips (and any optional add-ins like nuts). Make sure the chocolate is evenly distributed throughout the dough. At this point, you can taste a tiny bit of the dough to check the sweet-savory balance. If you want more miso flavor, you can add another teaspoon, but remember it intensifies as the cookies bake.
Step 7: Chill the Dough (Don’t Skip This!)
Cover the bowl with plastic wrap and refrigerate for at least 2 hours, or up to 72 hours. Chilling is crucial for several reasons: it allows the flour to fully hydrate, prevents excessive spreading during baking, and lets the flavors meld together. Cold dough also creates thicker cookies with better texture.
For the best flavor and texture, chill the dough for 24 hours. Many bakers swear by this extended rest time, claiming it creates the most flavorful, perfectly textured cookies.
Step 8: Shape and Prepare for Baking
When ready to bake, preheat your oven to 350°F (175°C). Line two baking sheets with parchment paper or silicone baking mats. Remove the dough from the refrigerator and let it sit for 5-10 minutes to make scooping easier.
Using a cookie scoop or spoon, portion the dough into balls about 2 tablespoons each (roughly the size of a golf ball). For extra-impressive cookies, tear each ball in half and press the two halves back together with the rough, torn sides facing up. This creates those coveted craggy edges with more surface area to caramelize.
Place the dough balls on the prepared baking sheets, spacing them about 3 inches apart to allow for spreading.
Step 9: Bake to Perfection
Bake for 11-13 minutes, rotating the pans halfway through baking for even browning. The cookies are done when the edges are golden brown and set, but the centers still look slightly underdone and soft. They may even look a bit pale in the center—this is perfect. The cookies will continue cooking on the hot pan after you remove them from the oven.
For chewier cookies, bake for 11 minutes. For crispier edges with chewy centers, bake for 12-13 minutes. Every oven is different, so watch your first batch carefully and adjust timing as needed.
Step 10: Finish and Cool

Immediately after removing from the oven, while the cookies are still hot, sprinkle each one with a small pinch of flaky sea salt. The contrast between the sweet cookie and the crunchy salt crystals is essential to the recipe’s success.
Let the cookies cool on the baking sheet for 5 minutes. This resting period allows them to set up properly. Then transfer to a wire cooling rack to cool completely, or enjoy them warm with melted chocolate still gooey.
The Science Behind These Amazing Cookies
Understanding why these cookies work so well helps you bake them perfectly every time. Brown butter undergoes the Maillard reaction, the same chemical process that creates flavor in seared steaks and toasted bread. This reaction develops hundreds of new flavor compounds that add complexity and depth.
Miso paste contains naturally occurring glutamates, the same compounds that make foods taste savory and satisfying. These umami flavors enhance sweetness without adding more sugar and create a more dimensional taste experience. The fermentation process also adds subtle tangy notes that brighten the overall flavor.
The combination of two sugars—granulated and brown—serves specific purposes. Granulated sugar promotes spreading and crispy edges, while brown sugar, with its molasses content, adds chewiness and moisture. Together, they create the ideal texture: crispy edges with soft, chewy centers.
Chilling the dough allows the flour to fully absorb the liquid ingredients, resulting in a more flavorful, less cakey cookie. It also solidifies the fat, which slows spreading during baking and creates thicker cookies with better texture contrast.
Troubleshooting Common Issues
Cookies spreading too much: Your butter may have been too warm, the dough wasn’t chilled long enough, or your oven temperature is too low. Ensure the dough is thoroughly chilled and your oven is properly preheated.
Cookies too cakey: You may have added too much flour or overmixed the dough. Measure flour by spooning it into the measuring cup and leveling off, never packing it down.
Can’t taste the miso: White miso is mild, so the flavor is subtle by design. For a more pronounced miso flavor, increase to 3 tablespoons or use yellow miso, which has a stronger taste.
Brown butter burned: This happens quickly! Watch carefully once the butter starts browning and remove from heat as soon as it reaches amber color. A burned butter taste is bitter and can’t be fixed.
Cookies too salty: If using a saltier miso paste (yellow or red), reduce the salt in the recipe to ½ teaspoon. Remember that flaky sea salt on top adds additional saltiness.
Storage and Make-Ahead Tips
Store baked cookies in an airtight container at room temperature for up to 5 days. Place a piece of bread in the container to help maintain moisture and keep cookies soft. For longer storage, freeze baked cookies for up to 3 months in a freezer-safe container or bag.
The cookie dough freezes beautifully for up to 3 months. Scoop the dough into balls, place them on a baking sheet, and freeze until solid. Transfer the frozen dough balls to a freezer bag. Bake directly from frozen, adding 1-2 minutes to the baking time.
For the ultimate convenience, prepare the dough through step 7, portion into balls, and refrigerate for up to 72 hours. Bake fresh cookies whenever you want them—perfect for entertaining or satisfying sudden cookie cravings.
Creative Variations
White Miso Chocolate Chip (Classic)
The original and many people’s favorite. The white miso provides subtle umami without overwhelming the brown butter.
Tahini Swirl Miso Cookies
Swirl 2 tablespoons of tahini into the finished dough for extra nuttiness and a beautiful marbled appearance.
Triple Chocolate Miso
Use a combination of dark, milk, and white chocolate chips for chocolate lovers. The varied sweetness levels play beautifully with the miso.
Miso Butterscotch
Replace chocolate chips with butterscotch chips. The caramel notes complement the miso and brown butter perfectly.
Black Sesame Miso
Add 3 tablespoons black sesame paste and sprinkle cookies with black and white sesame seeds before baking for an elegant, nutty variation.
Spiced Miso Cookies
Add ½ teaspoon ground ginger and ¼ teaspoon cardamom to the dough for a warming, aromatic twist.
Frequently Asked Questions (FAQ)
What type of miso should I use?
White miso (shiro miso) is recommended for its mild, slightly sweet flavor that won’t overpower the cookies. Yellow miso works too but is slightly stronger. Avoid red or dark miso, which is too intense for desserts.
Can I skip browning the butter?
You could, but you’d miss the signature nutty flavor that makes these cookies special. Brown butter is what elevates these from good to extraordinary. It’s worth the extra 10 minutes.
Where can I buy miso paste?
Find it in the refrigerated section of most grocery stores near tofu and Asian ingredients, or in the international aisle. Asian markets carry many varieties. Once opened, it keeps for months in the refrigerator.
Do these cookies taste like miso soup?
No! The miso adds a subtle savory depth and umami that enhances the sweetness without making them taste “Asian” or soup-like. Most people can’t identify miso as the secret ingredient.
Can I use salted butter?
Yes, but reduce the added salt to ¼ teaspoon since salted butter already contains salt. Unsalted butter gives you more control over the final saltiness.
Why do I need to chill the dough?
Chilling prevents excessive spreading, creates thicker cookies, allows flavors to develop, and improves texture. It’s essential for the best results.
How do I know when the cookies are done?
They should look slightly underdone in the center when you remove them from the oven. The edges will be golden and set. They continue cooking on the hot pan.
Can I make these gluten-free?
Yes, substitute with a 1:1 gluten-free flour blend (like Bob’s Red Mill or King Arthur Measure for Measure). The texture may be slightly different but still delicious.
Do I have to use chocolate chips?
Chocolate is highly recommended as it balances the savory miso, but you could try butterscotch chips, white chocolate, or even dried fruit like cherries.
Can I double the recipe?
Absolutely! These cookies are perfect for holiday baking or gifting. The recipe doubles and triples well.
People Also Ask (PAA)
What does miso taste like in cookies?
Miso adds a subtle savory, umami depth that enhances sweetness without tasting salty or soup-like. It creates complexity and keeps the cookies from being one-dimensionally sweet.
Is brown butter worth the effort?
Yes! Brown butter adds irreplaceable nutty, caramelized flavors that regular melted butter cannot provide. It’s a simple technique with dramatic results that elevates any cookie recipe.
How long does brown butter last?
Store cooled brown butter in an airtight container in the refrigerator for up to 2 weeks or freeze for up to 3 months. Bring to room temperature before using in recipes.
Can you taste miso in desserts?
When used correctly, miso in desserts provides depth and umami rather than an identifiable miso flavor. It’s similar to adding salt to enhance chocolate—you don’t taste salt, just better chocolate.
Why add salt to cookies?
Salt enhances all other flavors, provides contrast to sweetness, and creates a more complex, satisfying taste. Flaky sea salt on top adds textural interest and visual appeal.
What makes cookies chewy vs crispy?
More brown sugar and less baking time creates chewier cookies. More granulated sugar and longer baking creates crispier cookies. Chilling dough also promotes chewiness.
Can you freeze cookie dough?
Yes! Cookie dough freezes excellently for up to 3 months. Freeze as scooped balls and bake directly from frozen, adding 1-2 minutes to baking time.
Why do cookies need to cool on the pan?
The residual heat continues cooking the cookies gently, allowing them to set properly. Removing too early can cause them to fall apart or be too soft.
Conclusion
Miso brown butter cookies represent the beautiful evolution of baking—where traditional techniques meet unexpected ingredients to create something truly special. These cookies have earned their viral status for good reason: they deliver a sophisticated flavor profile that surprises and delights with every bite. The combination of nutty brown butter, savory-sweet miso, and rich chocolate creates a cookie that’s impossible to stop eating.
What makes these cookies particularly special is their ability to appeal to both adventurous bakers looking for something new and traditional cookie lovers who appreciate a perfectly executed chocolate chip cookie. The miso doesn’t announce itself loudly; instead, it works quietly in the background, adding depth and preventing the cookies from being cloying or one-dimensional.
For bakers ready to expand their repertoire beyond standard recipes, these cookies offer an accessible entry point into more creative baking. The techniques are straightforward—browning butter is easier than it sounds, and miso requires no special handling. Yet the results taste like they came from a high-end bakery.
Whether you’re baking for a special occasion, bringing treats to a potluck, or simply treating yourself to something extraordinary, these miso brown butter cookies deliver every time. They’re conversation starters, recipe requests waiting to happen, and the kind of cookie that converts skeptics into believers.
Make a batch this week and discover why pastry chefs and home bakers alike are obsessed with this perfect marriage of sweet and savory. Your cookie jar will never be the same—and that’s a very good thing.
Prep Time: 20 minutes (plus browning butter)
Chill Time: 2-24 hours
Bake Time: 12 minutes per batch
Total Time: 2 hours 45 minutes (mostly hands-off)
Yield: About 24 cookies
Difficulty: Intermediate
Cuisine: American-Japanese Fusion
Course: Dessert, Snack
Diet: Vegetarian
Keywords: miso brown butter cookies, brown butter cookies, miso cookies, viral cookie recipe, savory sweet cookies, umami cookies, chocolate chip cookies