Is there anything more satisfying than a smooth, wobbly, delicious jelly dessert? Loved by kids and adults alike, jelly is a timeless treat that brings joy to any occasion. But store-bought options can often be packed with artificial ingredients, excessive sugar, and preservatives.
Homemade jelly is incredibly simple to prepare, healthier, and endlessly customizable. Yes, you heard it right – you can experiment with different flavors, colors, and even shapes to create the perfect jelly dessert at home.
In this guide, we’ll take you through a step-by-step process of making your own homemade jelly that will impress your taste buds and leave your guests asking for more.
Table of Contents
Step 1: Gather Your Ingredients
A Closer Look at Jelly Ingredients
1. Gelatin
Gelatin is the backbone of any jelly dessert, providing its iconic wobbly texture. It’s available in two main forms:
- Powdered Gelatin: Convenient, easy to measure, and widely available.
- Leaf Gelatin: Offers a smoother texture, preferred by many chefs.
If you’re vegan or vegetarian, don’t worry! Options like agar-agar (derived from seaweed) and pectin can also create fabulous jellies without animal-based ingredients.
2. Sugar Alternatives
Classic jelly recipes often call for sugar, but you can create a healthier version by using these alternatives:
- Stevia
- Erythritol
- Monk Fruit Sweetener
These options deliver sweetness without spiking your blood sugar, making your dessert diabetic-friendly.
3. Natural Flavorings
Opt for natural flavorings like fruit purees, citrus zest, or vanilla extract for delightful flavors. While artificial flavorings are tempting for convenience, fresh and natural ingredients elevate your jelly to a whole new level.
Health Benefits of Homemade Jelly
Why go to the effort of making jelly at home? Here are some significant benefits:
- Control Over Ingredients
You decide the sugar content, flavors, and additives, ensuring every ingredient aligns with your dietary preferences.
- Reduced Preservatives
Homemade jelly eliminates unnecessary chemicals found in store-bought versions.
- Customizable Recipes
Create vegan, keto, or diabetic-friendly versions tailored to your or your family’s needs.
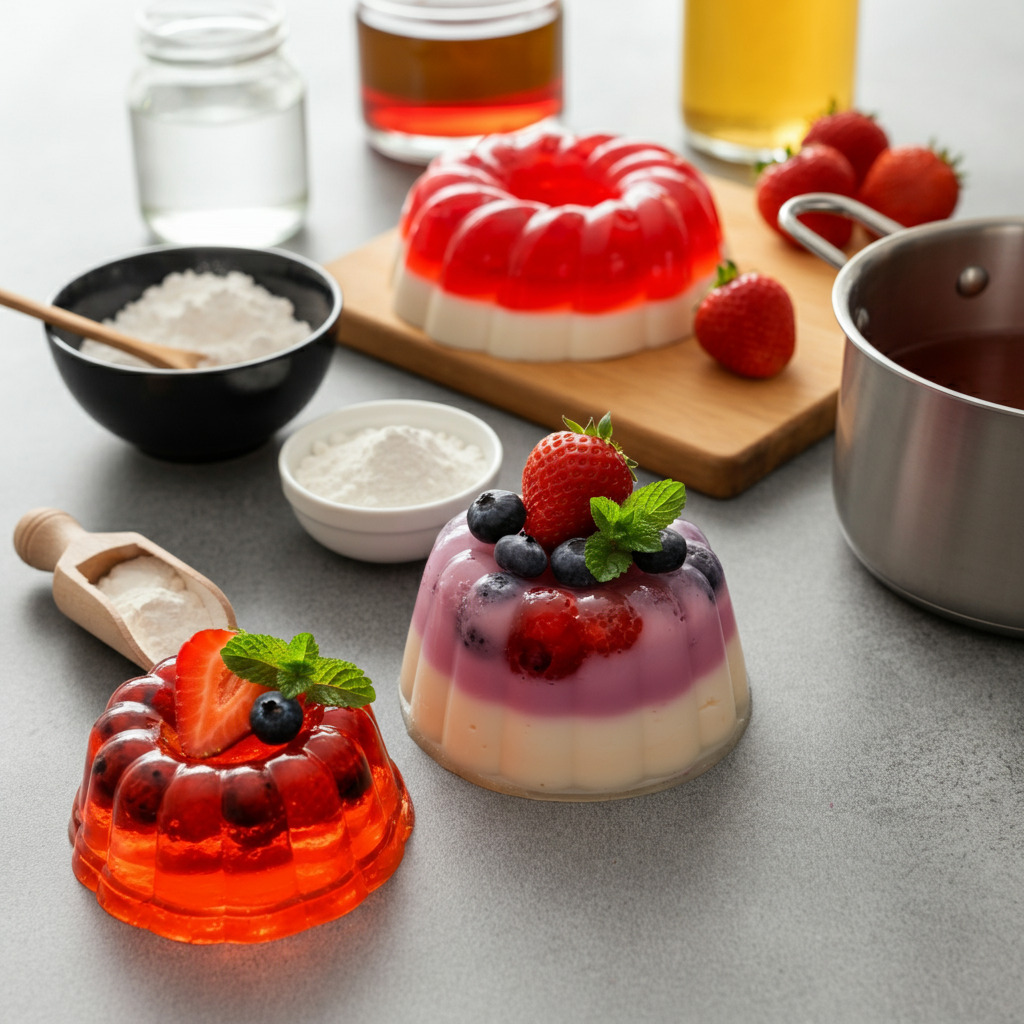
Essential Equipment for Jelly Making
Before we get to the step-by-step guide, ensure you have the following tools on hand:
- Mixing Bowls
- Measuring Cups and Spoons
- Saucepan for heating liquids or dissolving gelatin.
- Molds or Containers for setting your jelly. Silicone molds work wonders for ease of removal.
Step-by-Step Guide to Preparing Jelly
Follow these simple steps for a fail-proof jelly dessert every time:
Step 1. Dissolve Gelatin
Sprinkle gelatin powder over a small amount of cold water or juice in a bowl. Allow it to bloom (absorb liquid) for 5–10 minutes. Then, heat the mixture gently in a saucepan until fully dissolved.
Step 2. Mix Ingredients
Combine your dissolved gelatin with your choice of sweetened liquid (juice, puree, etc.). Stir until evenly blended, and adjust sweetness if necessary.
Step 3. Pour and Chill
Pour the mixture into your prepared molds or containers. Refrigerate for 4–6 hours, or until fully set.
Delightful Flavor Variations
Why stick to classic jelly flavors when you can create unique and mouthwatering combinations?
Fruity Favorites
- Berry Blast: A mix of raspberry, strawberry, and blueberry purees.
- Citrus Delight: Lemon and orange zest paired with fresh juice.
- Tropical Twist: Mango and pineapple puree with a hint of coconut milk.
Creative Combos
- Coffee Jelly: Perfect for coffee lovers, sweetened with a hint of vanilla.
- Chocolate Jelly: A decadent dessert with cocoa, milk, and gelatin.
- Floral Inspiration: Infuse your jelly with lavender, rose water, or hibiscus.
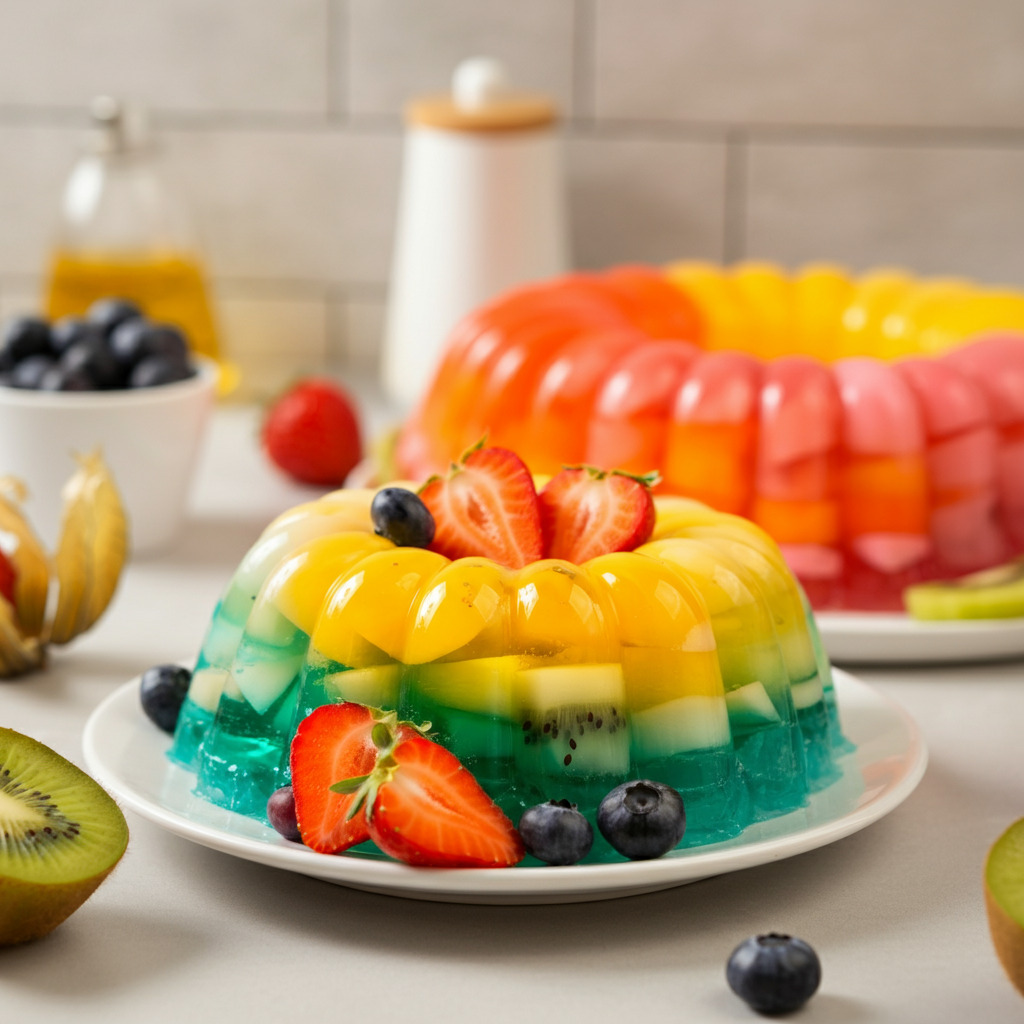
Layered and Swirled Designs
For impressive visuals, create layered jellies by pouring and chilling each layer before adding the next. Swirled designs can be achieved by gently stirring two contrasting colors before chilling.
Tips for Perfect Texture and Setting
- Gelatin-to-Liquid Ratio
Too much gelatin makes your jelly rubbery, while too little can prevent it from setting properly. Stick to the recommended ratio provided on the gelatin package.
- Temperature Control
Never boil gelatin, as it may lose its gelling properties. Heat it gently for best results.
- Troubleshooting
Does your jelly have lumps? Strain the mixture before pouring it into molds. If it hasn’t set, consider placing it back in the fridge or adjusting the ratio next time.
Incorporating Healthy Add-Ins
Take your jelly dessert to the next level by adding nutritious ingredients like:
- Fruits and Berries
Fresh or canned fruits like kiwi, oranges, or berries add bursts of flavor and texture.
- Nuts and Seeds
A sprinkle of crushed almonds or chia seeds adds crunch and nutrients.
- Yogurt or Coconut Milk
For a creamy jelly, incorporate yogurt or non-dairy milk, creating delicious layers or marble effects.
Storage and Shelf Life
Proper refrigeration is key to maintaining the texture and taste of your homemade jelly.
- Storage
Always store jelly in an airtight container in the fridge to prevent it from absorbing odors.
- Shelf Life
Consume your jelly within 5–7 days for optimal freshness.
Why Not Try Jelly as a Low-Sugar Breakfast?
Pair a small serving of jelly with your favorite unsweetened yogurt or overnight chia pudding. It’s a fun, low-sugar way to start your morning and can complement a variety of flavors. Try experimenting with different types of jelly, such as raspberry or peach, to find your perfect pairing.
Conclusion
Making your own jelly at home can be a fun and rewarding experience. By following these simple steps and using quality ingredients, you can create a delicious and versatile dessert that can be enjoyed in a variety of ways.
From traditional jelly desserts to more creative options, the possibilities are endless. So why not try making your own jelly at home and see what delicious creations you can come up with.
Frequently Asked Questions
Is it necessary to add pectin to make jelly?
A: Pectin is not necessary, but it helps the jelly set and achieve the desired consistency. You can also use natural sources of pectin such as apples or citrus fruit.
How long will homemade jelly last?
If stored properly in a sealed jar in the fridge, homemade jelly can last for several months.
Can I use frozen fruit to make jelly?
Yes, you can use frozen fruit to make jelly. Just be sure to thaw and drain the fruit before using it in your recipe. Alternatively, you can cook the frozen fruit with some water to release its juices before straining and using the liquid for your jelly.
Can I use honey or other sweeteners instead of sugar in homemade jelly?
Yes, you can substitute honey, agave nectar, or other liquid sweeteners for sugar in homemade jelly. However, keep in mind that these substitutions may affect the texture and taste of your jelly. It is best to follow a recipe specifically designed for alternative sweeteners to ensure the desired result.