Get ready to discover one of the most brilliant desserts ever created. Brownie Pudding is the magical recipe where you pour hot water over brownie batter (yes, really!), then watch it transform in the oven into a two-layer masterpiece: a cake-like brownie top with thick, molten chocolate pudding sauce underneath. It’s self-saucing genius that looks fancy but is absurdly easy to make.
This classic recipe has been passed down through grandmothers’ recipe boxes for decades, but it deserves to be everywhere right now. The technique seems completely wrong—who pours water over cake batter?—but the results are spectacular every single time. Served warm with vanilla ice cream melting into that pudding sauce? It’s honestly one of life’s greatest simple pleasures.
Whether you need an impressive dessert with minimal effort, want to use pantry staples, or just need an emergency chocolate fix ready in 45 minutes, Brownie Pudding is your answer. Let’s make some magic!
Table of Contents
Why You’ll Love This Recipe
Pure Chocolate Heaven: This is for serious chocolate lovers. It’s intensely chocolatey, deeply fudgy, and unapologetically rich.
The Self-Saucing Magic: The technique is genuinely fascinating—it seems wrong but creates perfect results every single time.
Warm Dessert Perfection: Served warm from the oven with ice cream, this is peak comfort food. The contrast of hot and cold is incredible.
Easier Than It Looks: Despite seeming fancy and complex, this uses basic pantry ingredients and simple techniques. No mixer required!
No Frosting Needed: The pudding sauce underneath IS the frosting/sauce. It’s built right in!
Makes Its Own Sauce: Unlike regular brownies where you might add chocolate sauce, this dessert creates its own thick, fudgy sauce as it bakes.
Perfect Texture Contrast: Cake-like top, gooey middle, molten bottom. Three incredible textures in one dessert.
Crowd-Pleaser: I’ve never met anyone who didn’t love this. It’s universally adored by chocolate fans.
Serves a Crowd: One pan easily serves 8-12 people, making it perfect for gatherings.
Pantry-Friendly: Uses basic ingredients you probably already have—no special trips to the store required.
Impressive Presentation: When you scoop it and reveal that hidden pudding sauce, people are amazed every single time.
Ingredients You’ll Need
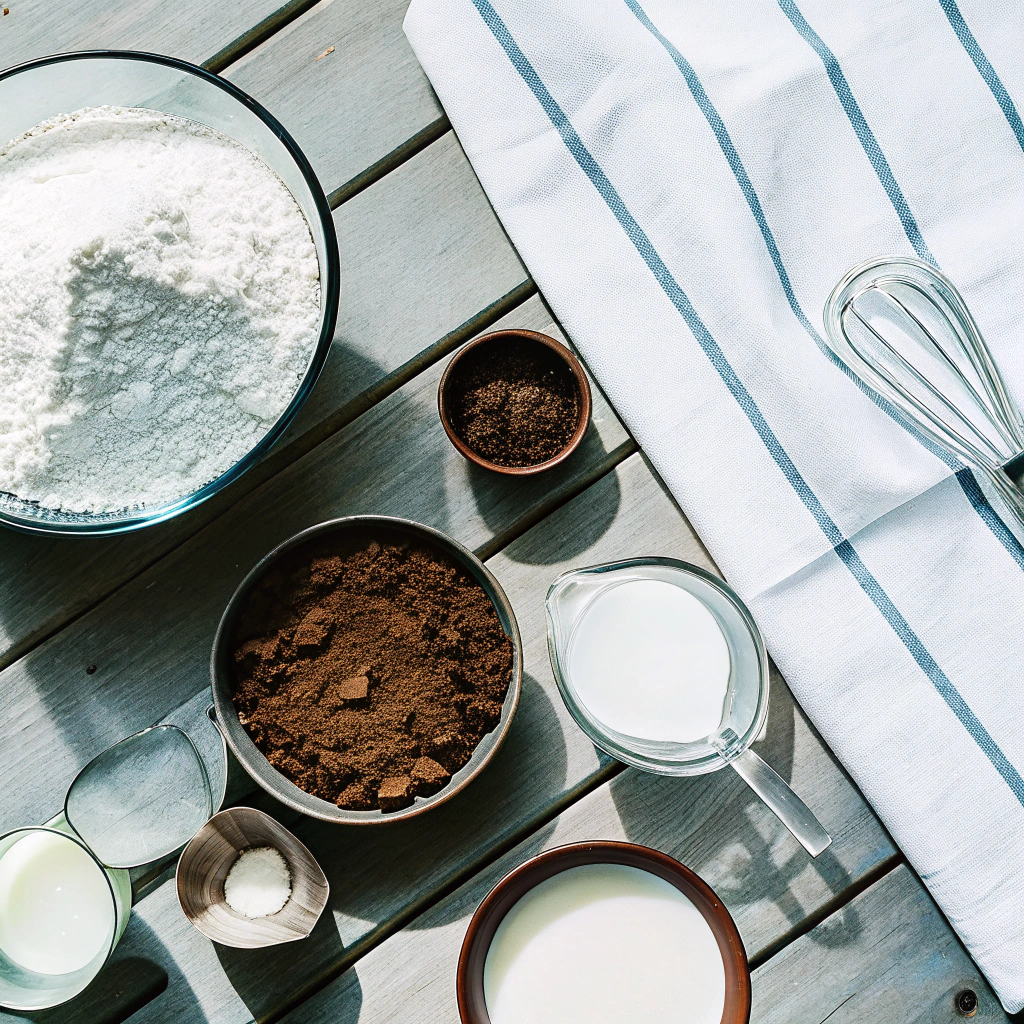
For the Brownie Batter:
- 1 cup all-purpose flour – Provides structure for the brownie top
- 3/4 cup granulated sugar – Sweetens the brownie layer
- 2 tablespoons unsweetened cocoa powder – First layer of chocolate flavor
- 2 teaspoons baking powder – Helps the batter rise to create the cake layer
- 1/2 teaspoon salt – Enhances the chocolate flavor
- 1/2 cup whole milk – Creates moisture and tenderness
- 2 tablespoons melted butter – Adds richness and helps bind
- 1 teaspoon vanilla extract – Essential for depth of flavor
- 1/2 cup semi-sweet chocolate chips (optional) – Extra chocolate pockets throughout
For the Pudding Layer (Topping):
- 1 cup packed brown sugar – Creates the rich, molasses-flavored sauce
- 1/4 cup unsweetened cocoa powder – Intensifies the chocolate flavor
- Pinch of salt – Balances sweetness
- 1 3/4 cups hot water or hot coffee – The “magic” ingredient that creates the sauce (coffee enhances chocolate flavor!)
For Serving:
- Vanilla ice cream – Absolutely essential, non-negotiable
- Whipped cream – Alternative or addition to ice cream
- Fresh berries – Raspberries work especially well
- Chocolate shavings – For extra presentation
- Flaky sea salt – A tiny pinch on top is chef’s kiss
Optional Flavor Variations:
- 1/2 teaspoon espresso powder – Intensifies chocolate flavor
- 1/4 teaspoon cinnamon – Adds warmth
- 2 tablespoons peanut butter – Swirled into batter
- 1/2 cup chopped nuts – Walnuts or pecans
- Peppermint extract – Replace vanilla for mint chocolate version
Equipment You’ll Need
- 9×9-inch baking dish (or 8×8-inch for thicker pudding)
- Medium mixing bowl
- Small bowl for topping mixture
- Whisk
- Measuring cups and spoons
- Rubber spatula
- Oven mitts
- Ice cream scoop (for serving!)
Step-by-Step Instructions
Step 1: Prep Your Oven and Pan
Preheat your oven to 350°F (175°C). Lightly grease a 9×9-inch baking dish with butter or non-stick spray.
Pro tip: Don’t skip greasing the pan! While the pudding is self-saucing, you still want easy serving and cleanup.
Step 2: Make the Brownie Batter
In a medium bowl, whisk together the flour, granulated sugar, 2 tablespoons cocoa powder, baking powder, and salt until well combined and no lumps remain.
Add the milk, melted butter, and vanilla extract. Stir with a wooden spoon or spatula until just combined—a few small lumps are fine! Don’t overmix or your brownie top will be tough.
If using chocolate chips, fold them in now.
The secret: This batter will be quite thick, almost like a thick cake batter. That’s exactly what you want!
Step 3: Spread Batter in Pan
Pour the brownie batter into your prepared baking dish. Use a spatula to spread it evenly across the bottom. It might seem like not much batter, but trust the process—it will rise as it bakes!
Important: Make sure the batter is spread in an even layer for consistent baking.
Step 4: Make the Pudding Topping (The Magic Part!)
In a small bowl, whisk together the brown sugar, 1/4 cup cocoa powder, and a pinch of salt. This dry mixture will seem like way too much to sprinkle on top, but use it all!
Evenly sprinkle this brown sugar-cocoa mixture over the brownie batter in the pan. Cover the entire surface—don’t leave any batter exposed.
This seems weird, right? Stay with me. The magic is about to happen!
Step 5: Pour Hot Water Over Everything (Trust the Process!)
Here’s where you need to trust the process completely. Heat 1 3/4 cups of water until very hot (or brew 1 3/4 cups of hot coffee if you want extra chocolate intensity).
Slowly and gently pour the hot liquid evenly over the entire surface of the brown sugar mixture. Do NOT stir! Do NOT mix! Just pour it over the top.
Critical: The water will look like it’s sitting on top doing nothing. This is correct! Do not stir or disturb it!
Why this works: As it bakes, the batter will rise through the liquid to create a cake layer on top, while the liquid underneath combines with the sugar and cocoa to create that molten pudding sauce. It’s kitchen chemistry at its finest!
Step 6: Bake Until Magic Happens
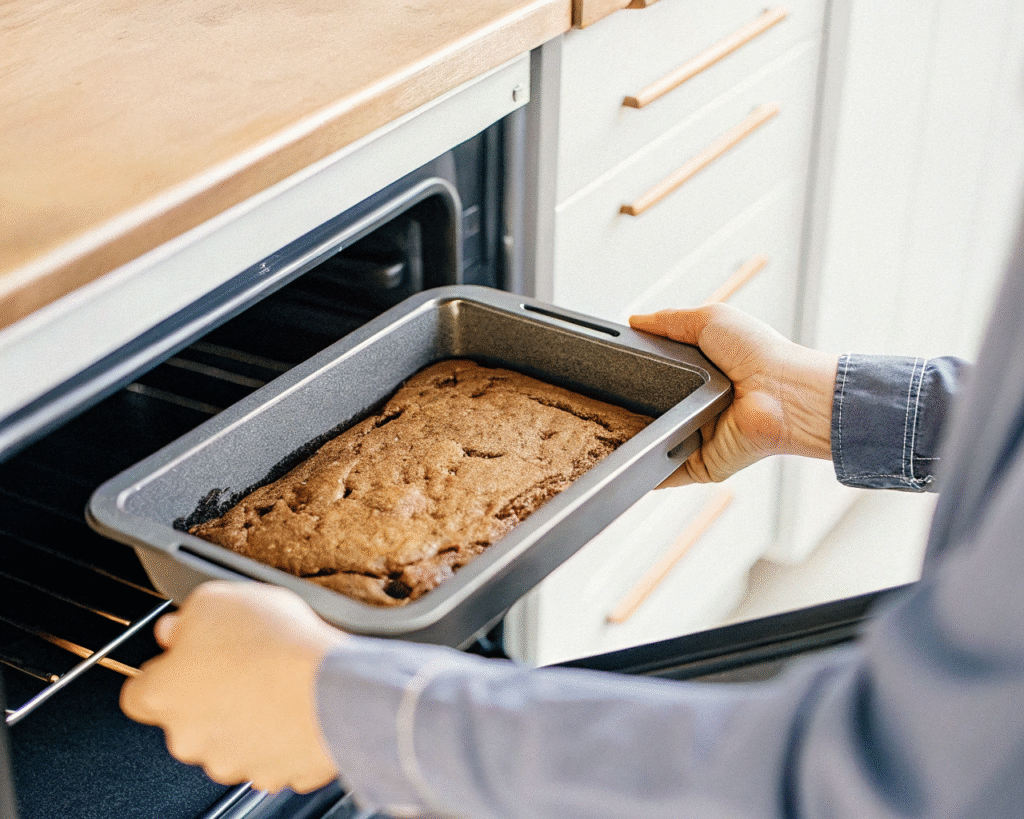
Carefully transfer the baking dish to the preheated oven. Bake for 35-40 minutes.
What to look for: The top should be set and look like a brownie cake. It might crack slightly—that’s fine! The edges will pull away from the pan slightly, and when you gently shake the pan, the center should jiggle just a little (that’s the pudding underneath!).
Don’t overbake: If you bake too long, you’ll have less pudding sauce. The top should be set but the inside should still be very gooey.
Step 7: Let It Rest (The Hardest Part!)
Remove from the oven and let it cool for 10-15 minutes. I know this is torture when it smells so amazing, but this rest time allows the pudding sauce to thicken slightly and makes it easier to serve.
Important: It will still be very hot inside! The pudding sauce will be molten lava-hot, so the cooling time is also a safety measure.
Step 8: Serve and Reveal the Magic
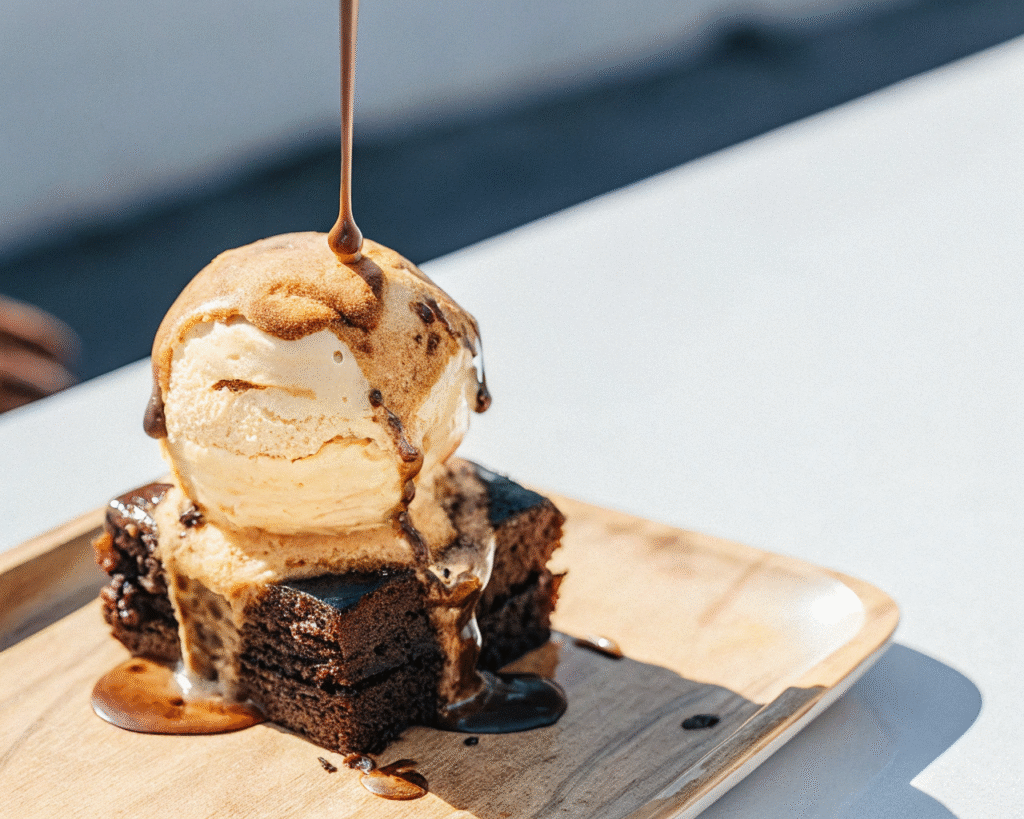
To serve, use a large spoon to scoop portions into bowls. Make sure to scoop all the way to the bottom to get both the brownie cake and the thick pudding sauce underneath.
The reveal: As you scoop, that gorgeous dark chocolate pudding sauce will pool at the bottom of each bowl. This is the “wow” moment!
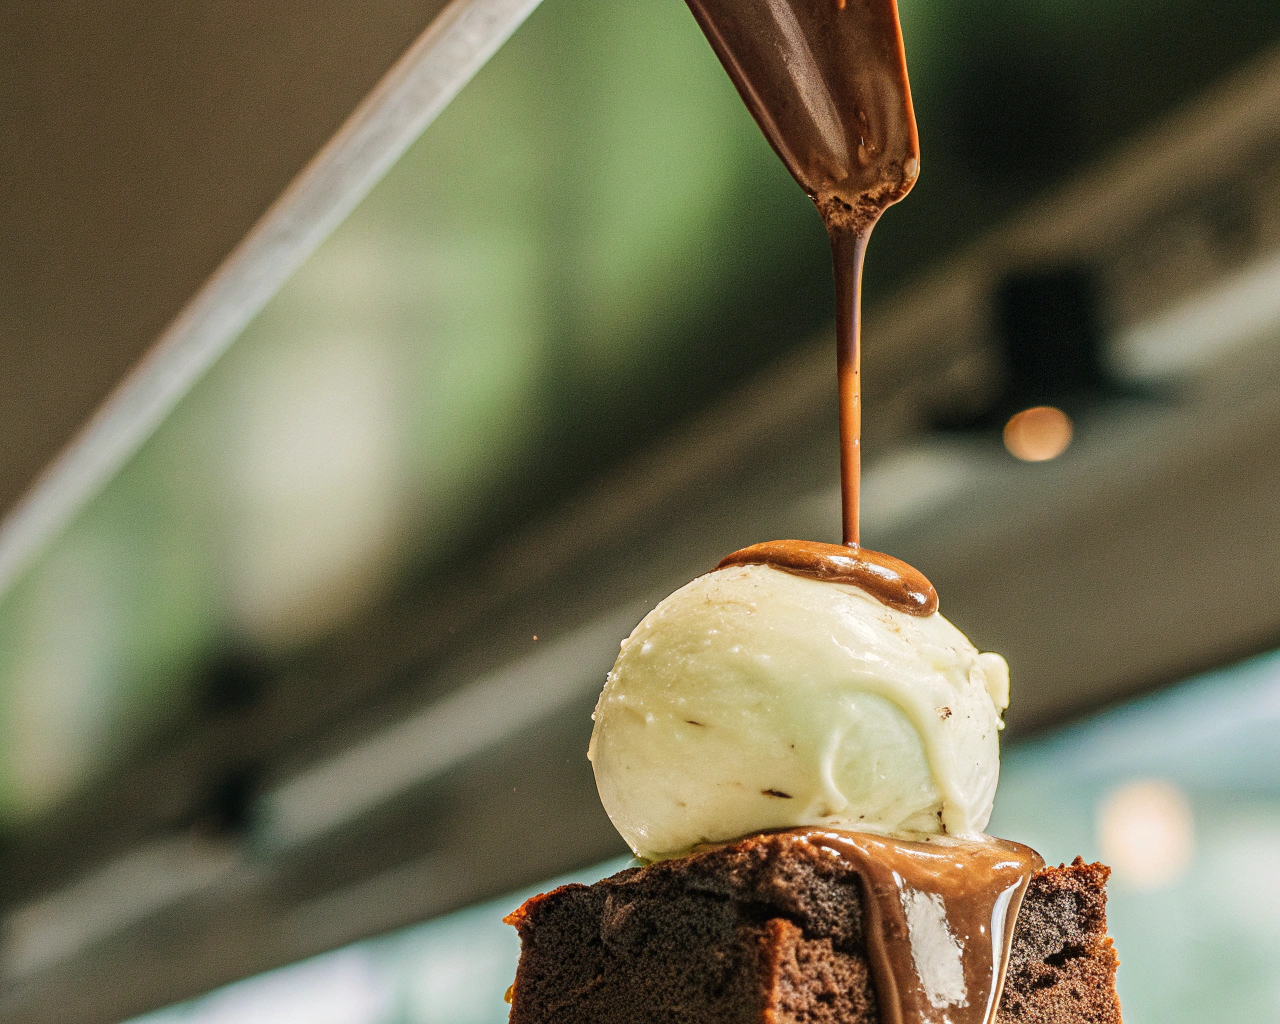
Top immediately with a generous scoop of vanilla ice cream. The ice cream will start melting into the hot pudding sauce, creating an incredible hot-cold contrast.
Chef’s tip: Serve in shallow bowls rather than on plates so the sauce doesn’t run everywhere.
Expert Tips for Perfect Brownie Pudding
Use Hot (Not Warm) Liquid: The water or coffee needs to be genuinely hot—not lukewarm. Hot liquid is essential for the chemistry to work properly.
Coffee Enhances Chocolate: Even if you don’t taste coffee, it dramatically intensifies the chocolate flavor. Highly recommended!
Don’t Stir After Adding Liquid: This is crucial! When you pour the hot water over the top, resist the urge to mix. The magic happens during baking.
Pan Size Matters: A 9×9-inch pan is ideal. An 8×8-inch will be thicker and gooier (more pudding ratio). A 9×13-inch will be thinner with less sauce.
Check for Doneness Carefully: The top should look set and cake-like, but the center will jiggle when gently shaken. That jiggle is your pudding sauce!
Serve It Warm: This dessert is meant to be enjoyed warm from the oven. Reheating is fine, but nothing beats that first serving.
The Pudding Thickens as It Cools: Right out of the oven, the sauce is quite liquidy. After 10-15 minutes, it thickens to a perfect pudding consistency.
Ice Cream is Non-Negotiable: The cold vanilla ice cream melting into hot chocolate pudding is what makes this dessert transcendent. Don’t skip it!
Leftovers Reheat Beautifully: Microwave individual portions for 20-30 seconds to restore that warm, gooey texture.
Double the Recipe for a Crowd: This doubles perfectly in a 9×13-inch pan. Just add 5-10 minutes to the baking time.
Delicious Variations to Try
Peanut Butter Brownie Pudding
Swirl 1/4 cup peanut butter into the brownie batter before spreading in the pan. Chocolate + PB heaven!
Mexican Chocolate Version
Add 1 teaspoon cinnamon and 1/4 teaspoon cayenne pepper to the batter for a spicy kick.
Mint Chocolate Pudding
Replace vanilla extract with peppermint extract. Top with crushed peppermint candies or Andes mints.
S’mores Brownie Pudding
Add 1/2 cup mini marshmallows and 1/2 cup graham cracker pieces to the batter. Top with more marshmallows in the last 5 minutes of baking.
Triple Chocolate
Use chocolate milk instead of regular milk, add chocolate chips to the batter, and top with chocolate shavings when serving.
Salted Caramel Version
Drizzle caramel sauce over each serving and sprinkle with flaky sea salt. The sweet-salty combo is incredible.
Raspberry Chocolate
Add 1 cup fresh or frozen raspberries to the batter. The tartness balances the richness perfectly.
Nutella Swirl
Dollop spoonfuls of Nutella over the batter before adding the topping. Swirl gently with a knife.
Espresso Chocolate
Add 2 tablespoons espresso powder to the pudding topping for an intense mocha flavor.
Gluten-Free Version
Replace all-purpose flour with 1:1 gluten-free flour blend. Works perfectly!
Storage and Reheating
Room Temperature: Cover and store at room temperature for up to 2 days. The pudding sauce will thicken and become more fudge-like at room temp.
Refrigerator: Cover tightly and refrigerate for up to 5 days. The texture changes slightly (becomes more fudgy, less pudding-like) but it’s still delicious.
Freezer: This doesn’t freeze particularly well due to the pudding sauce, but if you must, freeze portions for up to 1 month. Thaw in fridge and reheat.
Reheating Methods:
- Microwave (best): Individual portions for 20-30 seconds until warm and gooey
- Oven: Cover with foil and reheat at 325°F for 10-15 minutes
- Stovetop: Not recommended—the pudding can separate
Serving Leftovers: Leftover brownie pudding is delicious cold as a thick, fudgy dessert. The pudding sauce firms up into almost a truffle-like consistency when chilled!
Pro tip: Reheat individual portions with a splash of milk or cream to restore some of that molten pudding texture.
Serving Suggestions
This dessert is perfect for so many occasions:
Dinner Parties: Makes a big batch, looks impressive when you scoop and reveal the sauce, and can be made ahead.
Potlucks: Transport in the baking dish, reheat briefly before serving if needed. Always a hit!
Holiday Gatherings: Serves a crowd and feels special enough for Thanksgiving, Christmas, or Easter.
Weeknight Treat: Simple enough to make on a Tuesday when you need chocolate therapy.
Date Night Dessert: Romantic chocolate dessert that’s easy to share. Serve in one bowl with two spoons!
Comfort Food Night: The ultimate cozy, warm, chocolatey comfort food.
What to Serve With:
- Vanilla ice cream (essential!)
- Whipped cream (fresh is best)
- Caramel sauce drizzle
- Fresh raspberries or strawberries
- Coffee or espresso
- Milk (especially for kids!)
- Hot fudge sauce (for chocolate overload)
Troubleshooting Common Issues
Not enough pudding sauce: You may have overbaked it. Next time, remove it when the top is just set and the center still jiggles.
Too much liquid, not enough cake: The liquid wasn’t hot enough, or your oven temperature is too low. Use very hot water and verify oven temp with a thermometer.
Pudding sauce is thin: It needs more cooling time. Let it sit for 15-20 minutes—it thickens as it cools.
Top is burning: Your oven is too hot. Reduce temperature to 325°F and bake longer. Consider tenting with foil for the last 10 minutes.
Cake layer sank: You may have stirred after adding the liquid, or the batter wasn’t spread evenly. Remember: don’t stir after pouring the hot water!
Too sweet: Add a pinch of salt to the batter next time, and make sure to use unsweetened cocoa powder, not sweetened.
Not chocolatey enough: Use coffee instead of water, add espresso powder, increase cocoa powder by 1 tablespoon, or use dark cocoa.
Dry cake layer: You overbaked it. The top should be set but still soft, not dry or hard.
Uneven pudding distribution: Make sure the brownie batter is spread evenly, and pour the hot liquid slowly and evenly over the entire surface.
Frequently Asked Questions
Can I use coffee instead of water?
Yes! Coffee enhances chocolate flavor dramatically. Use hot brewed coffee—even decaf works great.
Why do you pour water over the batter?
It seems counterintuitive, but this is the magic! The batter rises through the liquid during baking, creating the two layers.
Can I make this ahead?
You can make it several hours ahead and reheat before serving. It’s actually best served warm and fresh, though.
Is this like lava cake?
Similar concept (gooey center) but different technique and texture. Brownie pudding is more homestyle and has more sauce.
Can I double this recipe?
Absolutely! Use a 9×13-inch pan and add about 10 minutes to the baking time.
Why is my pudding watery?
It needs more cooling time, or it was underbaked. The pudding thickens significantly as it cools.
Can I use Dutch-process cocoa?
Yes, either regular or Dutch-process cocoa works fine in this recipe.
Do I really need ice cream?
Technically no, but the hot-cold contrast is what makes this dessert truly special. Highly recommended!
Can I make this gluten-free?
Yes! Use a 1:1 gluten-free flour blend. The texture is nearly identical.
How do I know when it’s done?
The top should look like a set brownie cake. When you gently shake the pan, you’ll see/feel jiggling underneath—that’s your pudding!
Nutritional Information
Per Serving (1/9 of recipe, without ice cream):
- Calories: 285
- Total Fat: 4g
- Saturated Fat: 2g
- Cholesterol: 8mg
- Sodium: 220mg
- Total Carbohydrates: 61g
- Dietary Fiber: 2g
- Sugars: 46g
- Protein: 3g
Key Nutrients:
- Iron: 10% DV
- Calcium: 6% DV
- Potassium: 4% DV
Notes:
- This is a rich, indulgent dessert meant for special occasions
- Adding ice cream adds approximately 150-200 calories per serving
- The pudding sauce contributes most of the sugar content
- Relatively low in fat compared to many chocolate desserts
- Best enjoyed in moderation as a treat!
Why This Recipe Works
The magic of Brownie Pudding lies in brilliant kitchen science:
Density Differences: The brownie batter is denser than the hot liquid. During baking, the batter rises through the water to create the top layer.
Gelatinization: As the flour in the batter heats, it absorbs moisture and gelatinizes, creating structure in the cake layer while leaving liquid below.
Sugar Dissolution: The brown sugar and cocoa in the “topping” dissolve into the hot water during baking, creating a thick, sweet sauce.
Steam Creation: The hot water creates steam as it bakes, which helps cook the batter from below while the oven heat cooks from above.
The Coffee Effect: Coffee contains compounds that enhance chocolate flavor perception. Even people who hate coffee love chocolate with coffee—they just don’t know it’s there!
Temperature Contrast: Serving hot pudding with cold ice cream creates sensory contrast that’s incredibly satisfying and makes both elements taste better.
Self-Saucing Magic: The technique eliminates the need to make a separate sauce—it creates its own as it bakes, saving time and dishes.
The Final Scoop
This Brownie Pudding is one of those magical recipes that seems too good to be true but delivers every single time. The technique looks weird (pouring water over brownie batter?!), the process seems suspicious (don’t stir?!), but the results are absolutely spectacular—a two-layer chocolate masterpiece that’s part cake, part pudding, all delicious.
What makes this dessert so special is that combination of simplicity and wow factor. You use basic pantry ingredients and one bowl, yet you create something that looks and tastes like you spent hours on a complicated recipe. The moment you scoop into it and reveal that hidden pudding sauce, people are genuinely amazed.
Whether you’re serving this at a dinner party, bringing it to a potluck, making it for a cozy night in, or just desperately need a chocolate fix, Brownie Pudding delivers. Top it with vanilla ice cream and watch the magic happen as the cold cream melts into that hot, fudgy sauce.
This is the kind of recipe you’ll make again and again, the one you’ll pass down to your kids, the one people will specifically request. It’s a true classic that deserves its place in every chocolate lover’s repertoire.
Happy baking, and enjoy every warm, gooey, chocolate-pudding-sauced bite! 🍫✨🍨
Yields: 9-12 servings
Prep Time: 10 minutes
Bake Time: 35-40 minutes
Total Time: 45-55 minutes
Difficulty: Easy
Voilà ! L’article complet avec une intro beaucoup plus courte et directe ! 🍫✨