Table of Contents
Introduction
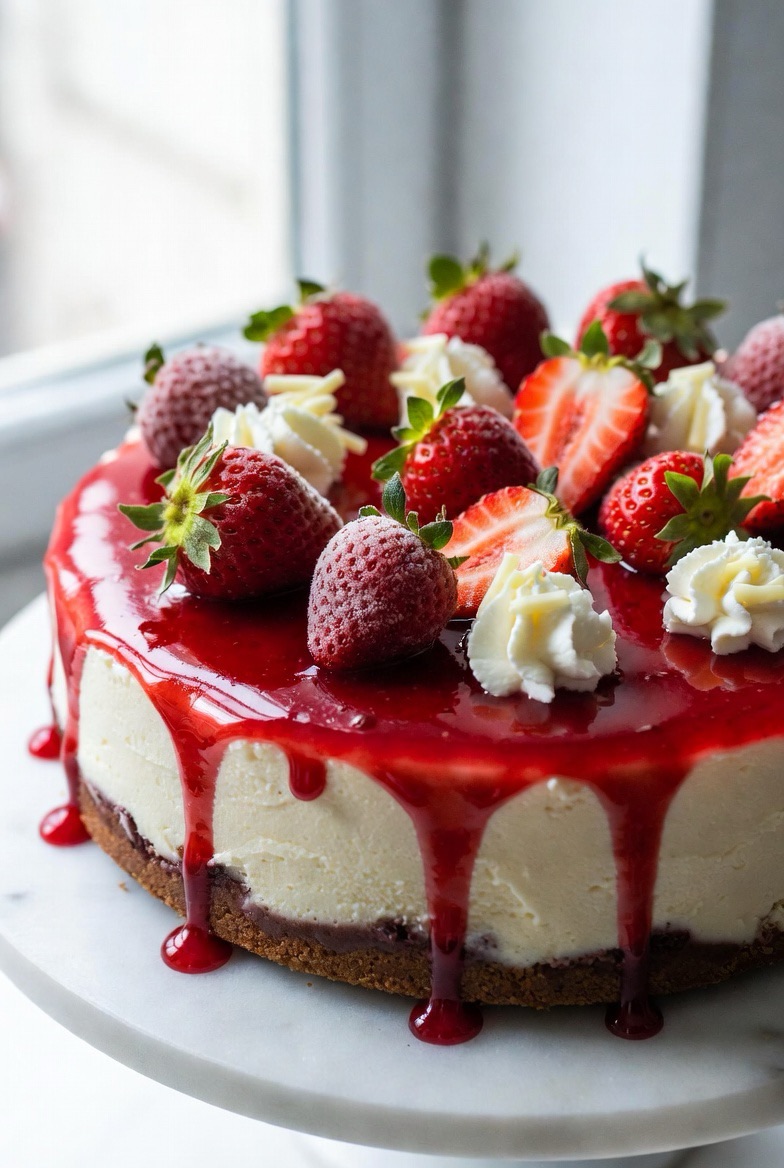
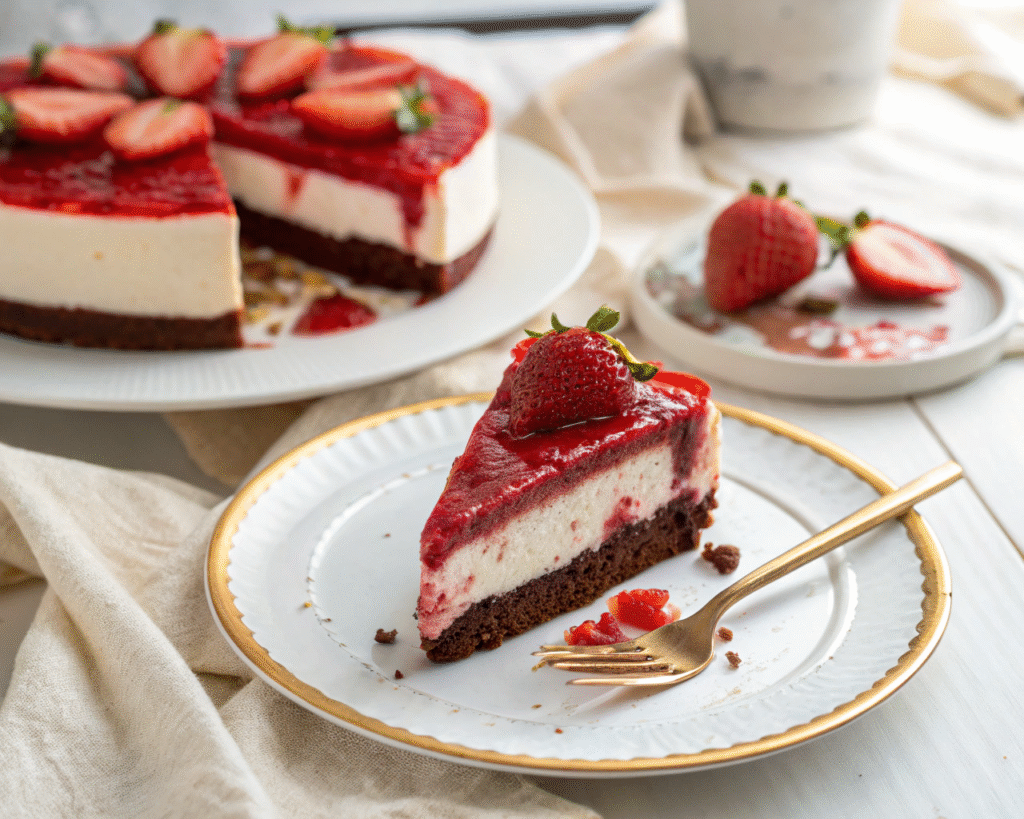
Get ready to create the dessert that stops conversations and captures hearts: Strawberry Red Velvet Cheesecake! This jaw-dropping masterpiece combines three beloved desserts into one spectacular creation—rich red velvet cake, creamy cheesecake, and fresh strawberry glaze, all layered into gorgeous crimson-and-cream perfection. Each slice reveals stunning layers: a dark chocolate cookie crust, vibrant red velvet cake layer, silky white cheesecake filling, and a glossy strawberry glaze crowned with fresh berries. It’s the kind of dessert that makes people pull out their phones before taking the first bite.
What makes Strawberry Red Velvet Cheesecake absolutely irresistible is the brilliant combination of textures and flavors. The slight cocoa richness of red velvet pairs beautifully with tangy cream cheese, while fresh strawberries add bright, fruity freshness that cuts through the richness. Unlike traditional cheesecakes that can feel heavy, the red velvet layer adds a tender, cake-like element that creates perfect balance. And visually? Those vibrant red and pristine white layers create a color contrast that’s absolutely Instagram-worthy.
Whether you’re celebrating Valentine’s Day, an anniversary, a bridal shower, or simply want to create something extraordinary, this Strawberry Red Velvet Cheesecake delivers on every level. The technique is surprisingly straightforward—no complicated tempering or tricky assembly—and the results are consistently spectacular. Let’s create this showstopper together!
Why Strawberry Red Velvet Cheesecake is the Ultimate Hybrid Dessert
Red velvet and cheesecake are both crowd-pleasers on their own, but together they create something even more magical. The red velvet layer provides that signature subtle chocolate flavor with its distinctive tender crumb, while the cheesecake adds luxurious creaminess. The strawberry component ties everything together with fresh, fruity brightness that prevents the dessert from being too rich.
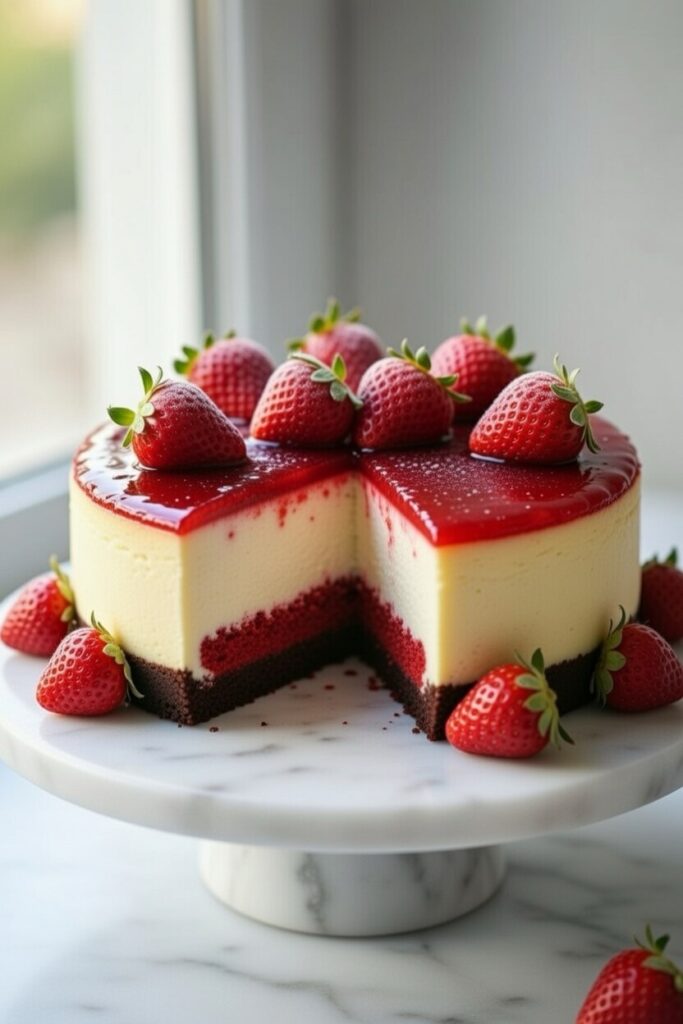
The layered presentation is what really sets this dessert apart. Unlike swirled or marbled cheesecakes, these distinct layers create visual drama when you slice into it. The crimson red velvet against pristine white cheesecake, topped with jewel-toned strawberry glaze—it’s a feast for the eyes before it ever touches your lips.
This dessert also solves some common baking challenges. Red velvet cake can sometimes be dry when made on its own, but incorporating it as a layer with cream cheese keeps it moist and tender. Traditional cheesecakes can crack or be temperamental, but this version is forgiving and less prone to surface imperfections since it’s topped with glaze and berries anyway.
The flavor combination is both nostalgic and sophisticated. Red velvet reminds us of special occasion cakes, cream cheese brings comfort and richness, and fresh strawberries add elegance and freshness. It’s fancy enough for the most formal celebrations yet approachable enough that everyone from kids to grandparents will love it.
Essential Ingredients for Strawberry Red Velvet Cheesecake (12 Servings)

For the chocolate cookie crust:
- 2 cups (200g) chocolate cookie crumbs (about 24 Oreos, filling removed, or chocolate graham crackers)
- 6 tablespoons (85g) unsalted butter, melted
- 2 tablespoons (25g) granulated sugar
- Pinch of salt
For the red velvet layer:
- 1½ cups (150g) red velvet cake crumbs (from prepared red velvet cake or box mix)
- ½ cup (120g) cream cheese, softened
- ¼ cup (60ml) strawberry purée (fresh or frozen strawberries blended)
- 2 tablespoons (30ml) milk, if needed for consistency
For the classic cheesecake layer:
- 24 oz (680g) cream cheese, full-fat, at room temperature (three 8-oz blocks)
- ⅔ cup (135g) granulated sugar
- 3 large eggs, at room temperature
- 2 teaspoons vanilla extract
- ½ cup (120ml) heavy cream or sour cream
- 2 tablespoons (15g) all-purpose flour (optional, for extra stability)
For the strawberry glaze and topping:
- 2 cups (300g) fresh strawberries, divided
- ¼ cup (50g) granulated sugar
- 1 tablespoon fresh lemon juice
- 1 tablespoon cornstarch mixed with 2 tablespoons water
- 1 teaspoon vanilla extract
- Additional whole fresh strawberries for decoration
Optional garnish:
- Whipped cream rosettes
- White chocolate shavings
- Fresh mint leaves
- Powdered sugar for dusting
Detailed Step-by-Step Instructions
Step 1: Prepare Pan and Make Red Velvet Cake
Preheat oven to 325°F (165°C). Wrap the outside of a 9-inch springform pan tightly with heavy-duty aluminum foil to prevent leaks. Grease the inside lightly with butter or cooking spray.
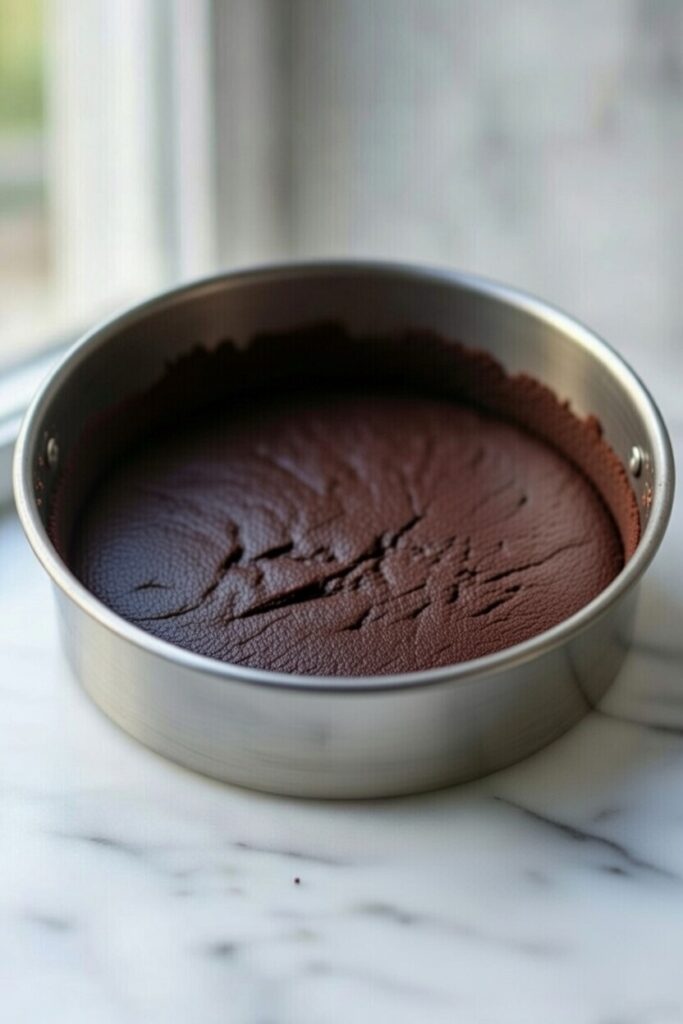
If you don’t have red velvet cake already prepared, make a simple red velvet cake using your favorite recipe or a box mix. You only need about 1½ cups of crumbled cake, so you can bake it in an 8-inch round pan or make cupcakes and use a few. Let the cake cool completely before proceeding.
Bring all cream cheese and eggs to room temperature—this is crucial for smooth, lump-free cheesecake filling! Leave them out for 1-2 hours, or warm eggs gently in a bowl of warm water for 10 minutes.
Step 2: Create the Chocolate Cookie Crust
In a food processor, pulse chocolate cookies (Oreos work perfectly—remove the filling first) until you have fine, even crumbs. You need 2 cups of crumbs total.
Transfer crumbs to a medium bowl. Add melted butter, sugar, and a pinch of salt. Mix thoroughly with a fork until the mixture resembles wet sand and holds together when squeezed in your hand.
Pour the crumb mixture into your prepared springform pan. Using the bottom of a measuring cup or a flat-bottomed glass, press the crumbs firmly and evenly across the bottom and about 1 inch up the sides of the pan. Pack it tightly—a well-compacted crust won’t crumble when you slice.
Bake the crust for 10 minutes to set it. Remove from oven and let cool while you prepare the next layer. This pre-baking step prevents sogginess and creates a sturdy foundation.
Step 3: Prepare the Red Velvet Layer
Crumble your cooled red velvet cake into fine crumbs using your hands or a food processor. You want a texture similar to coarse breadcrumbs—not too fine, but no large chunks.
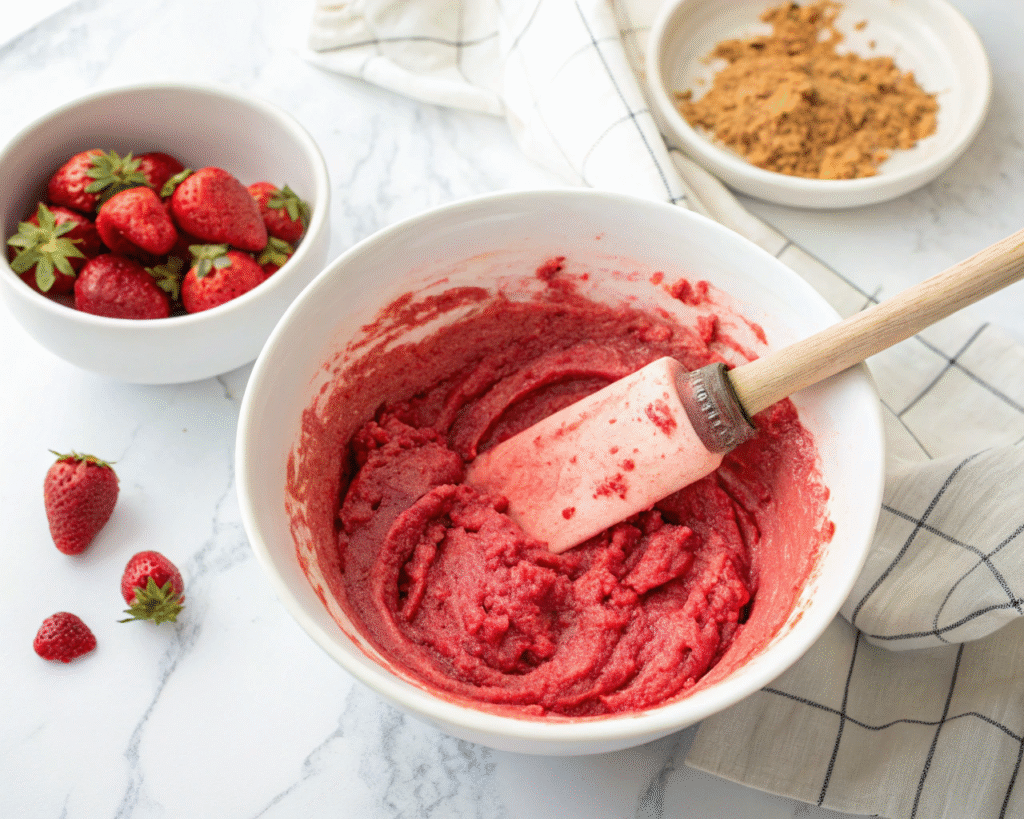
In a medium bowl, beat the softened cream cheese until smooth and fluffy, about 1-2 minutes. Add the strawberry purée and mix until fully incorporated and the mixture turns a beautiful pink color.
Add the red velvet cake crumbs to the cream cheese mixture. Fold gently but thoroughly until everything is evenly combined. The mixture should be spreadable but hold its shape—like thick frosting. If it’s too dry, add 1-2 tablespoons of milk; if too wet, add more cake crumbs.
Spread the red velvet mixture evenly over the cooled chocolate crust, smoothing the top with a spatula. Press gently to eliminate air pockets. This layer should be about ½-inch thick. Set aside while you prepare the cheesecake filling.
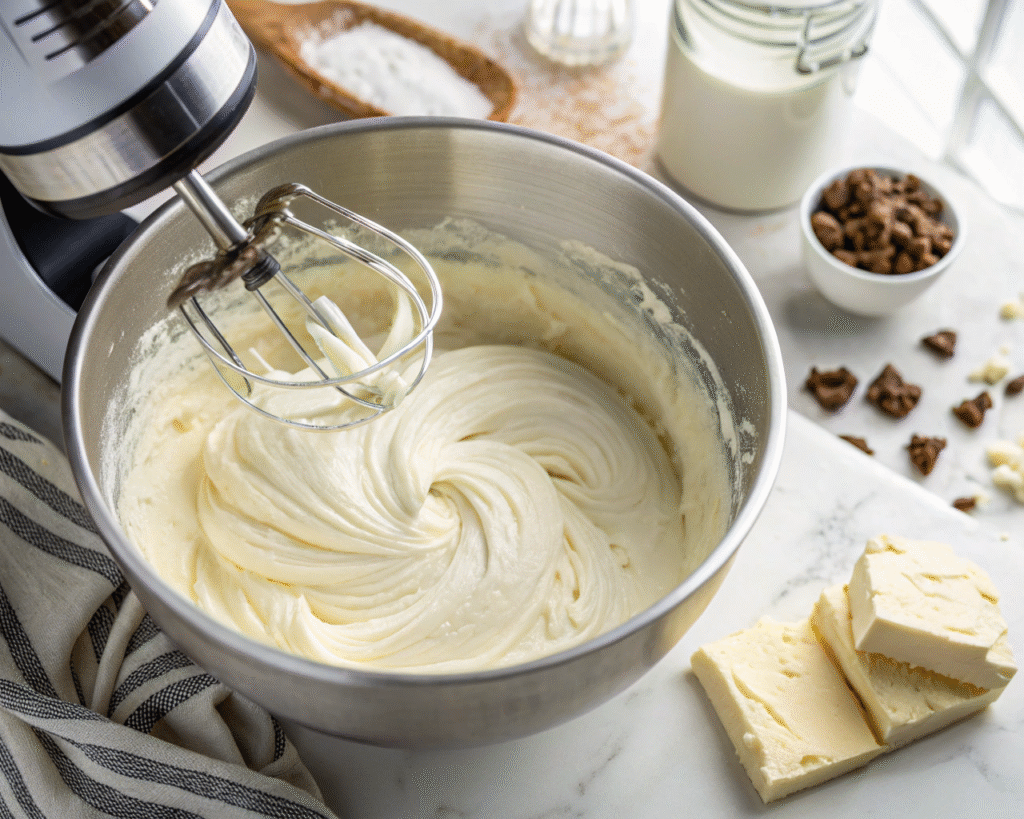
Step 4: Make the Silky Cheesecake Filling
In a large mixing bowl, beat the room-temperature cream cheese with an electric mixer on medium speed for 2-3 minutes until completely smooth, fluffy, and lump-free. Scrape down the bowl several times to ensure even mixing.
Add the sugar and beat on medium speed for another 2 minutes until light and creamy. The mixture should look pale and airy.
Add eggs one at a time, beating on low speed just until each egg is incorporated. Don’t overbeat after adding eggs—this incorporates too much air and can cause cracks. Mix just until the yellow streaks disappear.
Add vanilla extract and heavy cream (or sour cream for extra tanginess). Beat on low speed until smooth and uniform. If using flour for extra stability, add it now and mix just until incorporated.
The finished cheesecake batter should be silky, smooth, and pourable—like thick pancake batter.
Step 5: Assemble and Bake
Carefully pour the cheesecake filling over the red velvet layer in the pan. Pour slowly and evenly to avoid disturbing the red velvet layer underneath. Use a spatula to spread the filling gently to the edges, smoothing the top.
Gently tap the pan on the counter 3-4 times to release any large air bubbles trapped in the batter.
Place the springform pan on a baking sheet (to catch any potential drips) and bake at 325°F (165°C) for 55-65 minutes. The cheesecake is done when the edges are set and slightly puffed, but the center still jiggles slightly when you gently shake the pan—about a 2-inch diameter wobbly area in the center is perfect.
Don’t overbake! The center will firm up completely as it cools. An overbaked cheesecake will be dry, grainy, and prone to cracking.
Step 6: Cool Slowly to Prevent Cracks

Turn off the oven and crack the door open about 4 inches. Leave the cheesecake inside for 1 hour. This gradual cooling prevents the dramatic temperature change that causes cracking and sinking.
After 1 hour, remove the cheesecake from the oven and place it on a wire cooling rack. Immediately run a thin knife or offset spatula around the edge to loosen it from the pan—this prevents pulling and cracking as the cheesecake contracts while cooling.
Let the cheesecake cool completely at room temperature, about 2-3 hours. Then cover loosely with plastic wrap and refrigerate for at least 4 hours, preferably overnight. This chilling is essential—the cheesecake needs time to set properly and develop its creamy, sliceable texture.
Step 7: Make Fresh Strawberry Glaze
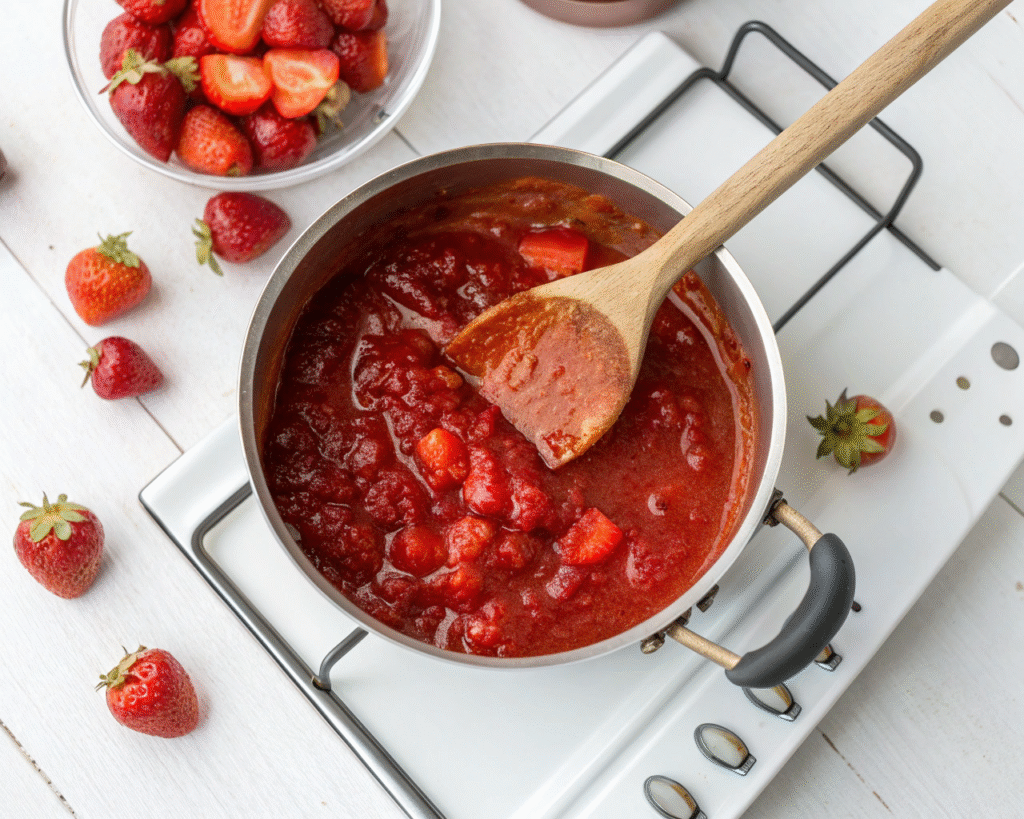
Hull and slice 1½ cups of fresh strawberries. In a medium saucepan, combine the sliced strawberries, sugar, and lemon juice. Cook over medium heat, stirring occasionally, until the strawberries break down and release their juices, about 5-7 minutes.
For a smoother glaze, use an immersion blender to partially blend the mixture—you want some small strawberry pieces for texture but mostly smooth. For a chunkier glaze, simply mash with a fork.
Add the cornstarch slurry (cornstarch mixed with water) to the simmering strawberry mixture. Stir constantly and cook for 1-2 minutes until the glaze thickens to a syrupy consistency that coats the back of a spoon.
Remove from heat and stir in vanilla extract. Transfer to a bowl and let cool to room temperature. The glaze will thicken more as it cools. If it becomes too thick, thin with a tablespoon of water.
Step 8: Glaze and Decorate
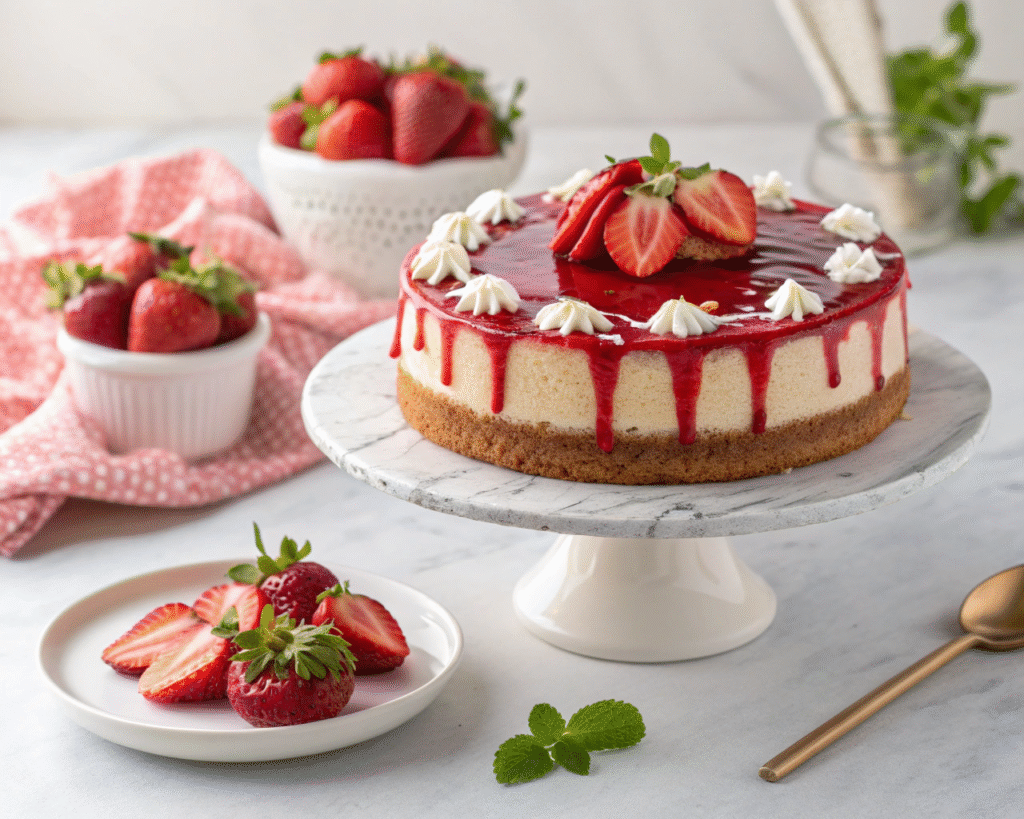
Remove the thoroughly chilled cheesecake from the refrigerator. Run a thin knife around the edge one more time, then carefully remove the springform pan sides. Leave the cheesecake on the pan base, or use a large offset spatula to carefully transfer it to a serving plate.
Pour the cooled strawberry glaze over the top of the cheesecake. Use a spatula to spread it evenly, letting some drip naturally down the sides for a beautiful rustic look. Don’t worry about perfection—the organic drips add charm!
Arrange whole fresh strawberries on top of the glaze while it’s still slightly wet. You can create a pattern (like a circle around the edge and cluster in the center) or arrange them artistically across the surface.
If desired, pipe whipped cream rosettes around the edge, add white chocolate shavings, or place fresh mint leaves between strawberries for extra elegance.
Step 9: Final Chill and Serve
Return the decorated cheesecake to the refrigerator for at least 30 minutes to allow the glaze to set fully. This makes slicing much neater.
For perfect slices, use a large, sharp knife. Dip the knife in very hot water, wipe it completely dry with a towel, then make one clean cut through the cheesecake. Wipe the knife clean, dip in hot water again, wipe dry, and make the next cut. This creates those picture-perfect slices with clean, distinct layers.
Serve chilled. Each slice will showcase the beautiful layers: dark chocolate crust, vibrant red velvet, pristine white cheesecake, and glossy strawberry topping.
Pro Tips for Perfect Strawberry Red Velvet Cheesecake
Room temperature ingredients are non-negotiable. Cold cream cheese creates lumps, and cold eggs don’t incorporate smoothly. Plan ahead and leave ingredients out for 2 hours before starting.
Use quality red velvet cake. Whether homemade or boxed, make sure your red velvet cake is moist and flavorful. Dry cake will create a dry, crumbly layer that doesn’t integrate well.
Don’t skip the crust pre-bake. Those 10 minutes make the difference between a crisp, sturdy crust and a soggy mess that falls apart when you slice.
Make your red velvet layer spreadable. It should have the consistency of thick frosting—easy to spread but not runny. The cream cheese and strawberry purée provide moisture and help bind the crumbs.
Pour cheesecake filling gently. A rushed pour can disturb the red velvet layer underneath. Pour slowly in the center and let it spread outward naturally, then smooth the edges carefully.
Cool gradually for crack-free results. The slow oven cooling (door cracked open) is your best defense against cracks. Resist the urge to rush this step!
Let it chill completely before glazing. A fully set, cold cheesecake provides the perfect base for glaze and won’t absorb excess moisture.
Fresh strawberries make the best glaze. Frozen work in a pinch, but fresh strawberries create a brighter, more vibrant flavor and color.
Freeze for ultra-clean slices. If you want those Instagram-perfect slices with razor-sharp layer definition, freeze the cheesecake for 20-30 minutes before slicing, then let slices come to cool (not cold) temperature before serving.
Strawberry Variations and Flavor Twists
Classic Strawberry Version (as written)
Fresh strawberry glaze with whole berry decoration. Bright, fruity, and beautiful.
Mixed Berry Red Velvet Cheesecake
Use a combination of strawberries, raspberries, and blueberries in the glaze and as topping. Gorgeous color variation!
Strawberry White Chocolate Version
Fold 4 oz melted white chocolate into the cheesecake filling. Add white chocolate shavings on top with strawberries.
Strawberry Lemon Red Velvet Cheesecake
Add 1 tablespoon lemon zest to the cheesecake filling and 1 teaspoon to the strawberry glaze. Bright and refreshing!
No-Bake Strawberry Red Velvet Cheesecake
Skip baking the cheesecake layer. Instead, make a no-bake filling with cream cheese, whipped cream, and gelatin. Chill until set.
Individual Red Velvet Cheesecake Cups
Layer the components in clear glass jars or cups for individual servings. Perfect for parties!
Chocolate Ganache Version
Top with chocolate ganache instead of strawberry glaze, then add fresh strawberries. Decadent chocolate-strawberry combination.
Strawberry Swirl Red Velvet Cheesecake
Swirl strawberry purée through the cheesecake filling before baking for a marbled effect, then top with fresh strawberries.
Make-Ahead and Storage Guide
Strawberry Red Velvet Cheesecake is perfect for advance preparation:
Timeline:
- 3 days ahead: Bake red velvet cake, prepare and store in airtight container
- 2 days ahead: Bake and cool cheesecake (without glaze), wrap tightly and refrigerate
- 1 day ahead: Make strawberry glaze, store refrigerated in airtight container
- 4-6 hours ahead: Add glaze and fresh strawberry decoration, refrigerate
- Just before serving: Add any final garnishes (whipped cream, mint)
Storage:
- Unglazed cheesecake: 5 days refrigerated, tightly wrapped
- Fully decorated cheesecake: 2-3 days refrigerated (strawberries stay freshest)
- Freeze unglazed cheesecake: Up to 2 months, wrapped in plastic then foil
- Don’t freeze with fresh strawberry glaze (texture changes upon thawing)
Best Practices:
- Store covered in the refrigerator, away from strong-smelling foods
- If making ahead, add fresh strawberry decoration within 6-8 hours of serving
- Reglaze if the original glaze is absorbed (rare, but can happen if made too far ahead)
- Freeze individual slices wrapped separately for easy single servings later
Frequently Asked Questions (FAQ)
Can I use a boxed red velvet cake mix?
Absolutely! Boxed red velvet mix works perfectly for this recipe. Follow package directions, bake, cool completely, and crumble as directed.
Do I need to make the red velvet cake from scratch?
No. You can use leftover red velvet cake, store-bought red velvet cake, or even red velvet cake crumbs if you can find them. The key is having about 1½ cups of crumbled cake.
Can I make this without the red velvet layer?
Yes, but it wouldn’t be the same! You could make a strawberry cheesecake by using graham cracker crust, plain cheesecake filling, and strawberry topping. Still delicious but different.
Why did my cheesecake crack?
Common causes: overbaking, cooling too quickly, cold ingredients creating lumps and air pockets, or over-beating after adding eggs. Follow the slow-cooling method for best results.
Can I use frozen strawberries for the glaze?
Yes! Thaw them first and drain excess liquid, or cook them from frozen and reduce the liquid more. Fresh strawberries provide brighter flavor and color, but frozen work in a pinch.
How do I know when the cheesecake is done baking?
The edges should be set and slightly puffed, while the center (about 2-3 inches in diameter) still jiggles like gelatin when gently shaken. It will firm completely as it cools.
Can I make this gluten-free?
Yes! Use gluten-free chocolate cookies for the crust and a gluten-free red velvet cake mix or recipe. The cheesecake filling is naturally gluten-free.
My red velvet layer is too dry and crumbly, what do I do?
Add more cream cheese (1-2 tablespoons) or a splash of milk until the mixture becomes spreadable. It should hold together like thick frosting.
Can I make mini versions?
Absolutely! Make in muffin tins lined with cupcake liners. Layer crust, red velvet, and cheesecake filling. Bake at 325°F for 18-22 minutes. Top with glaze when cool.
How far ahead can I decorate with fresh strawberries?
For best appearance and freshness, add fresh strawberry decoration within 6-8 hours of serving. The berries stay vibrant and the glaze remains glossy.
Troubleshooting Common Issues
Layers mixing together:
Cause: Red velvet layer too wet, or cheesecake filling poured too quickly
Solution: Ensure red velvet layer is spreadable but not runny; pour cheesecake filling slowly and gently
Cheesecake sinking in the middle:
Cause: Overbaking, opening oven door during baking, or cooling too quickly
Solution: Don’t open oven door while baking; follow slow-cooling method; bake just until center jiggles
Strawberry glaze too runny:
Cause: Not enough cornstarch, or not cooked long enough
Solution: Add more cornstarch slurry (1 tsp cornstarch + 2 tsp water) and cook until thickened
Strawberry glaze too thick:
Cause: Too much cornstarch, or over-reduced
Solution: Thin with 1-2 tablespoons water or strawberry juice, stir until desired consistency
Crust falling apart when slicing:
Cause: Not enough butter, or not pressed firmly enough
Solution: Ensure proper butter ratio and pack crust very firmly; pre-baking helps too
Red velvet layer too thick or thin:
Cause: Incorrect amount of cake crumbs
Solution: Aim for about ½-inch thick layer; adjust cake crumbs as needed for even coverage
Cheesecake sticking to pan:
Cause: Didn’t run knife around edge before cooling, or pan not greased
Solution: Always grease pan lightly; run thin knife around edge immediately after baking and again before removing sides
People Also Ask (PAA)
What is Strawberry Red Velvet Cheesecake?
Strawberry Red Velvet Cheesecake is a layered dessert combining chocolate cookie crust, red velvet cake layer, classic cheesecake filling, and fresh strawberry glaze. It merges three popular desserts into one stunning creation with vibrant red and white layers.
How many calories are in Strawberry Red Velvet Cheesecake?
A typical slice (1/12 of a 9-inch cheesecake) contains approximately 420-480 calories, depending on exact ingredients and portion size. The rich layers make it an indulgent treat best enjoyed in moderation.
Can you freeze red velvet cheesecake?
Yes, freeze the unglazed cheesecake for up to 2 months. Wrap tightly in plastic wrap then aluminum foil. Thaw overnight in the refrigerator and add fresh strawberry glaze and toppings before serving.
How long does Strawberry Red Velvet Cheesecake last?
Properly stored in the refrigerator, it lasts 3-5 days. For best quality and freshest strawberries, consume within 2-3 days of decorating with fresh fruit.
Is red velvet cheesecake the same as regular cheesecake?
No. Red velvet cheesecake incorporates red velvet cake as a distinct layer, adding cocoa flavor and tender cake texture. Regular cheesecake has only the creamy filling without cake layers.
What makes red velvet cake red?
Red velvet cake gets its distinctive color from red food coloring (or historically from a reaction between cocoa and acidic ingredients). It has a subtle cocoa flavor and tender, velvety crumb texture.
Can I make Strawberry Red Velvet Cheesecake without baking?
You can make a no-bake version by using a no-bake cheesecake filling (cream cheese, whipped cream, and gelatin) over the red velvet layer and unbaked crust. Chill until set instead of baking.
Why is my cheesecake grainy?
Graininess usually comes from cold cream cheese that wasn’t fully beaten smooth, overbaking, or overbeating after adding eggs. Always use room temperature ingredients and don’t overbeat.
Conclusion
Strawberry Red Velvet Cheesecake represents the pinnacle of creative baking—taking beloved classics and reimagining them into something even more spectacular. This stunning dessert proves that with quality ingredients, patience, and proper technique, you can create bakery-worthy masterpieces in your own kitchen. The vibrant layers, contrasting textures, and perfect balance of chocolate, cream cheese, and fresh strawberries come together in pure harmony.
What makes this dessert truly exceptional is its wow factor combined with achievability. Yes, it looks incredibly impressive with those dramatic red and white layers, but the actual technique is straightforward and forgiving. It’s fancy enough for the most special celebrations—Valentine’s Day, anniversaries, weddings, birthdays—yet reliable enough to become your signature dessert. The make-ahead nature means you can prepare it stress-free, enjoying your event rather than spending it in the kitchen.
The combination of red velvet and strawberry cheesecake creates something that appeals to virtually everyone. Chocolate lovers adore the cocoa notes, cheesecake enthusiasts can’t resist the creamy filling, and fruit dessert fans celebrate the fresh strawberry brightness. It’s a crowd-pleaser that transcends age, preferences, and occasions.
Make this Strawberry Red Velvet Cheesecake for someone special, or treat yourself to something extraordinary. Watch faces light up when you bring it to the table and reveal those gorgeous layers when you slice it. Photograph it for posterity (because you absolutely will want to), then savor every creamy, fruity, velvety bite. This is dessert artistry at its finest—beautiful, delicious, and unforgettable. 🍓❤️✨
Prep Time: 40 minutes
Bake Time: 55-65 minutes (plus 10 min crust)
Cooling/Chill Time: 6+ hours (overnight recommended)
Total Time: 8+ hours
Servings: 12-14 slices
Difficulty: Intermediate
Cuisine: American Fusion
Course: Dessert
Calories: ~420-450 kcal per slice
Diet: Vegetarian
Keywords: strawberry red velvet cheesecake, red velvet cheesecake recipe, strawberry cheesecake, layered cheesecake, red velvet dessert, strawberry dessert, special occasion cake, valentines day dessert