Table of Contents
Introduction
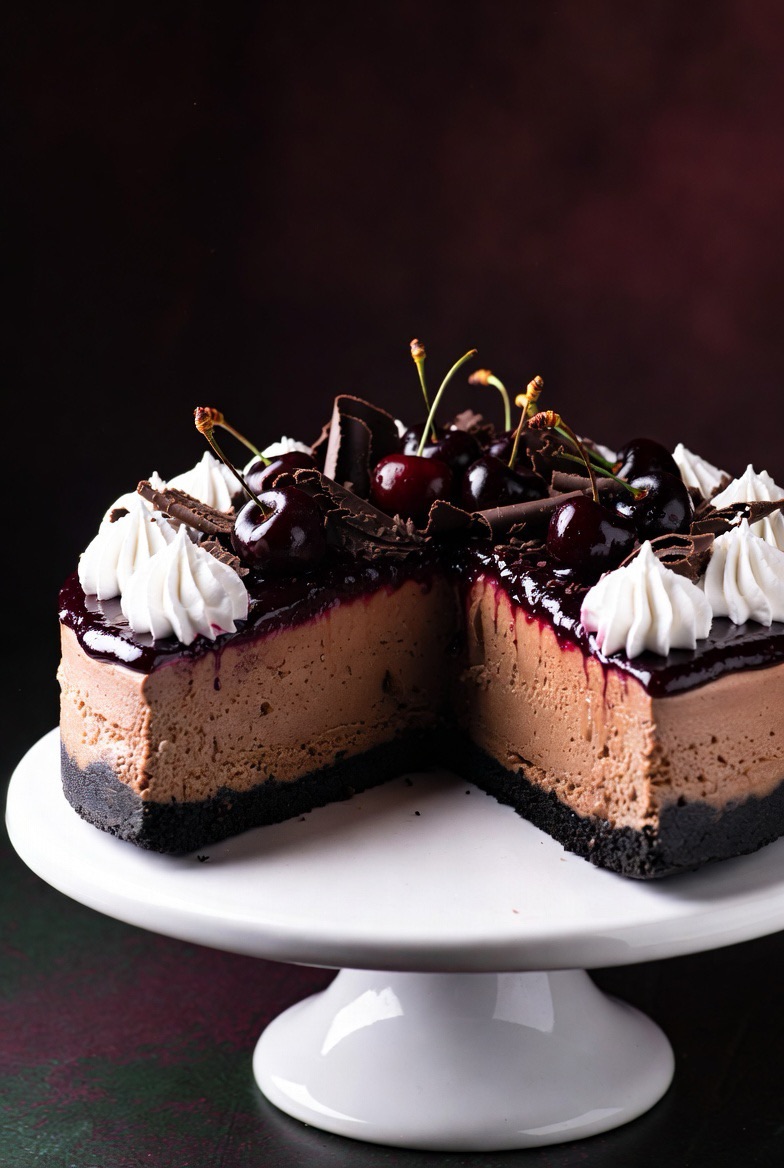
Prepare to fall in love with the most decadent fusion dessert ever created: Black Forest Cheesecake! This showstopping masterpiece takes everything you adore about classic German Black Forest Cake—rich chocolate, sweet-tart cherries, clouds of whipped cream—and marries it with the creamy, luxurious texture of New York-style cheesecake. Each slice reveals dramatic layers: a dark chocolate cookie crust, velvety chocolate cheesecake filling, glossy cherry topping, billows of whipped cream, and a cascade of chocolate shavings. It’s pure indulgence that makes every special occasion unforgettable.
What makes Black Forest Cheesecake absolutely irresistible is how it combines the best of both dessert worlds. The chocolate cheesecake filling is impossibly smooth and rich, with deep cocoa flavor that’s not overly sweet. The cherry topping adds bright, fruity contrast that cuts through the richness perfectly. And unlike traditional Black Forest Cake with its layers of sponge, this version has that signature creamy cheesecake texture that melts on your tongue. It’s elegant enough for the fanciest dinner party yet beloved enough that everyone asks for seconds.
Whether you’re a cheesecake devotee, a Black Forest Cake fanatic, or simply someone who believes chocolate and cherries are a match made in heaven, this recipe delivers on every level. The technique is straightforward—no water bath required—and the results are consistently spectacular. Let’s create this chocolate-cherry dream together!
Why Black Forest Cheesecake is the Perfect Fusion Dessert
Black Forest Cheesecake brilliantly solves one of traditional Black Forest Cake’s biggest challenges: the delicate sponge layers can dry out or become soggy. By replacing sponge with rich cheesecake, you get a dessert that stays perfectly moist and creamy for days. The chocolate cheesecake provides a stable, luxurious base that holds up beautifully under the cherry topping and whipped cream.
The flavor combination is iconic for a reason. Chocolate and cherry is one of those timeless pairings that feels both sophisticated and comforting. The slight tartness of cherries balances the richness of chocolate and cream cheese, preventing the dessert from being cloying. It’s indulgent but not heavy, rich but refreshing.
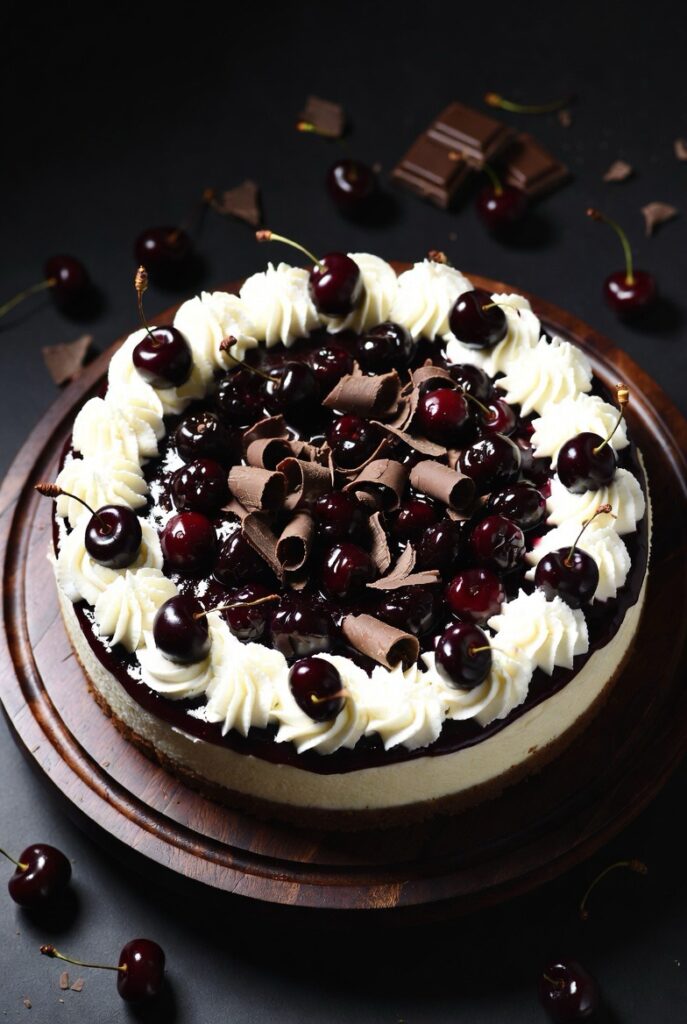
Visually, this cheesecake is absolutely stunning. The dark chocolate base contrasts dramatically with white cream and ruby-red cherries. When you slice it, those distinct layers create a gorgeous cross-section that photographs like a dream. It’s the kind of dessert that makes people gasp when you bring it to the table—and then go silent when they taste it because they’re too busy savoring every bite.
The practical advantages are significant too. Unlike traditional Black Forest Cake which requires multiple components prepared separately and carefully assembled, this cheesecake streamlines the process. One crust, one filling, bake, top with cherries and cream—done. It also keeps beautifully refrigerated for up to 5 days, making it perfect for advance preparation.
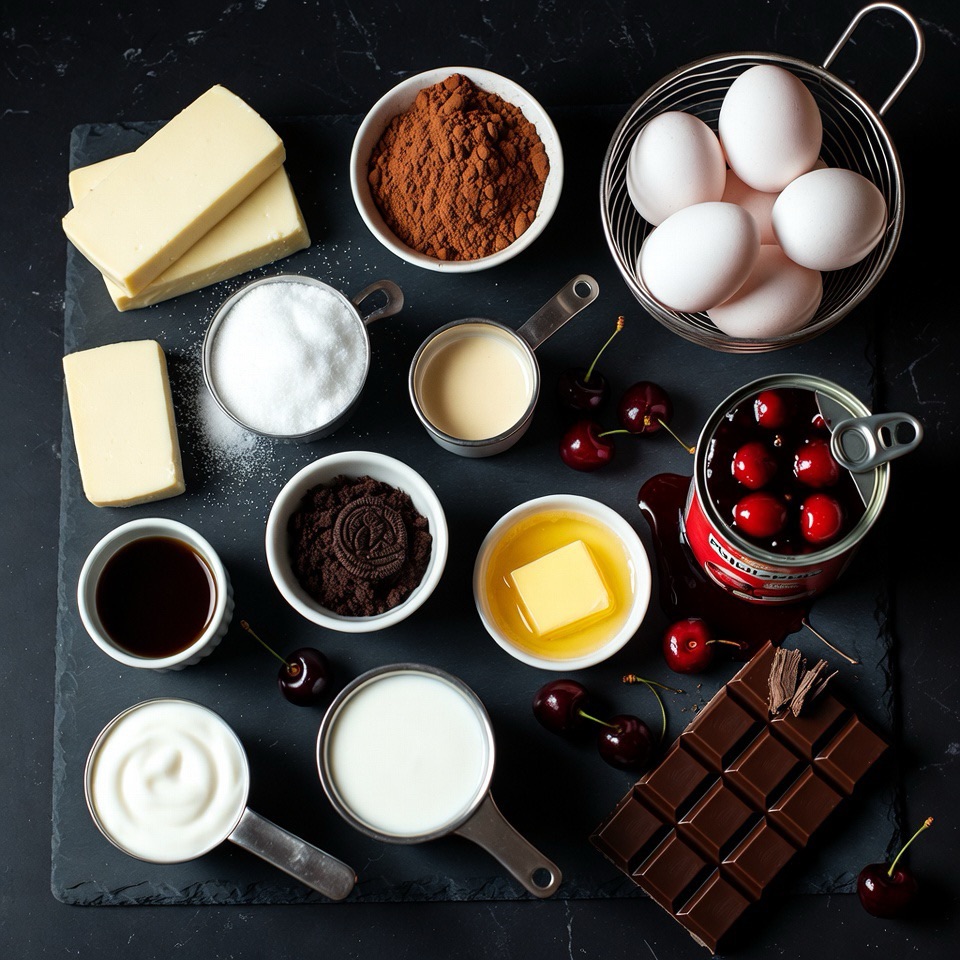
Essential Ingredients for Black Forest Cheesecake (12 Servings)
For the chocolate cookie crust:
- 2 cups (200g) chocolate cookie crumbs (about 24 Oreos, filling removed, or chocolate graham crackers)
- ¼ cup (50g) granulated sugar
- 6 tablespoons (85g) unsalted butter, melted
- Pinch of salt
For the chocolate cheesecake filling:
- 24 oz (680g) cream cheese, full-fat, at room temperature (three 8-oz blocks)
- 1 cup (200g) granulated sugar
- ½ cup (50g) unsweetened cocoa powder, Dutch-process preferred
- 3 large eggs, at room temperature
- 1 cup (240g) sour cream, at room temperature
- 2 teaspoons vanilla extract
- ¼ teaspoon salt
- 4 oz (115g) semi-sweet or dark chocolate, melted and slightly cooled
For the cherry topping:
- 21 oz (595g) cherry pie filling (one can), or 2 cups homemade
- 1 tablespoon kirsch (cherry brandy), optional but traditional
- 1 teaspoon vanilla extract
For decoration:
- 1½ cups (360ml) heavy whipping cream, cold
- 3 tablespoons (25g) powdered sugar
- 1 teaspoon vanilla extract
- 4 oz (115g) dark chocolate, for shavings
- Fresh dark cherries with stems (optional, for garnish)
Detailed Step-by-Step Instructions
Step 1: Prepare Pan and Preheat
Preheat oven to 325°F (165°C). Wrap the outside of a 9-inch springform pan tightly with heavy-duty aluminum foil—this prevents leaks and protects the crust. Grease the inside of the pan lightly with butter or cooking spray.
Bring cream cheese, eggs, and sour cream to room temperature—this is crucial! Cold ingredients create lumps in the batter and can cause cracking. Leave them out for 1-2 hours, or quick-warm eggs in a bowl of warm water for 10 minutes.
Step 2: Make the Chocolate Cookie Crust
In a food processor, pulse chocolate cookies (Oreos with filling removed work perfectly) until fine crumbs form. You need 2 cups of crumbs. If using chocolate graham crackers, crush them the same way.
Transfer crumbs to a medium bowl. Add sugar and salt, then pour in melted butter. Mix with a fork until the mixture resembles wet sand and holds together when squeezed.
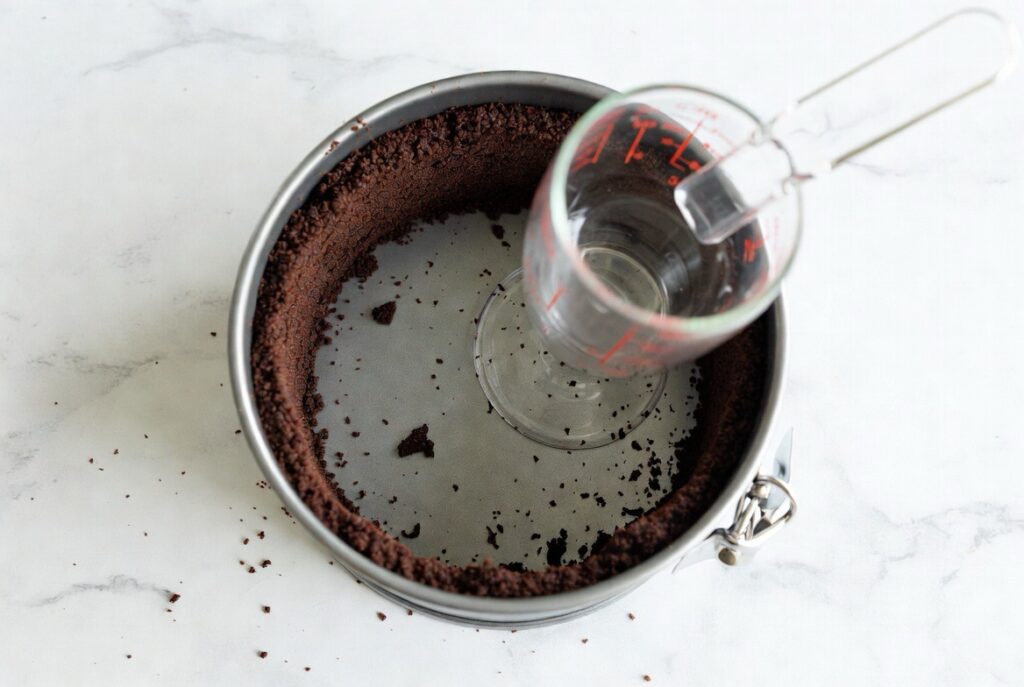
Pour crumb mixture into prepared springform pan. Press firmly and evenly across the bottom and about 1 inch up the sides using the bottom of a measuring cup or glass. Pack it tightly—a compact crust won’t crumble when you slice.
Bake crust for 10 minutes. Remove and let cool while you prepare the filling. This pre-baking sets the crust and prevents sogginess.
Step 3: Make the Chocolate Cheesecake Filling
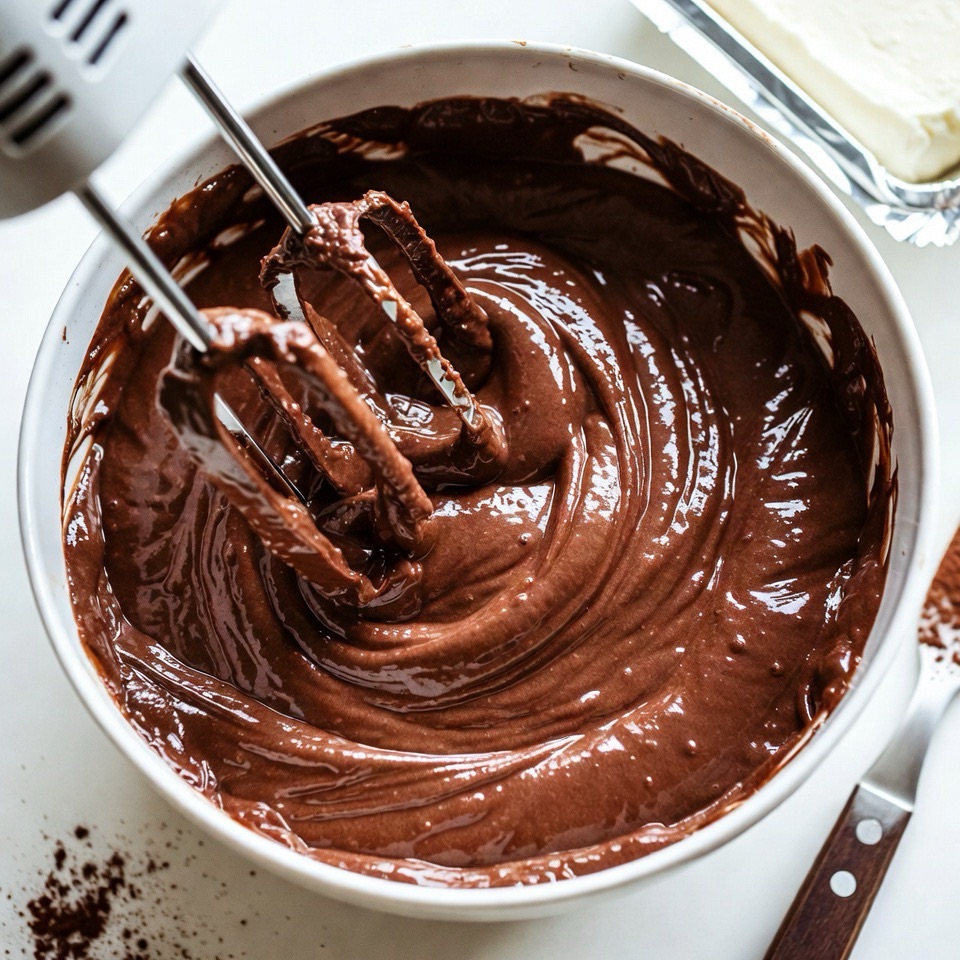
In a large mixing bowl, beat room-temperature cream cheese with an electric mixer on medium speed for 2-3 minutes until completely smooth and fluffy, with no lumps. Scrape down the bowl several times.
Add sugar and cocoa powder. Beat on medium-low speed until fully incorporated and smooth, about 1-2 minutes. The cocoa should be completely dissolved with no dry pockets. Scrape the bowl.
Add eggs one at a time, beating on low speed just until each is incorporated. Don’t overbeat after adding eggs—this incorporates too much air and can cause cracks. Mix just until the yellow disappears.
Add sour cream, vanilla extract, and salt. Beat on low speed until smooth and creamy. Finally, pour in the melted and slightly cooled chocolate. Mix on low until fully incorporated and the batter is uniformly dark and silky.
Step 4: Bake the Cheesecake (No Water Bath!)
Pour the chocolate cheesecake batter over the pre-baked crust. Smooth the top with a spatula. Gently tap the pan on the counter a few times to release any large air bubbles.
Place springform pan on a baking sheet (catches any drips) and bake at 325°F (165°C) for 60-75 minutes. The cheesecake is done when the edges are set and slightly puffed, but the center still jiggles slightly when you gently shake the pan—about a 2-inch diameter wobbly area in the center.
Don’t overbake! The center will firm up as it cools. An overbaked cheesecake will crack and have a dry, grainy texture.
Step 5: Cool Slowly (Critical for Preventing Cracks!)
Turn off the oven and crack the door open about 4 inches. Leave the cheesecake inside for 1 hour. This gradual temperature change prevents the dramatic shrinking that causes cracks.
After 1 hour in the oven, remove the cheesecake and place it on a wire rack. Run a thin knife around the edge to loosen it from the pan—this prevents cracking as it cools and contracts.
Let the cheesecake cool completely at room temperature, about 2-3 hours. Then cover loosely with plastic wrap and refrigerate for at least 6 hours, preferably overnight. This chilling is essential—the cheesecake needs time to set properly and develop its creamy texture.
Step 6: Prepare Cherry Topping
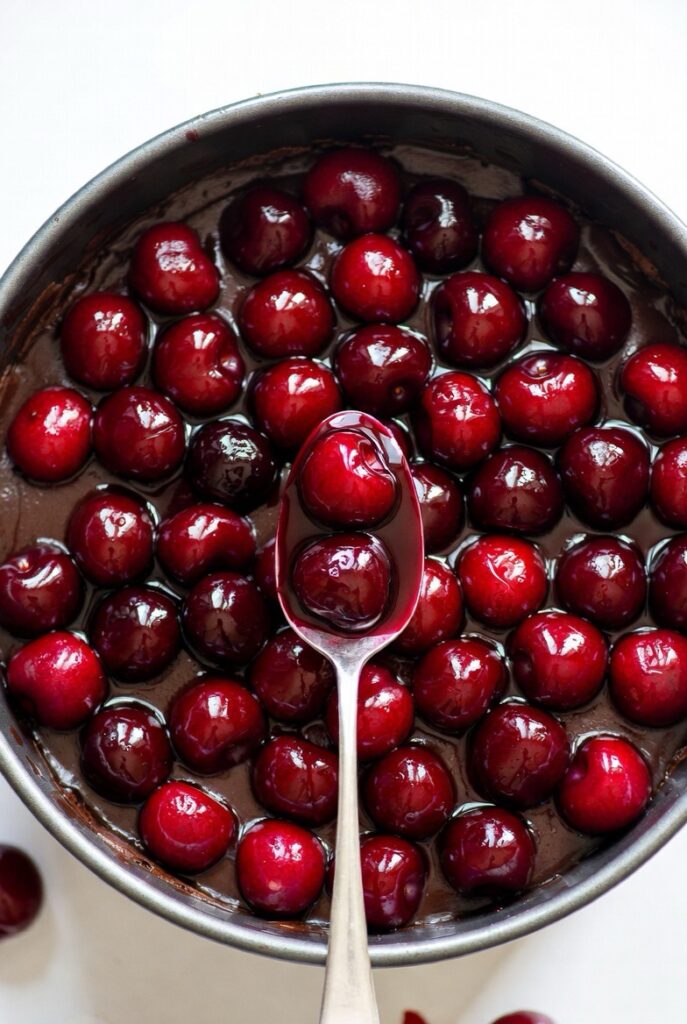
If using canned cherry pie filling, transfer it to a bowl and stir in kirsch (if using) and vanilla extract. This brightens the flavor and adds that traditional Black Forest touch.
For homemade cherry topping: In a saucepan, combine 2 cups pitted fresh or frozen cherries, ½ cup sugar, 2 tablespoons cornstarch, ¼ cup water, and 1 tablespoon lemon juice. Cook over medium heat, stirring, until thickened and glossy, about 8-10 minutes. Remove from heat, stir in kirsch and vanilla. Cool completely before using.
Step 7: Make Whipped Cream
In a cold bowl with cold beaters, whip heavy cream, powdered sugar, and vanilla on medium-high speed until stiff peaks form—the cream should stand straight up when you lift the beaters. Don’t overwhip or it will become grainy.
For extra stability (especially in warm weather), add 1 tablespoon of powdered gelatin bloomed in 2 tablespoons cold water, then microwaved for 10 seconds, to the cream as you whip.
Keep whipped cream refrigerated until ready to decorate.
Step 8: Assemble and Decorate
Remove the thoroughly chilled cheesecake from the refrigerator. Run a knife around the edge again, then carefully remove the springform pan sides.
Spread cherry topping evenly over the top of the cheesecake, leaving a small border around the edge if you want to see some chocolate showing.
Transfer whipped cream to a piping bag fitted with a large star tip. Pipe rosettes or swirls around the outer edge of the cheesecake. Alternatively, dollop spoonfuls of whipped cream around the border.
Using a vegetable peeler, shave dark chocolate over the cherries and cream to create beautiful curls and shavings. Let the shavings fall naturally for an elegant, casual look.
Top each whipped cream rosette with a fresh cherry (with stem attached for drama), if desired. Add a few more chocolate curls if you want extra decadence.
Step 9: Slice and Serve
For perfect slices, use a large, sharp knife. Dip the knife in hot water, wipe dry, then make one clean cut. Wipe the knife clean, dip in hot water again, wipe, and make the next cut. This creates those picture-perfect slices with clean edges.
Serve chilled. This cheesecake is rich, so slices can be slightly smaller than regular cake—12-16 slices from one 9-inch cheesecake is typical.
Pro Tips for Perfect Black Forest Cheesecake
Use room temperature ingredients. This cannot be stressed enough! Cold cream cheese creates lumps, and the batter won’t be smooth. Plan ahead and leave ingredients out for 1-2 hours.
Don’t overbeat after adding eggs. Excessive beating incorporates too much air, which expands during baking and causes cracks when cooling. Mix on low speed just until incorporated.
Use Dutch-process cocoa for deeper, richer chocolate flavor. Natural cocoa works too but will taste slightly more acidic and lighter in color.
Let it cool gradually. The slow cooling process (in the turned-off oven with door cracked) is your best defense against cracks. Resist the urge to rush it!
Chill completely before topping. A fully set, cold cheesecake provides a stable base for the cherry topping and won’t make the cherries sink or slide.
Use quality chocolate for shavings. A good dark chocolate (60-70% cocoa) creates beautiful, elegant curls and tastes phenomenal against the sweet cherries.
Add kirsch for authentic flavor. That hint of cherry brandy is traditional in Black Forest desserts and elevates the cherry flavor beautifully. Just 1 tablespoon makes a difference!
Make it a day ahead. Cheesecake actually tastes better the next day after flavors have melded. It’s the perfect make-ahead dessert for entertaining.
Cherry Topping Options: Fresh vs. Canned vs. Homemade
Canned Cherry Pie Filling (Easiest):
Convenient, consistent, and perfectly thick. Look for brands with whole cherries and not too much gloopy sauce. Lucky Leaf and Comstock are good choices. Enhance with kirsch and vanilla.
Homemade Cherry Topping (Best Flavor):
Use fresh or frozen pitted cherries cooked with sugar and cornstarch. You control sweetness and consistency. Fresh cherries during summer months create an absolutely incredible topping with bright, pure cherry flavor.
Fresh Cherries (Most Beautiful):
Pit and halve fresh dark cherries, macerate with sugar for 30 minutes, then simmer briefly with a touch of cornstarch to create a light glaze. Stunning for special occasions!
Quick Kirsch-Soaked Cherries:
For adults only! Drain canned cherries, toss with 2-3 tablespoons kirsch and 1 tablespoon sugar. Let macerate for 2 hours. Thicken the liquid with cornstarch if needed. Boozy and delicious!
Make-Ahead and Storage
Black Forest Cheesecake is ideal for advance preparation:
Timeline:
- 3 days ahead: Bake cheesecake, cool, and refrigerate (covered, without topping)
- 1 day ahead: Make cherry topping and whipped cream (store separately)
- 4-6 hours ahead: Assemble with cherries and whipped cream, refrigerate
- Just before serving: Add chocolate shavings and fresh cherry garnishes
Storage:
- Unfrosted cheesecake: 5 days refrigerated, well-wrapped
- Fully decorated cheesecake: 2-3 days refrigerated
- Freeze unfrosted cheesecake up to 2 months (wrap tightly in plastic then foil)
- Don’t freeze with whipped cream topping (it weeps when thawed)
Best Practices:
- Store in an airtight container or cover tightly with plastic wrap
- Keep away from strong-smelling foods—cheesecake absorbs odors
- Add chocolate shavings just before serving (they can bleed color into cream)
- If freezing, thaw overnight in refrigerator, then add toppings fresh
Creative Black Forest Cheesecake Variations
No-Bake Black Forest Cheesecake
Use the same crust, don’t bake it. Make filling with whipped cream folded into cream cheese mixture instead of eggs. Set with gelatin. Chill 6+ hours.
Mini Black Forest Cheesecakes
Make in muffin tins lined with cupcake liners. Bake at 325°F for 18-22 minutes. Perfect for parties and portion control!
Black Forest Cheesecake Bars
Use a 9×13-inch pan. Press crust across bottom, pour filling, bake 35-40 minutes. Cool, top with cherries, cut into squares.
White Chocolate Black Forest Cheesecake
Replace cocoa powder and dark chocolate with 8 oz melted white chocolate in the filling. Still top with cherries and dark chocolate shavings for contrast.
Chocolate Cherry Swirl Cheesecake
Make half the batter chocolate, half vanilla (plain). Layer in pan, swirl with a knife. Top with cherries as usual.
Vegan Black Forest Cheesecake
Use vegan cream cheese, coconut cream instead of sour cream, flax eggs, and dairy-free chocolate. Surprisingly delicious!
Black Forest Cheesecake Trifle
Cube baked cheesecake, layer with cherry topping, whipped cream, and chocolate shavings in individual glasses. Stunning presentation!
Boozy Adult Version
Add 3 tablespoons kirsch to the cheesecake filling. Soak cherries in kirsch. Use kirsch-flavored whipped cream. Decadent!
Frequently Asked Questions (FAQ)
Do I need a water bath for this cheesecake?
No! This recipe is designed to bake without a water bath. The slow cooling method prevents cracks just as effectively and is much easier.
Why did my cheesecake crack?
Common causes: overbaking, cooling too quickly, overbeating after adding eggs, or opening the oven door during baking. Follow the slow-cooling method carefully.
Can I use milk chocolate instead of dark?
Yes, but the result will be sweeter and less intensely chocolate. Semi-sweet or dark chocolate (60-70%) provides the best flavor balance.
How do I know when the cheesecake is done?
The edges should be set and slightly puffed, while the center (about 2-3 inches diameter) still jiggles like jello when gently shaken. It will firm as it cools.
Can I make this gluten-free?
Absolutely! Use gluten-free chocolate cookies or chocolate graham crackers for the crust. The filling is naturally gluten-free.
My cheesecake sank in the middle, what happened?
Likely overbaked or cooled too quickly. The center can also sink slightly if you open the oven door during baking, releasing heat suddenly.
Can I use frozen cherries for homemade topping?
Yes! Frozen cherries work beautifully. Don’t thaw them first—cook from frozen and they’ll release the perfect amount of juice.
How far ahead can I make the whipped cream?
Stabilized whipped cream (with gelatin) keeps 2-3 days. Regular whipped cream is best made the same day, up to 8 hours ahead.
What’s the best way to remove the springform pan?
Run a thin knife around the edge first. Then unclasp and gently lift the ring straight up. Use a large spatula to transfer the cheesecake to a serving plate if desired.
Can I make this in a regular cake pan?
Not ideal—you need a springform pan to remove the cheesecake without damaging it. In a pinch, line a regular pan with parchment overhang to lift it out.
Troubleshooting: Preventing Cracks and Other Issues
Surface cracks appearing:
Cause: Overbaking, cooling too quickly, or too much air in the batter
Solution: Use the slow-cooling method, don’t overbeat, and watch for the jiggle test
Grainy or curdled texture:
Cause: Cold ingredients not properly mixed, or overbaking
Solution: Ensure all ingredients are room temperature, don’t overbake past the jiggle stage
Soggy crust:
Cause: Not pre-baking the crust, or moisture from the filling
Solution: Always pre-bake crust for 10 minutes, and ensure it’s packed tightly
Cheesecake won’t set:
Cause: Underbaking, or not chilling long enough
Solution: Bake until only the center jiggles, then chill at least 6 hours (overnight is best)
Cherry topping sliding off:
Cause: Cheesecake not fully chilled, or topping too thin/runny
Solution: Chill cheesecake completely, thicken topping with cornstarch if needed
Chocolate shavings melting into cream:
Cause: Adding shavings too early, or warm environment
Solution: Add chocolate shavings just before serving, keep cheesecake well-chilled
People Also Ask (PAA)
What is the difference between Black Forest Cake and Black Forest Cheesecake?
Black Forest Cake is a traditional German layer cake with chocolate sponge, whipped cream, and cherries. Black Forest Cheesecake replaces the sponge layers with rich, creamy chocolate cheesecake filling, creating a denser, more indulgent dessert with the same iconic flavors.
How long does Black Forest Cheesecake last in the fridge?
Properly stored in an airtight container, Black Forest Cheesecake lasts 3-5 days refrigerated. For best quality, consume within 3 days of adding the whipped cream topping.
Can you freeze Black Forest Cheesecake?
Yes, freeze the unfrosted cheesecake (without cherry topping or whipped cream) for up to 2 months. Wrap tightly in plastic wrap then aluminum foil. Thaw overnight in the refrigerator and add fresh toppings before serving.
Do you need to use kirsch in Black Forest Cheesecake?
Kirsch (cherry brandy) is traditional and adds authentic Black Forest flavor, but it’s optional. You can omit it entirely or substitute with cherry or almond extract for a non-alcoholic version.
Why is it called Black Forest Cheesecake?
Named after the Black Forest region in Germany, famous for its traditional Schwarzwälder Kirschtorte (Black Forest Cherry Cake). The “black” refers to the dark chocolate, and the cherries and kirsch are signature ingredients from that region.
What kind of cherries are best for Black Forest Cheesecake?
Dark sweet cherries are traditional—either fresh Bing cherries, canned cherry pie filling, or jarred Morello cherries (tart variety). Avoid maraschino cherries, which are too sweet and artificially colored.
Can I make Black Forest Cheesecake without a springform pan?
It’s challenging but possible. Use a regular cake pan lined completely with parchment paper with overhang. You’ll lift the entire cheesecake out using the parchment. A springform pan is strongly recommended for best results.
How do you keep cheesecake from cracking?
Use room temperature ingredients, don’t overbeat after adding eggs, don’t overbake (center should still jiggle), cool slowly in the turned-off oven with door cracked, and run a knife around the edge immediately after baking.
Conclusion
Black Forest Cheesecake represents the pinnacle of fusion desserts—taking two beloved classics and creating something even more spectacular than the sum of its parts. This recipe proves that with quality ingredients, proper technique, and a little patience, you can create restaurant-quality desserts right in your home kitchen. The rich chocolate cheesecake, sweet-tart cherries, billowy whipped cream, and dark chocolate shavings come together in perfect harmony.
What makes this dessert truly special is its versatility and reliability. It’s impressive enough for the most formal celebrations—weddings, anniversaries, milestone birthdays—yet approachable enough for casual family gatherings. The make-ahead nature means you can prepare it days in advance, leaving you stress-free when entertaining. And unlike temperamental layer cakes, this cheesecake is forgiving and consistent, delivering perfect results every time you make it.
The Black Forest flavor combination has stood the test of time for good reason. Chocolate and cherry is one of those magical pairings that feels both comforting and luxurious, familiar yet special. Whether you’re a longtime Black Forest Cake devotee or a cheesecake purist trying something new, this fusion will win your heart. Each creamy, chocolate-cherry bite reminds you why classic flavors become classics—they’re simply irresistible.
Make this Black Forest Cheesecake for someone you love, or simply to treat yourself to something extraordinary. Serve it at your next dinner party and watch it steal the show. Share slices with neighbors and become the designated dessert-bringer. However you enjoy it, know that you’ve mastered a showstopper that combines elegance, flavor, and pure indulgence. This is dessert done right—beautiful, delicious, and unforgettable. 🍰🍒✨
Prep Time: 40 minutes
Bake Time: 60-75 minutes
Cooling/Chill Time: 8+ hours (overnight recommended)
Total Time: 10 hours
Servings: 12-16 slices
Difficulty: Intermediate
Cuisine: German-American Fusion
Course: Dessert
Diet: Vegetarian
Keywords: black forest cheesecake, chocolate cherry cheesecake, black forest dessert, german cheesecake, chocolate cheesecake recipe, cherry pie filling cheesecake, black forest cake cheesecake