Table of Contents
Introduction
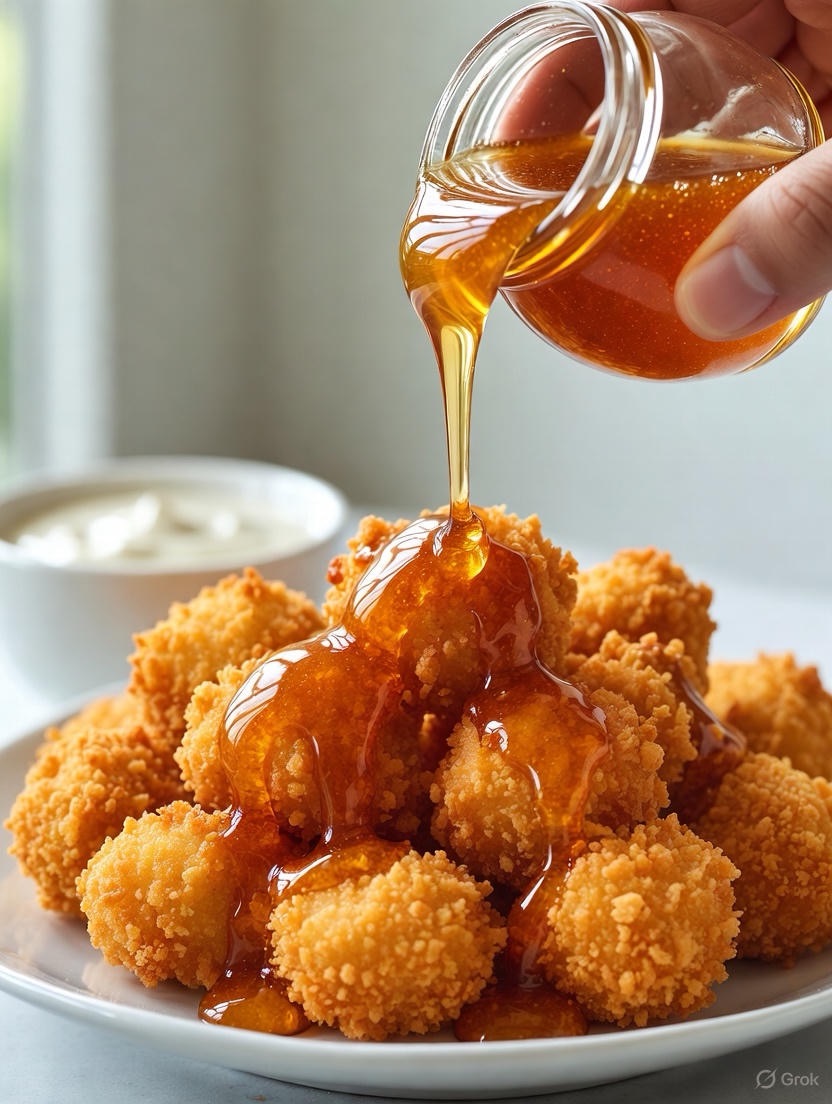
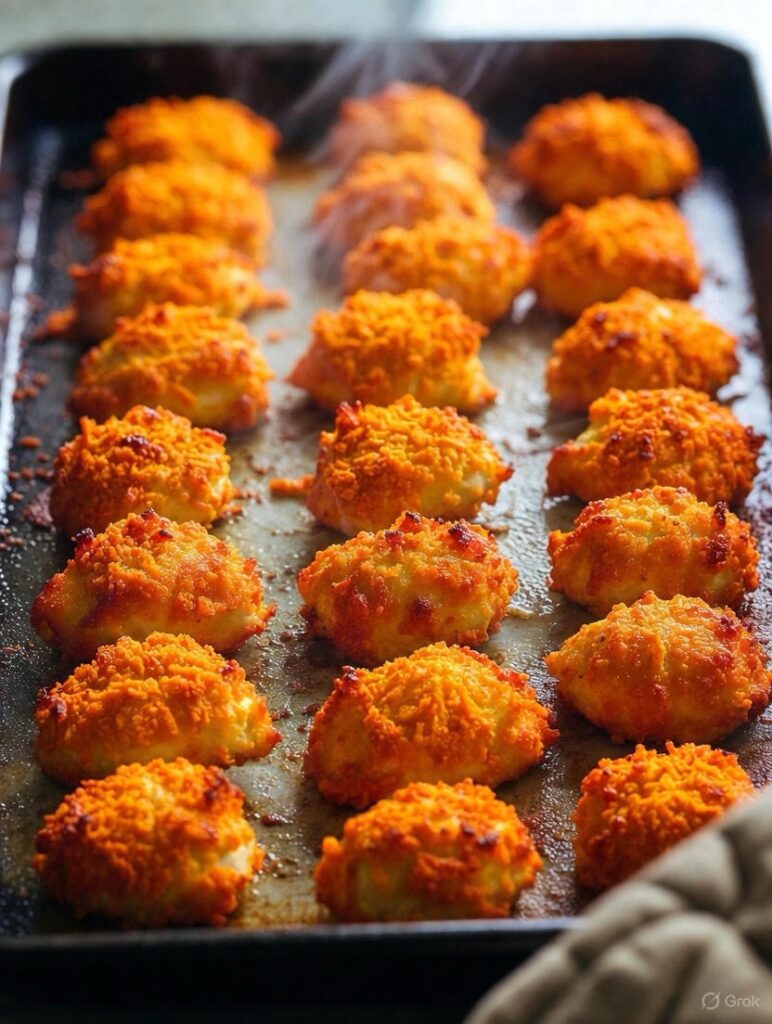
Get ready for the most addictive game day snack you’ll ever make: Crispy Hot Honey Cheez-It Chicken Bites! These golden, crunchy nuggets combine tender chicken pieces with a crispy Cheez-It cracker coating, then get drizzled with sweet and spicy hot honey for the ultimate flavor explosion. They’re easy enough for busy weeknights but impressive enough to be the MVP of your Super Bowl party or game day spread.
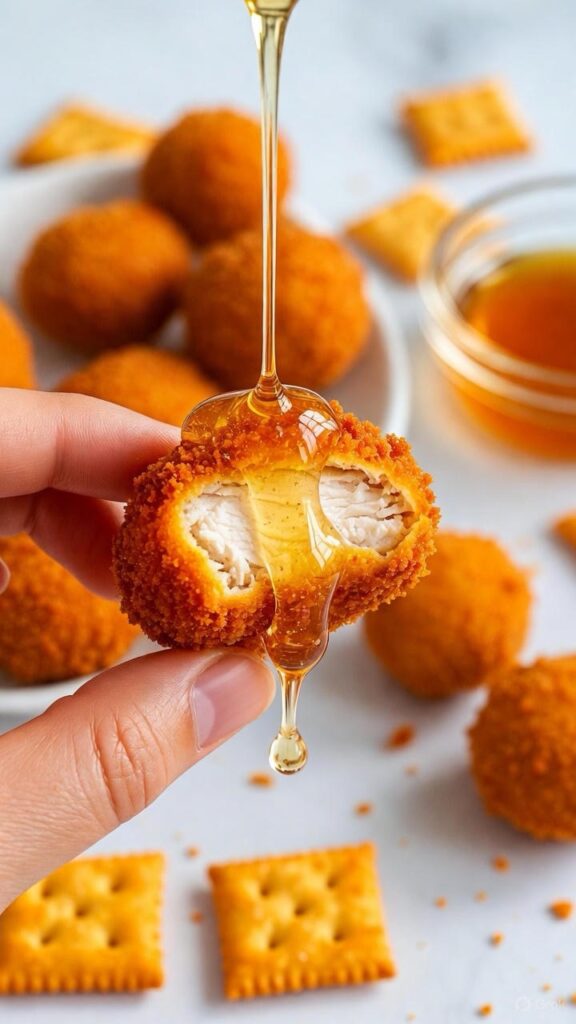
What makes these chicken bites absolutely irresistible is the genius combination of textures and flavors. The pulverized Cheez-It crackers create an incredibly crispy, cheesy coating that’s way more flavorful than regular breadcrumbs. The chicken stays juicy and tender inside while the exterior shatters with each bite. Then comes that hot honey drizzle—adding the perfect balance of sweet heat that keeps you reaching for just one more (and then another, and another).
Whether you’re hosting a crowd for the big game, need an easy weeknight dinner the kids will actually eat, or want a party appetizer that’ll have everyone asking for the recipe, these hot honey Cheez-It chicken bites deliver every single time. They come together in about 30 minutes with simple ingredients you probably already have, and they disappear even faster than they bake. Welcome to your new game day obsession!
Why This Recipe is a Total Game-Changer
The brilliance of using Cheez-It crackers as a coating isn’t just a gimmick—it’s genuinely superior to traditional breading methods. Cheez-It crackers are already seasoned with salt, cheese powder, and spices, which means your coating is packed with flavor before you even add anything else. When crushed into fine crumbs and baked, they create an exceptionally crispy texture that stays crunchy even after sitting out (perfect for game day buffets).
The hot honey component takes these from good to legendary. The sweetness balances the salty, cheesy coating while the heat adds excitement without being overwhelming. It’s that sweet-heat combination that’s currently dominating food trends—from Nashville hot chicken to honey-drizzled pizza—and it works perfectly with these cheesy chicken bites.
This recipe also solves multiple entertaining challenges at once. It’s finger food that doesn’t require utensils or plates. It can be prepped ahead and baked when guests arrive. Kids love it just as much as adults. It’s protein-packed enough to be substantial. And most importantly, it tastes like you put in way more effort than you actually did.
The method is foolproof: a simple three-step breading process (flour, egg, Cheez-It crumbs), bake until golden and crispy, then drizzle with hot honey. No deep frying, no complicated techniques, no special equipment. Just pure, crispy, cheesy, sweet-heat perfection.
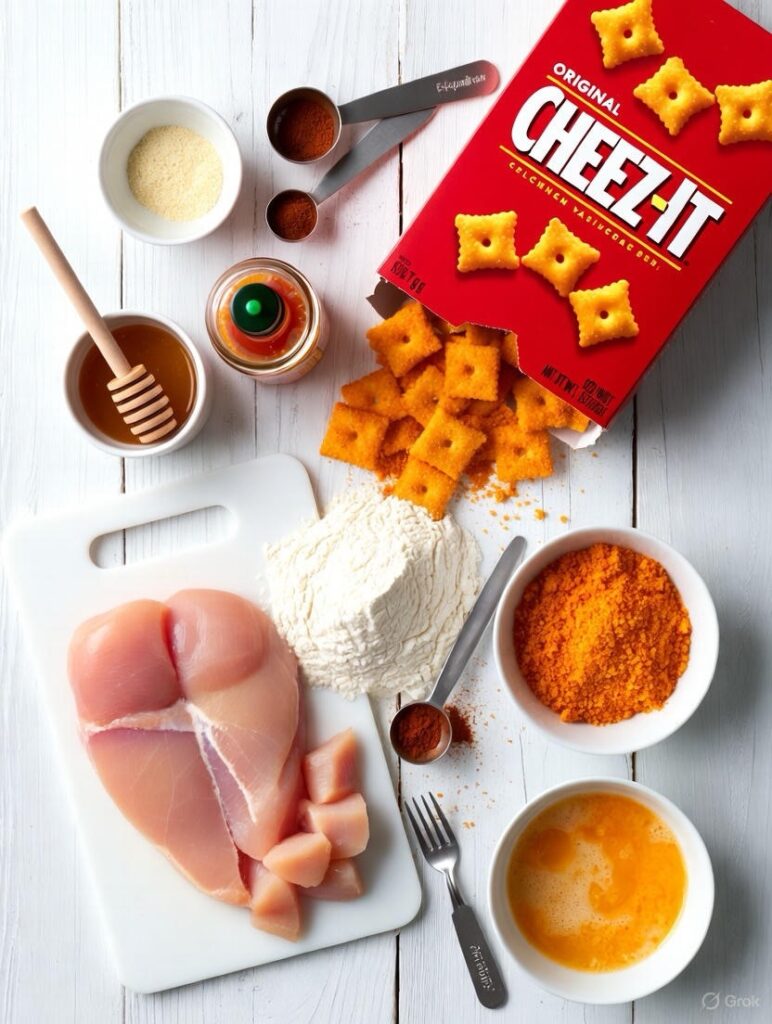
Ingredients for 4-6 Servings (About 24-30 Bites)
For the chicken bites:
- 1.5 lbs (680g) boneless, skinless chicken breasts or tenders, cut into 1-inch pieces
- 1 box (12.4 oz) Cheez-It Original crackers (about 4 cups)
- ½ cup all-purpose flour
- 1 teaspoon garlic powder
- 1 teaspoon paprika
- ½ teaspoon salt
- ½ teaspoon black pepper
- 2 large eggs
- 2 tablespoons milk
- Cooking spray or oil for misting
For the hot honey:
- ½ cup honey
- 1-2 tablespoons hot sauce (Frank’s RedHot or your favorite)
- 1 teaspoon apple cider vinegar
- ½ teaspoon red pepper flakes (optional for extra heat)
- Pinch of salt
Optional serving suggestions:
- Ranch dressing for dipping
- Blue cheese dressing
- Extra hot honey for drizzling
- Chopped fresh parsley for garnish
- Lemon wedges
- Celery sticks
Detailed Step-by-Step Instructions
Step 1: Prepare and Cut the Chicken
Start by patting the chicken breasts completely dry with paper towels—any excess moisture will prevent the coating from adhering properly. Place the chicken on a clean cutting board and cut it into uniform 1-inch pieces. Consistent sizing is crucial for even cooking; you want them all to finish at the same time.
If your chicken pieces have any tendons or fatty bits, trim them away. You want clean, neat pieces that are easy to eat as finger food. Aim for bite-sized chunks—not too small (they’ll dry out) and not too large (they won’t cook through properly). Think of the size of a large nugget or generous popcorn chicken piece.
Once cut, place the chicken pieces in a bowl and season lightly with a pinch of salt and pepper. Let them sit at room temperature while you prepare the breading stations. This brief rest helps them cook more evenly.
Step 2: Create the Cheez-It Coating
This is where the magic happens. Pour the entire box of Cheez-It crackers into a food processor. Pulse 10-15 times until you have fine, breadcrumb-like crumbs. You want the consistency of panko breadcrumbs—some texture is good, but no large chunks. Don’t over-process into a powder; you want those little crispy bits.
If you don’t have a food processor, place the crackers in a heavy-duty zip-top bag, seal it, and use a rolling pin to crush them. This takes more effort but works perfectly well. You can also use a meat mallet or the bottom of a heavy pan.
Transfer the Cheez-It crumbs to a shallow bowl or pie plate. You should have about 2½ to 3 cups of crumbs. The bright orange color of the crushed crackers looks amazing and promises the cheesy flavor to come.
Step 3: Set Up Your Breading Station
Organization is key to a smooth breading process. Set up three shallow bowls or pie plates in a row:
Station 1 (Flour): Combine the flour, garlic powder, paprika, salt, and black pepper in the first bowl. Whisk together until evenly mixed. This seasoned flour helps the egg adhere and adds another layer of flavor.
Station 2 (Egg Wash): In the second bowl, whisk together the eggs and milk until completely combined and slightly frothy. The milk thins the eggs slightly, making them easier to work with and creating a better glue for the Cheez-It crumbs.
Station 3 (Cheez-It Crumbs): Your crushed crackers in the third bowl, ready and waiting.
Have a clean plate or baking sheet ready nearby for placing the breaded chicken pieces. Keep one hand designated for dry ingredients and one for wet to minimize clumping on your fingers.
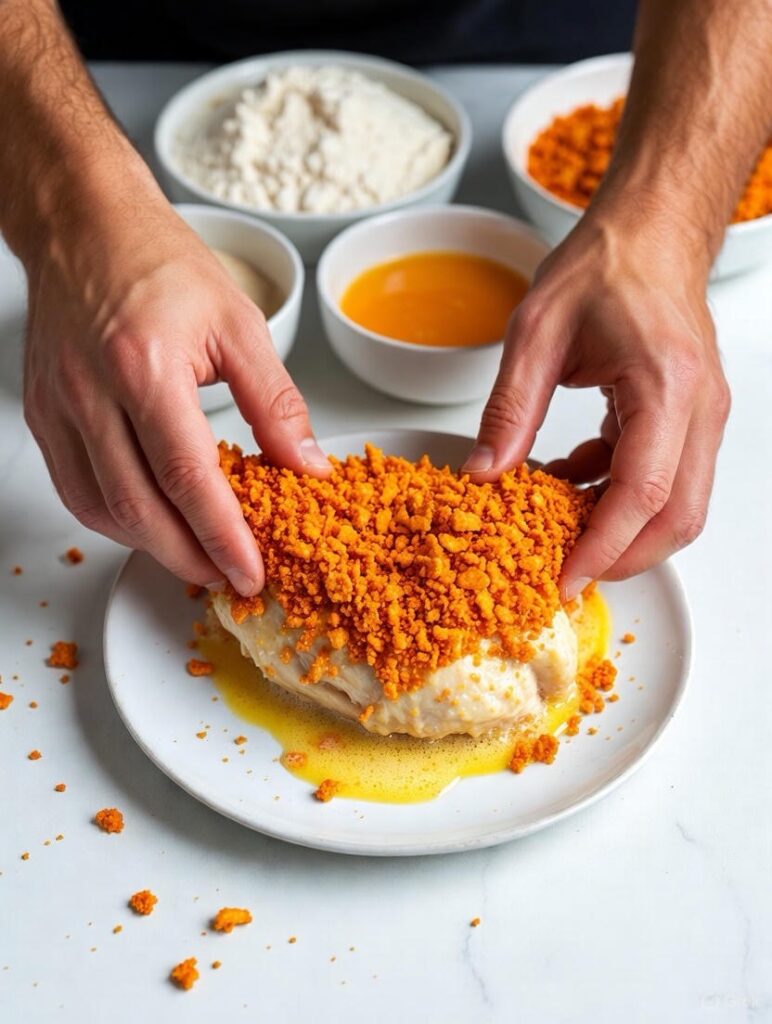
Step 4: Bread the Chicken (Assembly Line Style)
Now for the fun part—the breading assembly line. Working with 4-5 chicken pieces at a time:
First, toss the chicken pieces in the seasoned flour, coating them completely. Shake off any excess flour—you want a light, even coating, not clumps. The flour creates a dry surface for the egg to cling to.
Next, drop the floured chicken into the egg wash. Use a fork to turn each piece, ensuring it’s completely coated in egg. Let any excess egg drip off back into the bowl—too much egg will make the coating soggy.
Finally, place the egg-coated chicken into the Cheez-It crumbs. Press the crumbs gently onto the chicken with your hands or a fork, making sure every surface is completely covered. Really press and pat the crumbs on—they should stick firmly to the egg-coated chicken. The more crumbs you get to stick, the crispier and more flavorful your chicken will be.
Place the breaded chicken pieces on a clean plate or wire rack. Repeat this process until all chicken is breaded. Let the breaded chicken rest for 5-10 minutes while you preheat the oven. This resting period helps the coating set and adhere better during baking.
Step 5: Arrange on Baking Sheet
Preheat your oven to 400°F (200°C). Line a large baking sheet with parchment paper or aluminum foil for easy cleanup. For even crispier results, place a wire rack on top of the baking sheet and spray it with cooking spray—this allows hot air to circulate all around the chicken.
Arrange the breaded chicken pieces on the prepared baking sheet, leaving about ½ inch of space between each piece. Don’t let them touch or they’ll steam rather than crisp. Overcrowding is the enemy of crispy chicken, so use two baking sheets if necessary.
Lightly mist or spray the tops of the chicken pieces with cooking spray or brush with a thin layer of oil. This small amount of fat is crucial for achieving that golden, crispy exterior. The oil helps the Cheez-It coating brown and crisp up beautifully in the oven.
Step 6: Bake to Golden Perfection
Place the baking sheet in the preheated oven on the middle rack. Bake for 15-18 minutes, flipping the chicken pieces halfway through cooking (around the 8-9 minute mark). Flipping ensures even browning on all sides and maximum crispiness.
The chicken is done when the coating is deep golden brown and crispy, and the internal temperature reaches 165°F (74°C) when checked with an instant-read thermometer. The Cheez-It coating should look toasted and crunchy, not pale or soft.
If you want extra-crispy bites, turn on the broiler for the final 1-2 minutes of cooking, watching carefully to prevent burning. The broiler gives that extra golden color and crunch that takes these from good to absolutely perfect.
Remove from the oven and let the chicken rest for 2-3 minutes. This brief rest allows the juices to redistribute and the coating to set, making the chicken easier to handle and ensuring it stays crispy.
Step 7: Make the Hot Honey
While the chicken bakes (or anytime during prep), make your hot honey. In a small bowl, whisk together the honey, hot sauce, apple cider vinegar, red pepper flakes (if using), and a pinch of salt.
Start with 1 tablespoon of hot sauce and taste. The honey should be noticeably sweet with a pleasant heat that builds gradually. Add more hot sauce if you want more kick. The vinegar adds a subtle tang that brightens the sweetness and cuts through the richness of the fried chicken.
The hot honey can be made up to a week in advance and stored in an airtight container at room temperature. The flavors actually improve as they sit and meld together.
Step 8: Drizzle and Serve

Transfer the hot, crispy chicken bites to a serving platter. Using a spoon, drizzle the hot honey generously over all the chicken pieces, letting it pool slightly on the platter. The contrast between the hot chicken and the honey creates little moments of caramelization that are absolutely delicious.
Alternatively, you can serve the hot honey on the side in a small bowl for dipping, allowing everyone to control their own sweetness and heat level. Some people love them drowning in hot honey; others prefer a lighter touch.
Garnish with chopped fresh parsley for a pop of color and freshness. Serve immediately while the coating is at its crispiest, with ranch or blue cheese dressing on the side for dipping. Provide plenty of napkins—these are deliciously messy!
Pro Tips for Maximum Crispiness and Flavor
Use Original Cheez-It crackers for the best results. The classic flavor is universally loved and has the perfect salt-to-cheese ratio. White Cheddar Cheez-Its work too for a slightly different flavor profile.
Don’t skip the resting period after breading. Those 5-10 minutes allow the coating to adhere properly and create a barrier that keeps moisture in the chicken and crispiness on the outside.
Cut chicken into uniform sizes. This cannot be overstated—even sizing means even cooking. Use a kitchen scale if you’re unsure; aim for pieces around 1 oz each.
Use a wire rack if possible. Elevating the chicken on a rack allows hot air to circulate underneath, preventing soggy bottoms and ensuring all-around crispiness.
Don’t overcrowd the pan. Adequate space between pieces is essential. The chicken needs room for air to circulate. If pieces touch, they’ll steam and lose that precious crispiness.
Flip halfway through. This ensures even browning and crispiness on all sides. Use tongs to flip gently so you don’t knock off the coating.
Make hot honey ahead. It keeps at room temperature for up to a week, and the flavors improve as they meld. Just give it a good stir before using.
Serve immediately. Like all fried or breaded foods, these are best fresh from the oven while the coating is at peak crispiness. If you must wait, keep them in a low oven (200°F) on a wire rack.
Make-Ahead and Storage Tips
These chicken bites are excellent for meal prep and can be prepared ahead in several ways:
Prep the breading stations ahead: You can crush the Cheez-Its and set up your flour and egg wash up to 24 hours in advance. Cover and refrigerate the egg wash; keep the flour and crumbs at room temperature.
Bread the chicken ahead: Bread the chicken pieces up to 4 hours before baking. Arrange on a baking sheet, cover with plastic wrap, and refrigerate. Remove from the fridge 15 minutes before baking and spray with oil, then bake as directed.
Freeze for later: Bread the chicken completely and freeze in a single layer on a baking sheet until solid (about 2 hours). Transfer to a freezer bag and store for up to 2 months. Bake from frozen at 400°F for 20-25 minutes, no thawing needed.
Store leftovers: Cooked chicken bites can be refrigerated in an airtight container for up to 3 days. Reheat in a 375°F oven or air fryer for 5-7 minutes to restore crispiness. Avoid the microwave, which makes the coating soggy.
Hot honey storage: The hot honey keeps at room temperature in a sealed container for up to 2 weeks, or refrigerated for up to a month. If refrigerated, let it come to room temperature or warm gently before serving (honey crystallizes when cold).
Creative Variations and Flavor Twists
Buffalo Cheez-It Chicken Bites
Replace hot honey with classic buffalo sauce. Toss the hot chicken bites in melted butter mixed with Frank’s RedHot. Serve with blue cheese or ranch dressing and celery sticks.
BBQ Ranch Cheez-It Chicken
Use White Cheddar Cheez-Its and add 1 tablespoon ranch seasoning to the flour mixture. Drizzle with BBQ sauce instead of hot honey.
Spicy Nacho Cheez-It Bites
Use Extra Toasty Cheez-Its or Hot & Spicy flavor. Add 1 teaspoon chili powder and ½ teaspoon cumin to the flour. Serve with nacho cheese sauce for dipping.
Garlic Parmesan Cheez-It Chicken
Mix ½ cup grated parmesan with the Cheez-It crumbs. Add extra garlic powder to the flour. Drizzle with garlic butter instead of hot honey.
Maple Dijon Cheez-It Bites
Replace hot honey with a mixture of ⅓ cup maple syrup and 2 tablespoons Dijon mustard. Sweet, tangy, and delicious.
Pizza-Flavored Cheez-It Chicken
Use Italian Cheez-Its (or add Italian seasoning to the flour). Serve with warm marinara sauce for dipping.
Frequently Asked Questions (FAQ)
Can I use chicken thighs instead of breasts?
Absolutely! Boneless, skinless chicken thighs work great and stay even juicier. Cut them into similar-sized pieces and bake for the same amount of time.
Can I make these in an air fryer?
Yes! Arrange in a single layer in the air fryer basket (work in batches), spray with oil, and cook at 380°F for 10-12 minutes, flipping halfway through. They’ll be extra crispy.
What if I don’t have Cheez-It crackers?
You can substitute other cheese crackers like Goldfish (crush extra fine), Cheese Nips, or even regular crackers mixed with ½ cup grated parmesan. The flavor will differ but still be delicious.
How do I keep them crispy for a party?
Keep finished chicken bites warm in a 200°F oven on a wire rack until ready to serve. Don’t cover them or they’ll steam and lose crispiness. Drizzle with hot honey just before serving.
Can I deep fry these instead of baking?
Yes, they’ll be even crispier. Heat oil to 350°F and fry in batches for 3-4 minutes until golden. Drain on paper towels before drizzling with hot honey.
My coating keeps falling off, what am I doing wrong?
Make sure the chicken is dry before starting. Let the breaded chicken rest 5-10 minutes before baking. Ensure each piece is fully coated at each station. Don’t skip the flour—it helps everything stick.
How spicy is the hot honey?
Mildly spicy with the recipe as written. The heat is balanced by the sweetness. Adjust the hot sauce amount to your preference. Start with 1 tablespoon for mild, go up to 3 tablespoons for spicy.
Can kids eat these?
Yes! The Cheez-It coating is kid-friendly. For children sensitive to spice, serve the hot honey on the side or make a milder version with just 1 teaspoon hot sauce or substitute with regular honey.
Do these reheat well?
They’re best fresh, but you can reheat in a 375°F oven or air fryer for 5-7 minutes to restore some crispiness. Don’t microwave or they’ll be soggy.
Can I make these gluten-free?
Use gluten-free crackers (like gluten-free Cheez-Its if available) and gluten-free flour or cornstarch. The method remains the same.
People Also Ask (PAA)
What can I substitute for Cheez-Its?
Goldfish crackers, Cheese Nips, regular crackers mixed with parmesan cheese, or even crushed cheese puffs work. Each creates a different but delicious crispy coating.
How do you make chicken nuggets extra crispy?
Use a three-step breading process (flour, egg, crumbs), let breaded chicken rest before cooking, don’t overcrowd the pan, bake on a wire rack, and spray with oil before baking.
Is hot honey spicy or sweet?
Hot honey is both—it combines the natural sweetness of honey with heat from hot sauce or chili peppers. The ratio determines whether it’s more sweet or spicy. It’s balanced with pleasant heat.
What goes well with chicken bites?
Ranch or blue cheese dressing, celery and carrot sticks, french fries, coleslaw, mac and cheese, or a simple green salad. They’re also great on salads or in wraps.
How long do you bake breaded chicken?
At 400°F, breaded chicken bites (1-inch pieces) take 15-18 minutes. Larger pieces or whole breaded chicken breasts take 20-25 minutes. Always check that internal temperature reaches 165°F.
Can you freeze breaded uncooked chicken?
Yes! Bread completely, freeze in a single layer until solid, then store in freezer bags for up to 2 months. Bake from frozen, adding 5-7 minutes to the cooking time.
Why is my breading not sticking to chicken?
Common causes: chicken wasn’t dry enough, skipped the flour step, egg wash was too thin, didn’t press crumbs firmly onto the chicken, or didn’t let it rest before cooking.
What temperature should you bake chicken at?
For breaded chicken pieces, 400°F is ideal. This temperature is hot enough to crisp the coating while cooking the chicken through without drying it out. Always verify 165°F internal temperature.
Conclusion
Crispy Hot Honey Cheez-It Chicken Bites represent everything we love about modern comfort food: they’re fun, flavorful, easy to make, and absolutely crave-worthy. These golden nuggets of crispy, cheesy, sweet-heat perfection prove that sometimes the best recipes come from unexpected ingredient combinations and a willingness to think outside the box.
What makes this recipe truly special is how it takes familiar ingredients—chicken, crackers, honey—and transforms them into something that feels both nostalgic and innovative. The Cheez-It coating brings back childhood snack memories while the hot honey adds that trendy sweet-heat element that’s currently dominating restaurant menus. It’s comfort food with a gourmet twist.
These chicken bites have earned their place as the ultimate game day snack, but their versatility extends far beyond football Sundays. They’re perfect for busy weeknight dinners when you need something quick that the whole family will eat. They’re ideal for parties and potlucks where you need finger food that travels well. They’re even fancy enough for entertaining when you want to serve something fun but impressive.
The beauty of this recipe also lies in its foolproof nature. Even novice cooks can achieve crispy, restaurant-quality results by following the simple breading steps. There’s no deep frying, no complicated techniques, and no expensive equipment required. Just three stations, one baking sheet, and 30 minutes standing between you and these addictive chicken bites.
Make a batch of these Crispy Hot Honey Cheez-It Chicken Bites this weekend and watch them disappear faster than you can say “touchdown.” Whether you’re team sweet-heat, feeding a crowd, or just treating yourself to something delicious, these chicken bites deliver on every level. Welcome to your new favorite recipe—fair warning, you’ll be making these on repeat!
Prep Time: 15 minutes
Cook Time: 15-18 minutes
Total Time: 30-35 minutes
Servings: 4-6 (24-30 bites)
Difficulty: Easy
Cuisine: American
Course: Appetizer, Snack, Main Course
Diet: Can be modified
Keywords: Cheez-It chicken, hot honey chicken bites, game day snacks, crispy chicken nuggets, easy appetizers, party food, Super Bowl snacks