By Chef Hanna | Prep: 10 min | Cook: 15 min | Total: 25 min | Serves: 4 (12 pancakes)
Table of Contents
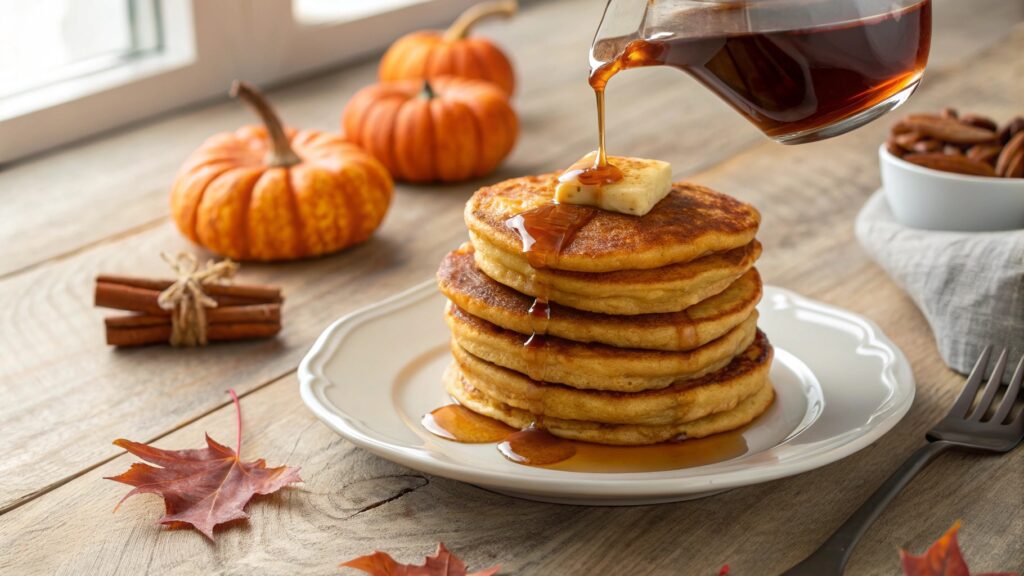
The Best Pumpkin Pancakes You’ll Ever Make
Is there anything that screams “fall morning” more than a stack of fluffy pumpkin pancakes? I’m Chef Hanna, and these are hands-down my favorite autumn breakfast – they’re like eating pumpkin pie for breakfast, but totally acceptable because they’re pancakes!
These pumpkin pancakes are incredibly fluffy, perfectly spiced, and bursting with real pumpkin flavor. They’re not dense or gummy like some pumpkin pancakes can be – these are light, airy, and melt-in-your-mouth delicious. The warm spices of cinnamon, nutmeg, and ginger combined with pure pumpkin purée create the ultimate cozy breakfast experience.
What makes this recipe special? I’ve perfected the ratio of pumpkin to flour so you get maximum pumpkin flavor without sacrificing that essential pancake fluffiness. The secret is in the technique – separating wet and dry ingredients, not overmixing, and letting the batter rest for just a few minutes. The result? Restaurant-quality pancakes that are crispy on the edges, fluffy in the middle, and packed with fall flavor.
Whether you’re making a special weekend breakfast, celebrating fall with the family, or just craving something cozy on a chilly morning, these pumpkin pancakes deliver every single time. Drizzle with maple syrup, top with whipped cream, or go all out with a sprinkle of pecans – however you serve them, they’re pure autumn magic!
Why This Pumpkin Pancake Recipe Works
Perfect Pumpkin Balance: Just the right amount of pumpkin purée gives amazing flavor without making pancakes dense or gummy. Too much pumpkin = heavy pancakes!
Buttermilk Magic: The acidity in buttermilk reacts with baking soda to create extra fluffy, tender pancakes with a slight tang that balances the sweetness.
Double Leavening: Using both baking powder AND baking soda gives these pancakes maximum lift and fluffiness – they practically float off the griddle!
Spice Blend Perfection: The combination of cinnamon, nutmeg, ginger, and a hint of cloves creates that signature pumpkin spice flavor without overpowering.
Oil vs Butter: Using vegetable oil instead of melted butter keeps pancakes tender and moist longer – no rubbery texture as they cool!
Don’t Overmix Rule: Lumpy batter is your friend! Overmixing develops gluten, resulting in tough, flat pancakes. Mix until just combined.
Resting Time: Letting the batter sit for 5 minutes allows the flour to hydrate and the leavening agents to activate, resulting in fluffier pancakes.
Ingredients You Need
For the Dry Ingredients:
- 2 cups all-purpose flour
- 2 tablespoons granulated sugar
- 2 tablespoons brown sugar, packed
- 2 teaspoons baking powder
- 1 teaspoon baking soda
- ½ teaspoon salt
- 2 teaspoons ground cinnamon
- ½ teaspoon ground nutmeg
- ½ teaspoon ground ginger
- ¼ teaspoon ground cloves (optional but recommended)
For the Wet Ingredients:
- 1½ cups buttermilk (room temperature)
- ¾ cup pumpkin purée (NOT pumpkin pie filling!)
- 2 large eggs (room temperature)
- ¼ cup vegetable oil (or melted coconut oil)
- 2 teaspoons vanilla extract
For Cooking:

- Butter or cooking spray for the griddle
Optional Toppings:
- Pure maple syrup
- Whipped cream
- Butter pats
- Chopped pecans or walnuts
- Cinnamon sugar
- Cream cheese glaze
- Caramel sauce
Ingredient Notes for Busy Families:
Pumpkin purée vs pumpkin pie filling: Use PLAIN pumpkin purée (100% pumpkin). Pumpkin pie filling contains added sugar and spices that will throw off the recipe!
No buttermilk? Make your own! Add 1½ tablespoons lemon juice or white vinegar to 1½ cups milk. Let sit 5 minutes until curdled. Works perfectly!
Fresh pumpkin: You can use fresh roasted pumpkin purée, but canned is actually more consistent and saves tons of time. Libby’s is my go-to brand.
Spice shortcut: Don’t have all the individual spices? Use 3 teaspoons pumpkin pie spice instead. Easy!
Room temperature matters: Cold eggs and buttermilk will create lumpy batter. Let them sit on the counter for 30 minutes before starting.
Step-by-Step Instructions
Step 1: Prep Your Ingredients (5 minutes)
Take eggs and buttermilk out of the refrigerator to come to room temperature (or microwave buttermilk for 30 seconds to take the chill off).
Get your griddle or large non-stick skillet heating over medium heat (about 350°F if your griddle has temperature control). A properly preheated griddle is crucial for even cooking!
Pro tip: Test griddle temperature by sprinkling a few drops of water on the surface. They should dance and evaporate quickly – that’s the perfect temperature!
Step 2: Mix Dry Ingredients (3 minutes)

In a large mixing bowl, whisk together flour, both sugars, baking powder, baking soda, salt, cinnamon, nutmeg, ginger, and cloves (if using).
Whisk vigorously for 30 seconds to ensure everything is evenly distributed and there are no lumps in the flour. This is your insurance against unevenly spiced pancakes!
Why whisk dry ingredients? It aerates the flour and distributes leavening agents evenly, contributing to fluffier pancakes.
Step 3: Combine Wet Ingredients (3 minutes)
In a separate medium bowl, whisk together buttermilk, pumpkin purée, eggs, oil, and vanilla extract until smooth and well combined.
The mixture should be uniform in color (no streaks of pumpkin) and slightly thick – like a smoothie consistency.
Temperature check: Make sure everything is room temperature! Cold ingredients won’t combine smoothly and can create lumps.
Step 4: The Critical Mixing Step (2 minutes)
Pour the wet ingredients into the bowl with dry ingredients. Using a wooden spoon or spatula (NOT a whisk at this stage!), gently fold the wet into the dry ingredients.
Mix until JUST combined. You should still see small lumps – this is perfect! The batter will look slightly thick and a beautiful orange color.
CRITICAL: Don’t overmix! Stop stirring as soon as you don’t see dry flour anymore. Overmixing = flat, tough pancakes. Those lumps will disappear during cooking.
Step 5: Rest the Batter (5 minutes)
Let the batter rest on the counter for 5 minutes while your griddle finishes heating. Don’t skip this step!
During this time, the flour absorbs liquid, the baking powder activates, and gluten relaxes. The result? Fluffier, more tender pancakes.
What to do during rest time: Prep your toppings, set the table, warm your maple syrup in the microwave (warm syrup = life-changing!).
Step 6: Grease Your Griddle
Lightly grease your preheated griddle or skillet with butter or cooking spray. For non-stick surfaces, you only need a thin coating.
Butter tip: Use a paper towel to spread melted butter across the griddle evenly. Excess butter creates greasy pancakes with uneven browning.
Step 7: Cook the First Side (2-3 minutes)
Pour ¼ cup of batter per pancake onto the hot griddle. Don’t spread it – let it naturally form a circle. Space pancakes 2 inches apart.
Watch for bubbles to form on the surface (this takes about 2-3 minutes). When bubbles appear across the entire surface and the edges look set and slightly dry, it’s time to flip!
The bubble test: You should see lots of little bubbles popping on the surface, and they should stay open (not close back up). The underside should be golden brown.
Don’t press down! Resist the urge to press pancakes with your spatula. This squeezes out air and makes them dense.
Step 8: Flip and Finish (2 minutes)
Using a wide spatula, confidently flip each pancake in one smooth motion. The second side cooks faster – only about 1-2 minutes.
The second side should be golden brown but slightly lighter than the first side. When you gently press the center and it springs back, they’re done!
Doneness test: Pancakes should feel firm to the touch (not jiggly) and spring back when gently pressed in the center.
Step 9: Keep Warm & Repeat
Transfer cooked pancakes to a plate and keep warm in a 200°F oven while you cook the remaining batter. Place parchment paper between layers to prevent sticking.
Repeat the greasing, pouring, and flipping process until all batter is used. This recipe makes about 12 pancakes (¼ cup each).
Batter consistency tip: The batter will thicken as it sits. If it becomes too thick, stir in 1-2 tablespoons of buttermilk to thin it slightly.
Step 10: Serve Immediately!
Stack those beautiful golden pumpkin pancakes high, add your favorite toppings, and serve immediately while they’re hot and fluffy!
Pro serving tip: Place a pat of butter between each pancake in the stack. As it melts, it creates buttery layers throughout. Game changer!
Pro Tips for Perfect Pumpkin Pancakes
Use a measuring cup for pouring: A ¼-cup measure creates uniform pancakes that cook evenly and look professional.
Don’t flip twice: Only flip once! Multiple flips deflate the pancakes and make them dense.
Watch your heat: If pancakes brown too quickly but are raw inside, lower the heat. If they’re pale and take forever, increase heat slightly.
First pancake test: The first pancake is always a test. Use it to adjust griddle temperature and batter consistency.
Freeze for later: Make a double batch! Cooled pancakes freeze beautifully separated by parchment paper. Reheat in toaster for quick breakfasts!
Make them extra special: Add mini chocolate chips, chopped pecans, or white chocolate chips to the batter for fun variations.
Prevent sticking: Even on non-stick surfaces, a light coating of butter or oil prevents sticking and adds flavor.
Consistent size matters: Same-sized pancakes cook at the same rate. Use a measuring cup or ice cream scoop for uniformity.
Topping Ideas to Try
Classic Fall Stack
- Warm maple syrup
- Pat of butter
- Whipped cream dollop
- Sprinkle of cinnamon
Pecan Praline Style
- Maple syrup
- Toasted chopped pecans
- Whipped cream
- Caramel drizzle
Cream Cheese Glaze
- Mix 4 oz softened cream cheese + ½ cup powdered sugar + 2 tbsp milk
- Drizzle over pancakes
- Top with cinnamon
Apple Cider Topping
- Sautéed cinnamon apples
- Maple syrup
- Vanilla ice cream (yes, for breakfast!)
Chocolate Lovers
- Chocolate chips in the batter
- Chocolate syrup drizzle
- Whipped cream
- Mini marshmallows
Nutella Dream
- Nutella spread between layers
- Sliced bananas
- Whipped cream
- Chopped hazelnuts
Healthy Option
- Greek yogurt
- Fresh berries
- Drizzle of honey
- Granola sprinkle
Cinnamon Roll Style
- Cream cheese frosting
- Cinnamon sugar
- Butter
- Maple syrup
Storage & Make-Ahead Instructions
Room Temperature:
Let pancakes cool completely on a wire rack (prevents soggy bottoms). Store in an airtight container separated by parchment paper for up to 2 days. Reheat in toaster or microwave.
Refrigerator:
Store cooled pancakes in an airtight container or ziplock bag with parchment paper between layers for up to 5 days.
Reheating from fridge:
- Microwave: 30-45 seconds per pancake
- Toaster: Toast on medium setting until warm
- Oven: 350°F for 5-7 minutes
- Skillet: 1 minute per side over medium heat
Freezer (The Ultimate Meal Prep!):
This is where pumpkin pancakes really shine for busy families!
- Cool pancakes completely on wire rack
- Place parchment paper between each pancake
- Stack and place in gallon freezer bag
- Remove as much air as possible
- Label with date
- Freeze for up to 3 months
Reheating from frozen:
- Toaster: 2-3 toaster cycles (my favorite method!)
- Microwave: 60-90 seconds, wrapped in damp paper towel
- Oven: 350°F for 10 minutes
- Skillet: 2 minutes per side over medium-low heat
Make-ahead batter: Mix dry ingredients up to 1 week ahead and store in airtight container. In the morning, just add wet ingredients and cook!
Sunday meal prep strategy: Make a triple batch on Sunday, freeze in portions, and have ready-made breakfasts all month! Kids can pop them in the toaster before school.
Delicious Variations
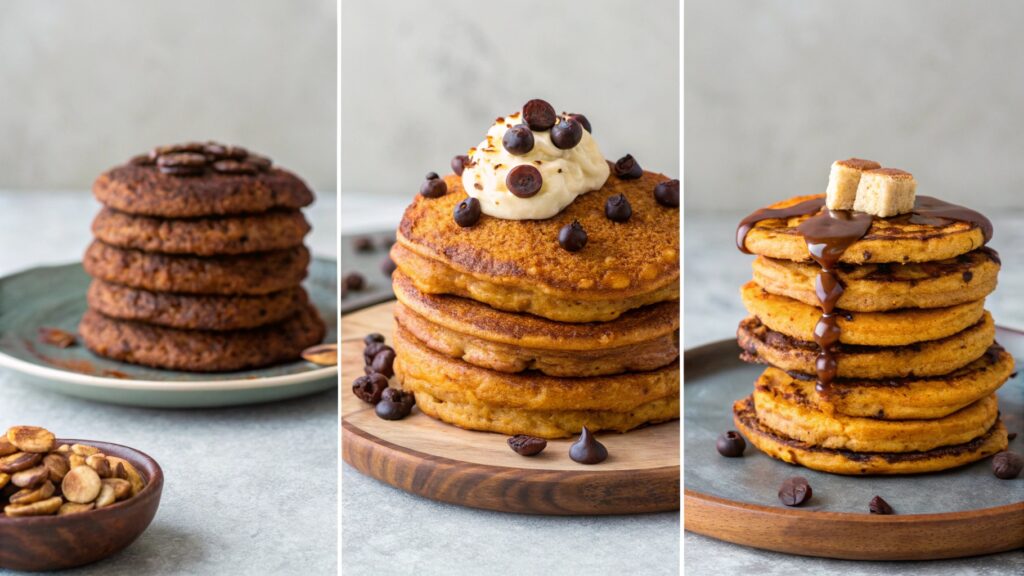
Chocolate Chip Pumpkin Pancakes
Fold in ½ cup mini chocolate chips after mixing batter. Kids go CRAZY for these!
Whole Wheat Pumpkin Pancakes
Replace 1 cup all-purpose flour with whole wheat flour. Add 2 extra tablespoons buttermilk to compensate for drier texture.
Gluten-Free Pumpkin Pancakes
Use 1:1 gluten-free flour blend (like Bob’s Red Mill). Add ½ teaspoon xanthan gum if your blend doesn’t include it.
Vegan Pumpkin Pancakes
- Replace buttermilk with non-dairy milk + 1½ tbsp vinegar
- Use flax eggs (2 tbsp ground flaxseed + 6 tbsp water, let sit 5 min)
- Replace oil with melted coconut oil
Protein-Packed Pumpkin Pancakes
Add ¼ cup vanilla protein powder, reduce flour by ¼ cup, add extra 2-3 tablespoons buttermilk for consistency.
Pumpkin Banana Pancakes
Mash 1 ripe banana and add to wet ingredients. Reduce pumpkin to ½ cup. Extra fluffy and naturally sweet!
Pumpkin Oat Pancakes
Replace ½ cup flour with ½ cup ground oats (blend rolled oats in food processor). Heartier texture, more fiber!
Spiced Pecan Pumpkin Pancakes
Fold in ½ cup finely chopped toasted pecans after mixing. Add extra ½ teaspoon cinnamon for more spice.
Frequently Asked Questions
Why are my pumpkin pancakes dense and gummy? Usually too much pumpkin or overmixing the batter. Stick to the ¾ cup pumpkin measurement and mix until just combined with visible lumps. Also ensure your baking powder is fresh (test by adding a pinch to hot water – it should fizz).
Can I make these pancakes without buttermilk? Yes! Make homemade buttermilk: add 1½ tablespoons lemon juice or white vinegar to 1½ cups milk. Let sit 5 minutes. Or use plain yogurt thinned with a little milk to reach buttermilk consistency.
My pancakes are burning on the outside but raw inside – help! Your griddle is too hot! Lower the temperature to medium or medium-low. Pumpkin pancakes are thicker than regular pancakes and need more time to cook through at a lower temperature.
Can I use fresh pumpkin purée instead of canned? Absolutely! Roast sugar pumpkin, purée until smooth, and measure out ¾ cup. Make sure to strain if watery – excess moisture makes pancakes soggy. Honestly though, canned is more consistent and saves so much time!
How do I prevent pancakes from sticking? Make sure your griddle is properly preheated and lightly greased before each batch. Non-stick surfaces still need a thin layer of butter or oil. If pancakes stick, your griddle isn’t hot enough yet!
Can I make the batter the night before? Not recommended. The leavening agents activate when wet meets dry, and overnight batter will lose fluffiness. However, you can mix dry ingredients separately and wet ingredients separately, refrigerate both, then combine in the morning.
Why aren’t my pancakes fluffy? Several possible reasons: (1) Old baking powder/soda – check expiration dates, (2) Overmixing the batter, (3) Not letting batter rest 5 minutes, (4) Flipping too early before bubbles form, (5) Pressing down with spatula while cooking.
Can I double this recipe? Yes! This recipe doubles perfectly. Just make sure you have a large enough bowl for mixing. The batter will keep consistency while you cook batches.
Are these pancakes suitable for toddlers? Absolutely! The spices are mild, and you can reduce cinnamon by half if preferred. Cut into strips for easy finger food. They’re also great for baby-led weaning (appropriate texture and not a choking hazard when cut properly).
Can I make these dairy-free? Yes! Use non-dairy milk (almond, oat, soy) with vinegar to make “buttermilk.” Use coconut oil instead of butter for greasing. The recipe works perfectly with these substitutions.
Why Busy Families Love These Pancakes
Quick Weekday Breakfast: From mixing bowl to table in 25 minutes. Faster than a drive-through and so much better!
Freeze & Reheat: Make once, eat for weeks! Frozen pancakes in the toaster = hot breakfast in 2 minutes on rushed mornings.
Kid-Approved: Even picky eaters love these! The spices are mild, and they taste like dessert for breakfast (but with actual pumpkin!).
One Bowl Wonder: Minimal cleanup! Just two bowls, one griddle. Perfect for Saturday mornings when you don’t want a kitchen disaster.
Budget-Friendly: Makes 12 pancakes for under $5. A can of pumpkin costs less than $2 and you’ll still have extra!
Seasonal Tradition: Makes fall feel special! Kids get excited when pumpkin pancake season arrives. It’s like a cozy family ritual.
Nutrient Boost: Sneak vegetables into breakfast! Pumpkin is loaded with vitamin A, fiber, and potassium. Parents win!
Flexible Serving: Works for breakfast, brunch, or even “breakfast for dinner” nights when you need something easy and comforting.
Perfect Pairings
Protein Sides:
- Crispy bacon strips
- Turkey sausage links
- Scrambled eggs
- Yogurt parfait
Beverages:
- Pumpkin spice latte (double the pumpkin!)
- Hot apple cider
- Chai tea
- Orange juice
- Coffee (essential for parents!)
Fresh Fruit:
- Sliced bananas
- Apple slices with cinnamon
- Mixed berries
- Caramelized pears
Make It a Buffet: Set out various toppings and let everyone customize their stack:
- Multiple syrups (maple, berry, caramel)
- Whipped cream
- Nuts (pecans, walnuts, almonds)
- Chocolate chips
- Fresh berries
- Butter options (regular, honey butter, cinnamon butter)
Troubleshooting Common Issues
Problem: Pancakes are pale and won’t brown Solution: Increase heat slightly. Your griddle isn’t hot enough. Also ensure you’re using enough sugar – sugar helps with browning.
Problem: Batter is too thick to pour Solution: Thin with 1-2 tablespoons of buttermilk at a time until it reaches pourable consistency (like thick cake batter).
Problem: Pancakes are spreading too thin Solution: Batter is too thin. Let it rest 5 minutes to thicken, or add 1-2 tablespoons more flour. Also could be too much oil on griddle.
Problem: Spices taste too strong or overwhelming Solution: Reduce cinnamon to 1 teaspoon and skip cloves next time. Some people are sensitive to strong spices. You can always add more but can’t take them away!
Problem: Pancakes are cooking unevenly Solution: Your griddle has hot spots. Rotate pancakes to different areas of the griddle partway through cooking, or invest in a quality griddle with even heat distribution.
Problem: First few pancakes are perfect, then they start sticking Solution: You need to re-grease the griddle between batches. As you cook, the butter/oil absorbs or burns off.
The Bottom Line
These pumpkin pancakes are everything fall breakfast should be – fluffy, flavorful, perfectly spiced, and absolutely delicious. They’re impressive enough for a special weekend brunch but easy enough for a busy Tuesday morning (especially if you make them ahead and freeze!).
I’ve been making these pumpkin pancakes every autumn for over a decade, and they never get old. My kids start asking for them the moment September hits, and honestly, I look forward to them just as much. There’s something magical about that first bite – the warm spices, the subtle pumpkin sweetness, the fluffy texture – it just feels like fall in pancake form.
The best part? This recipe is foolproof. Follow the simple steps, don’t overmix, and let the batter rest – that’s all you need for pancake perfection. Whether you’re a pancake pro or a breakfast beginner, these will turn out beautifully every single time.
Make a batch this weekend, freeze half, and thank yourself on those rushed school mornings when breakfast is as easy as popping pancakes in the toaster. Your family will think you’re a breakfast hero, and you’ll know the secret: good recipes make everything easy!
Happy flipping, and remember: lumpy batter makes fluffy pancakes!
– Chef Hanna
Prep Time: 10 minutes
Cook Time: 15 minutes
Total Time: 25 minutes
Yield: 12 pancakes (serves 4)
Category: Breakfast, Brunch
Method: Griddle/Stovetop
Cuisine: American
Diet: Vegetarian (easily made vegan or gluten-free)
Keywords: pumpkin pancakes, fall breakfast, fluffy pancakes, pumpkin spice pancakes, easy breakfast recipe, autumn pancakes, make ahead breakfast, freezer friendly pancakes, family breakfast

Traditional Full Irish Breakfast
Ingredients
Equipment
Method
- Preheat oven to about 180 °C (350 °F) to keep cooked items warm while preparing others.
- Arrange potatoes or hash browns (or leftover cooked potatoes) on a baking tray, drizzle lightly with oil, and bake until golden. Season with salt and pepper.
- While potatoes bake, heat the baked beans in a small saucepan until warmed through.
- In a large frying pan over medium heat, fry the bacon rashers until cooked but not too crispy. Transfer to a warm plate (or into the oven to keep warm).
- Next, cook the sausages in the same pan, turning until cooked through, then transfer to the warming area.
- Slice black and white pudding into rounds, then fry them for a few minutes on each side until browned. Add to the warming plate.
- Add mushrooms and tomatoes to the pan; sauté until mushrooms are browned and tomatoes are softened.
- In the same pan, fry the eggs (sunny-side up or to your preference).
- To serve: place all cooked components (bacon, sausage, black & white pudding, eggs, mushrooms, tomatoes, potatoes, beans) on a plate. Serve with slices of soda or brown bread (buttered).