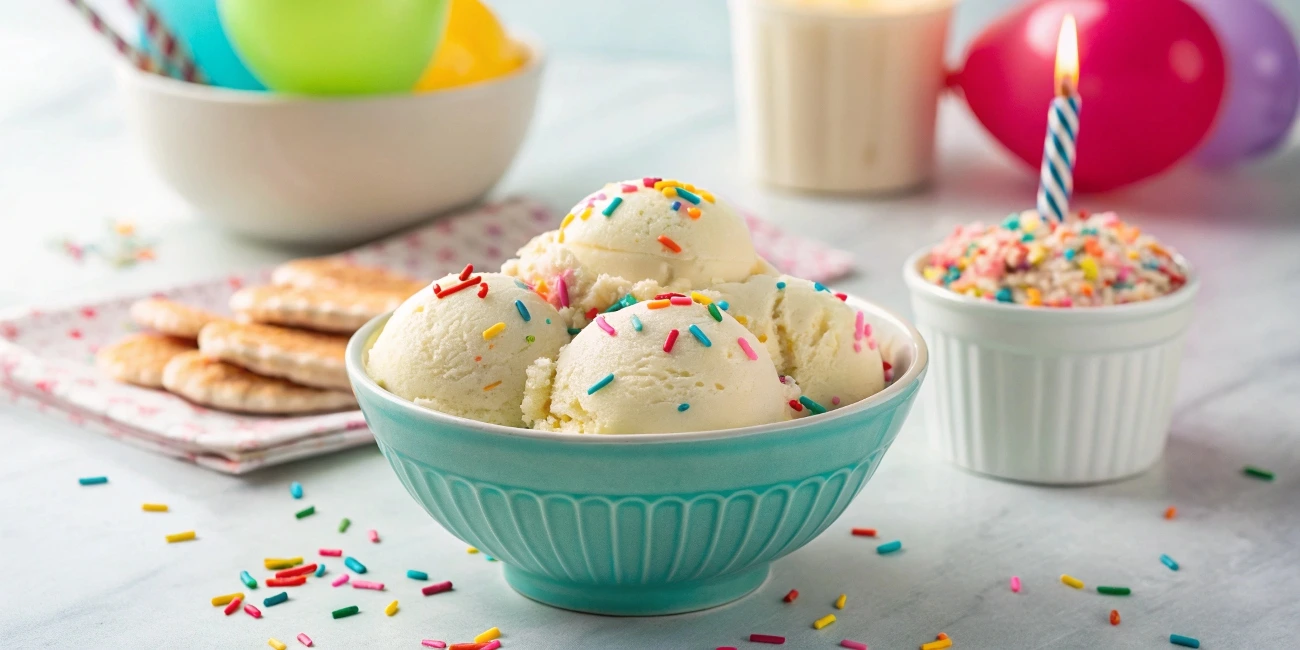
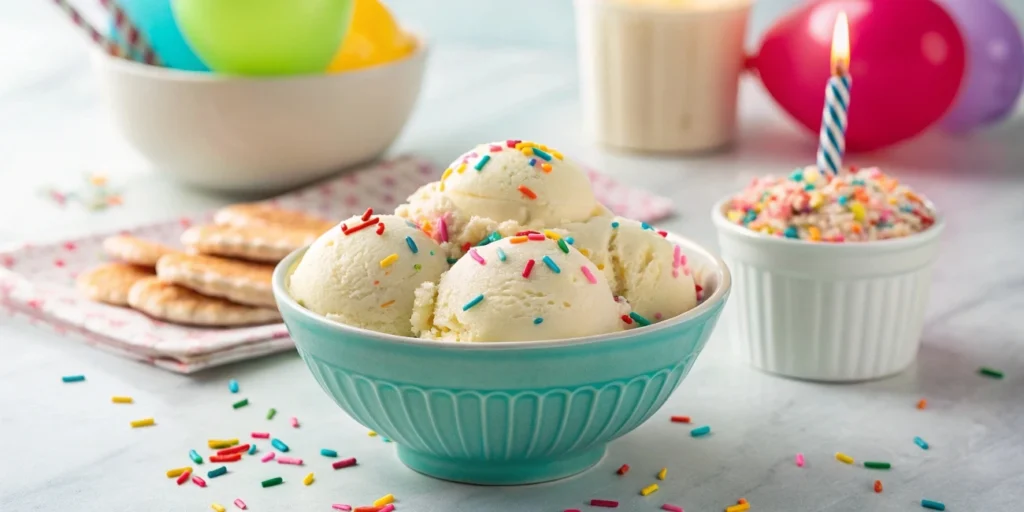
Who doesn’t love the nostalgic taste of birthday cake, with its sweet vanilla notes and colorful sprinkles? Now, imagine that delightful flavor transformed into a rich, creamy, and frozen treat—birthday cake ice cream! Whether you’re celebrating a special occasion or just craving a fun dessert, this homemade birthday cake ice cream recipe will bring joy to every scoop.
In this guide, we’ll cover everything you need to know to make the perfect batch at home. From the essential ingredients and step-by-step instructions to expert tips and delicious variations, you’ll be able to create an ice cream that tastes just like a birthday party in a bowl. Plus, we’ll answer some common questions and share storage tips so you can enjoy your homemade treat for days.
So, grab your mixing bowls and let’s dive into the world of funfetti ice cream magic!
Table of Contents
Introduction to Birthday Cake Ice Cream
What is Birthday Cake Ice Cream?
Birthday cake ice cream is a fun and festive frozen dessert that captures the essence of a classic birthday cake. It typically features a creamy vanilla or cake batter-flavored ice cream base, packed with colorful sprinkles, frosting swirls, or even bits of actual cake. The goal? To recreate that sweet, buttery, and nostalgic taste in every scoop!
Unlike regular vanilla ice cream, this version has a more pronounced cake-like flavor, thanks to added ingredients like yellow cake mix, butter extract, or almond extract. The result is a treat that tastes like you’re eating a spoonful of birthday cake—only in ice cream form!
Popularity and Origin of Birthday Cake Ice Cream
The concept of birthday cake flavor has been around for decades, often used in everything from protein bars to milkshakes. But its rise to fame in ice cream form can largely be credited to brands like Cold Stone Creamery and Blue Bell, which introduced their own takes on the flavor. Since then, it has become a staple in grocery store freezers and specialty ice cream shops worldwide.
Homemade versions have gained popularity because they allow you to customize the flavor, sweetness, and mix-ins to your liking. Plus, making it from scratch ensures a richer, creamier texture without any artificial additives.
Why Make Birthday Cake Ice Cream at Home?
Sure, you can buy birthday cake ice cream at the store, but nothing beats the homemade version. Here’s why:
- No artificial ingredients – Store-bought versions often contain artificial flavors, preservatives, and stabilizers.
- Customizable – Add extra sprinkles, swirl in frosting, or even mix in cake crumbs.
- Creamier texture – Homemade ice cream, especially if churned properly, has a richer and smoother consistency than most store-bought options.
- Fun to make – Whether it’s for a celebration or just a weekend treat, making your own birthday cake ice cream recipe is a fun kitchen project for all ages!
Essential Ingredients and Equipment
Key Ingredients for Birthday Cake Ice Cream
To achieve the perfect birthday cake ice cream recipe, you’ll need a few key ingredients that capture the signature flavor and creamy texture:
- Heavy cream & whole milk – The combination of these two creates a rich, smooth ice cream base.
- Granulated sugar – Sweetens the ice cream while helping with texture.
- Egg yolks – Used in custard-based recipes for a richer, creamier consistency.
- Vanilla extract – A must-have for that classic cake-like taste.
- Butter or almond extract – This adds a subtle, buttery note that mimics birthday cake flavor.
- Yellow cake mix – The secret ingredient! A small amount of dry cake mix enhances the taste.
- Rainbow sprinkles – Essential for the fun, colorful look.
- Salt – Just a pinch enhances all the flavors.
If you prefer a dairy-free birthday cake ice cream, swap the milk and cream for coconut milk or oat milk.
Equipment Needed for Homemade Ice Cream
Making ice cream at home is easier with the right tools. Here’s what you’ll need:
- Ice cream maker – A must for the creamiest texture. If you don’t have one, a no-churn method works too.
- Mixing bowls – For whisking together the ingredients.
- Whisk or electric mixer – Helps blend everything smoothly.
- Saucepan – Needed if you’re making a custard-based ice cream.
- Freezer-safe container – Stores the ice cream while it firms up.
Choosing the Right Sprinkles and Flavorings
Not all sprinkles are created equal! Jimmies (long, soft sprinkles) work best because they don’t bleed as much into the ice cream. Avoid nonpareils, which can dissolve and create a streaky mess.
For added depth, you can mix in crushed vanilla cake pieces or swirl in buttercream frosting. These little touches take your ice cream from good to next-level delicious!
Suggested Related Recipe:
Looking for more fun dessert ideas? Check out our Ice Cream Cake Recipes & Tips for another festive treat!
Step-by-Step Recipe for Birthday Cake Ice Cream
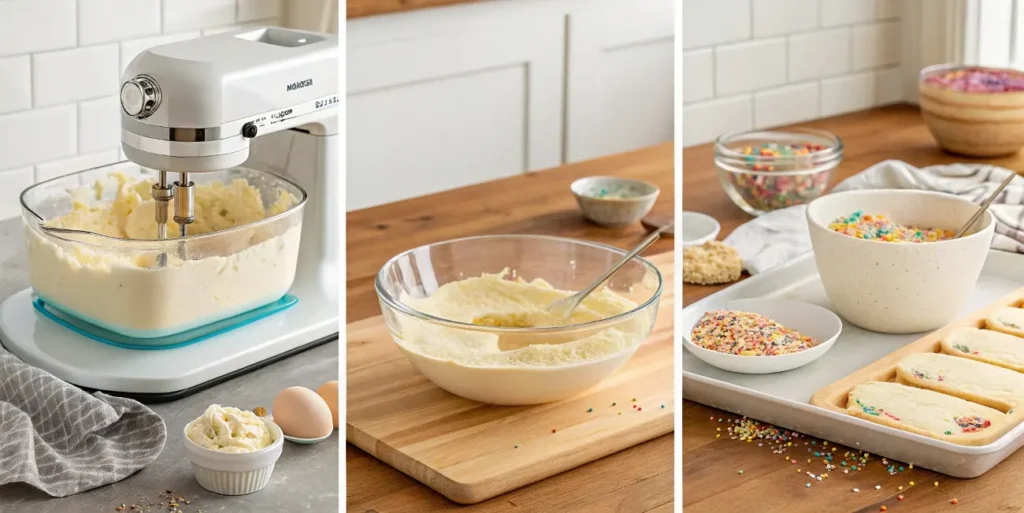
Preparing the Ice Cream Base
- Whisk the egg yolks and sugar – In a medium bowl, whisk together 4 egg yolks and ¾ cup of sugar until pale and slightly thickened.
- Heat the milk and cream – In a saucepan, heat 2 cups of heavy cream and 1 cup of whole milk over medium heat until steaming (but not boiling).
- Temper the eggs – Slowly pour a bit of the warm milk mixture into the egg mixture while whisking constantly. This prevents the eggs from scrambling.
- Cook the custard – Pour everything back into the saucepan and heat gently, stirring constantly, until the mixture thickens enough to coat the back of a spoon.
- Add flavors – Remove from heat and stir in 1 tablespoon of vanilla extract, ½ teaspoon of butter extract, and ⅓ cup of dry yellow cake mix.
Adding the Birthday Cake Flavor
Once your base is ready, let it cool to room temperature, then refrigerate for at least 4 hours (or overnight). This allows the flavors to deepen and ensures a smoother final texture.
Right before churning, mix in your rainbow sprinkles—about ¼ cup should do. If you’re adding cake crumbs, fold them in gently so they don’t break apart too much.
Churning and Freezing the Ice Cream
- Churn the mixture – Pour the chilled mixture into your ice cream maker and follow the manufacturer’s instructions. It usually takes 20-30 minutes.
- Fold in extras – Once churned, gently fold in extra sprinkles, cake pieces, or even swirls of buttercream frosting.
- Freeze until firm – Transfer to a freezer-safe container and freeze for at least 4 hours before serving.
Tips for Perfect Texture and Flavor
- Use quality ingredients – Higher-quality dairy and vanilla extract make a big difference.
- Don’t skip the chilling step – A cold base leads to creamier ice cream.
- Freeze in an airtight container – This prevents ice crystals from forming.
With these steps, you’ll have a homemade birthday cake ice cream recipe that’s even better than store-bought.
Tips and Tricks for Perfect Birthday Cake Ice Cream
Use Quality Ingredients for the Best Flavor
When making a homemade birthday cake ice cream recipe, the quality of your ingredients matters. High-fat dairy, pure vanilla extract, and fresh eggs make all the difference. Using real vanilla extract instead of imitation vanilla results in a richer, more authentic cake flavor.
If you’re using cake batter extract, check the ingredients to ensure it complements the ice cream without overpowering the vanilla notes. Additionally, opt for a freshly baked vanilla cake rather than store-bought cake, which may contain preservatives that affect the taste.
Chilling and Freezing Techniques for Creamy Texture
One of the most common mistakes in ice cream making is skipping the chilling step. After preparing your base:
- Let it cool at room temperature before refrigerating.
- Chill it for at least 4 hours (overnight is even better).
- Ensure your ice cream maker bowl is completely frozen—this helps the mixture churn smoothly.
For no-churn ice cream, stirring the mixture every 30 minutes while freezing helps incorporate air, resulting in a lighter texture.
Avoiding Common Mistakes
Even with a great recipe, mistakes can happen. Here’s how to prevent common issues:
❌ Icy texture? Use enough sugar and fat, as they prevent large ice crystals from forming.
❌ Ice cream too hard? Let it sit at room temperature for 5 minutes before scooping.
❌ Sprinkles bleeding color? Use “jimmies” instead of nonpareils, which tend to dissolve.
By following these tips, your birthday cake ice cream recipe will turn out creamy, smooth, and bursting with flavor!
No-Churn Birthday Cake Ice Cream: An Easy Alternative
Ingredients Needed for No-Churn Method
Not everyone has an ice cream maker, but that doesn’t mean you can’t enjoy homemade birthday cake ice cream. The no-churn method is simple and requires just a few ingredients:
- 2 cups heavy whipping cream (cold)
- 1 can (14 oz) sweetened condensed milk
- 1 teaspoon vanilla extract
- 1 teaspoon butter extract
- ½ cup yellow cake mix (optional but recommended)
- 1 cup crumbled vanilla cake
- ½ cup rainbow sprinkles
Mixing and Freezing the Ice Cream
- Whip the cream – In a large bowl, beat the heavy cream until stiff peaks form.
- Prepare the base – In a separate bowl, mix the condensed milk, vanilla extract, butter extract, and cake mix.
- Combine – Gently fold the whipped cream into the condensed milk mixture until smooth.
- Add mix-ins – Stir in crumbled cake and sprinkles, but don’t overmix.
- Freeze – Transfer to a freezer-safe container and freeze for at least 4 hours, or until firm.
Adding Fun Mix-Ins for Extra Flavor
The beauty of no-churn ice cream is its versatility. If you want to take this birthday cake ice cream recipe up a notch, try these fun add-ins:
- White chocolate chips for extra sweetness.
- Swirls of buttercream frosting for a richer texture.
- Crushed sugar cookies for a crunchy contrast.
For more delicious homemade ice cream ideas, check out our other ice cream recipes!
Creative Variations and Add-ins
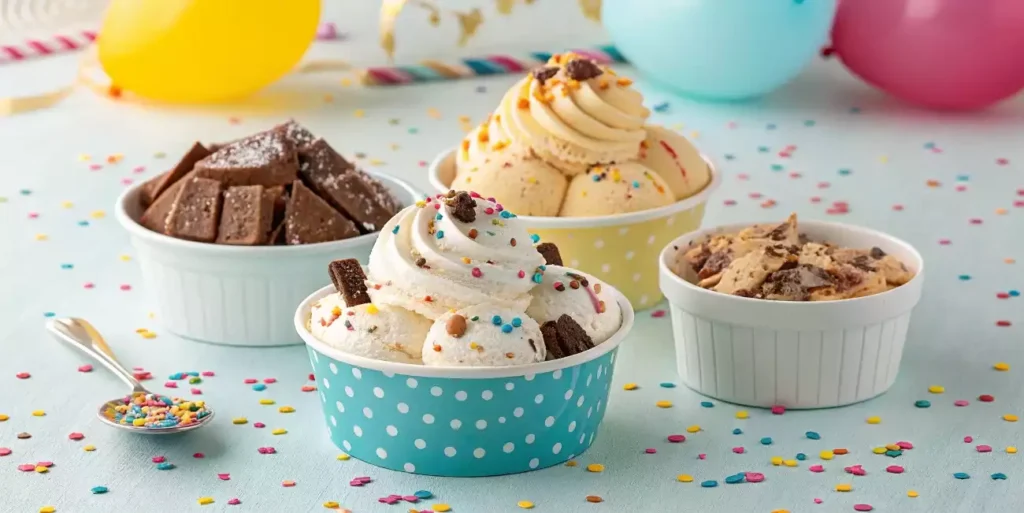
Adding Swirls and Toppings
One of the best things about a birthday cake ice cream recipe is how easy it is to customize. Adding swirls and toppings makes every scoop unique and extra delicious.
- Buttercream or frosting swirls – Mix in small spoonfuls of vanilla or chocolate frosting for an extra indulgent texture.
- Caramel or fudge ribbons – Drizzle caramel or hot fudge into the ice cream before freezing to create beautiful, flavorful streaks.
- Whipped cream topping – Serve each bowl with a dollop of whipped cream and extra sprinkles for a festive touch.
To get the best swirl effect, add your toppings just before transferring the ice cream to the freezer, gently folding them in with a spoon or knife.
Incorporating Other Flavors
While classic vanilla cake flavor is a favorite, you can get creative with different tastes. Here are a few fun variations:
- Chocolate Birthday Cake Ice Cream – Use chocolate cake crumbles instead of vanilla for a rich, cocoa-infused twist.
- Strawberry Shortcake Ice Cream – Swap out the yellow cake for strawberry-flavored cake pieces and add a swirl of strawberry jam.
- Confetti Cake Ice Cream – Add extra sprinkles into the base for a funfetti-inspired treat.
Mixing in new flavors allows you to personalize your birthday cake ice cream recipe while keeping the same creamy texture and festive look.
Making It Gluten-Free or Dairy-Free
If you need a gluten-free version, simply use a gluten-free vanilla cake instead of a traditional cake. Many stores carry great gluten-free cake options, or you can bake your own.
For a dairy-free birthday cake ice cream, replace heavy cream and whole milk with full-fat coconut milk or oat milk. Coconut milk gives a richer texture, while oat milk keeps the flavor neutral. You can also use a dairy-free frosting or coconut whipped cream as a topping.
No matter how you customize it, this birthday cake ice cream recipe is sure to impress!
Serving and Storing Your Birthday Cake Ice Cream
How to Serve for the Best Texture
Once your ice cream is frozen, it’s almost time to enjoy it! However, letting it sit at room temperature for 5 minutes before scooping makes it much easier to serve.
For a perfect scoop:
- Use a warmed ice cream scoop – Run it under warm water before dipping.
- Scoop in an S-pattern – This helps maintain the smooth texture instead of chipping away at the ice cream.
- Serve in fun ways – Try it in a waffle cone, as an ice cream sandwich, or even blended into a milkshake!
Pairing it with a slice of vanilla cake makes it feel even more like a birthday celebration.
Storing in the Freezer: Do’s and Don’ts
Keeping your birthday cake ice cream fresh is easy if you store it the right way.
✅ Use an airtight container – This prevents freezer burn and keeps it creamy.
✅ Press parchment paper or plastic wrap directly on the surface – This stops ice crystals from forming.
✅ Keep it in the back of the freezer – Avoid the door area, as temperature changes can make it melt and refreeze unevenly.
❌ Don’t store ice cream in a shallow, uncovered bowl – It will absorb freezer odors and become icy.
❌ Don’t let it sit out for too long – Refreezing melted ice cream changes its texture.
Homemade ice cream is best enjoyed within 2-4 weeks for maximum freshness. But with a dessert this good, it probably won’t last that long!
FAQs About Birthday Cake Ice Cream
What Makes Birthday Cake Flavor Ice Cream?
The signature birthday cake ice cream recipe flavor comes from a mix of vanilla, butter, and sweet cake notes. Cake batter extract, butter extract, and vanilla extract are key ingredients that give it that classic taste. Additionally, crumbled vanilla cake and sprinkles help recreate the texture and fun of a real birthday cake.
What Is the Difference Between Cake Batter and Birthday Cake Ice Cream?
Both flavors are similar, but there are key differences. Cake batter ice cream usually includes dry cake mix blended into the base, creating a slightly denser texture with a raw batter taste. In contrast, birthday cake ice cream often features baked cake pieces and sprinkles for a true celebratory feel.
Is Birthday Cake Ice Cream Just Vanilla?
Not quite! While vanilla is the base flavor, the birthday cake ice cream recipe includes butter extract and cake pieces, which give it a richer, more authentic cake-like taste. Regular vanilla ice cream lacks these extra ingredients, making birthday cake ice cream much more flavorful and fun.
What Do They Put in Cake Batter Ice Cream?
Cake batter ice cream typically contains a combination of:
- Dry yellow cake mix (for that raw batter flavor)
- Vanilla and butter extracts (to mimic cake)
- Heavy cream and sugar (for creaminess)
- Optional mix-ins like sprinkles or frosting swirls
While cake batter ice cream and birthday cake ice cream recipes are closely related, the addition of real cake chunks in birthday cake ice cream makes it feel even more festive!
Conclusion – Celebrate with Every Scoop!
Recap of the Recipe
Now that you’ve seen how easy it is to make a birthday cake ice cream recipe, why not give it a try? Whether you choose the classic churned version or the quick no-churn method, this ice cream is a perfect way to bring celebration to any day.
With its creamy texture, buttery vanilla flavor, and fun sprinkles, this dessert is a hit with both kids and adults. Plus, you can customize it with different cakes, swirls, or even make it gluten-free or dairy-free.
Encouragement to Experiment and Enjoy
Don’t be afraid to get creative! Try adding chocolate cake pieces, swirling in caramel, or even mixing in crushed cookies. The beauty of homemade ice cream is that you can make it exactly how you like it.
So go ahead—scoop up a bowl, grab a spoon, and enjoy your birthday cake ice cream recipe like it’s your birthday every day!